Configure Dokploy Backups with Cloudflare R2 - Complete Guide
Learn how to set up automated backups for your Dokploy applications, databases, and volumes using Cloudflare R2 with 10GB free storage.
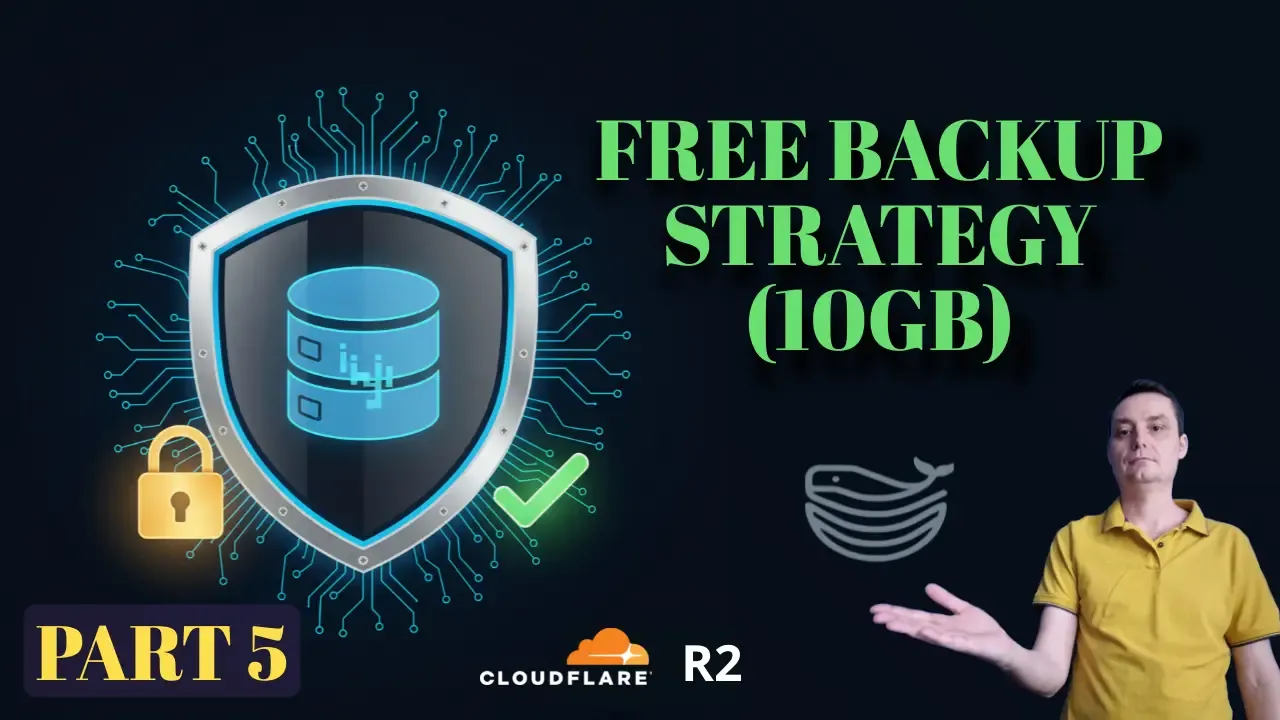
When you’re self-hosting applications on your VPS with Dokploy, having a reliable backup strategy isn’t just important—it’s essential. Whether you’re running production applications, databases, or personal projects, losing your data can be devastating. In this comprehensive guide, you’ll learn how to set up automated backups for your Dokploy installation using Cloudflare R2, a cost-effective S3-compatible storage solution with 10GB of free storage.
Why Backups Are Critical for Self-Hosted Applications
Before diving into the technical setup, let’s understand why backups should be your top priority when self-hosting:
- Hardware failures - VPS servers can experience disk failures, memory corruption, or complete hardware breakdowns
- Human errors - Accidentally deleting databases, misconfiguring services, or running destructive commands happens to everyone
- Security incidents - Ransomware, hacking attempts, or compromised credentials can destroy your data
- Provider issues - Cloud providers can experience outages, data center failures, or even account suspensions
- Software bugs - Application updates, migrations, or configuration changes can corrupt your data
- Compliance requirements - Many industries require regular backups and disaster recovery plans
The most important lesson: Never keep your backups in the same place as your primary data. If your VPS provider suspends your account or their data center has a catastrophic failure, you need your backups stored elsewhere.
The Separate Account Strategy
This is why even though Hetzner (where we host our VPS) offers affordable S3-compatible storage through their Storage Box service, we’re choosing Cloudflare R2 instead. By keeping backups with a different provider, you ensure that:
- Account issues won’t affect backups - If your VPS provider suspends your account, your backups remain accessible
- Geographic redundancy - Your data is stored in different data centers, reducing risk
- Provider independence - You’re not locked into a single vendor’s ecosystem
- Financial separation - Billing issues with one provider don’t affect your backup access
Critical Backup Rule
Always store your backups with a different cloud provider than your primary infrastructure. This separation ensures you can recover from provider-level failures or account issues.
Understanding Dokploy Backup Options
Dokploy provides a comprehensive backup system that covers three critical areas of your infrastructure. Let’s explore each type and when to use it.
1. Dokploy System Backups
These backups capture your entire Dokploy installation:
What’s included:
- PostgreSQL database (dokploy-postgres) containing all your application configurations
- Dokploy file system (/etc/dokploy) with settings, certificates, and metadata
- Application definitions, environment variables, and deployment history
- Traefik configurations and SSL certificates
When to use:
- Before major Dokploy updates or migrations
- After significant configuration changes
- For disaster recovery scenarios
- When moving to a new server
Schedule recommendation: Daily automated backups with 7-day retention
2. Database Backups
Individual database backups for your applications:
Supported databases:
- PostgreSQL (using pg_dump)
- MySQL (using mysqldump)
- MariaDB (using mariadb-dump)
- MongoDB (using mongodump)
What’s included:
- Complete database schema (tables, indexes, constraints)
- All data in compressed format
- User permissions and roles
- Stored procedures and functions
When to use:
- Before application updates or schema migrations
- For point-in-time recovery
- When testing major data changes
- For creating development/staging environments
Schedule recommendation: Multiple times per day for production databases (every 6 hours), daily for development
3. Volume Backups
Docker volume backups for applications using file-based storage:
Perfect for:
- SQLite databases (n8n, Memos, etc.)
- File uploads and user-generated content
- Configuration files stored in volumes
- Applications without traditional databases
What’s included:
- Complete volume contents
- File permissions and ownership
- Directory structure
When to use:
- Applications using SQLite or embedded databases
- Services storing important files in volumes
- Content management systems
- Before container updates
Schedule recommendation: Daily for production volumes, weekly for static content

Cloudflare R2: The Cost-Effective Backup Solution
Cloudflare R2 is an S3-compatible object storage service that’s perfect for backups. Here’s why it stands out:
Free Tier Benefits
- 10GB storage - Free forever, perfect for small to medium deployments
- Zero egress fees - Unlike AWS S3, you never pay for downloads
- S3 compatible - Works with any S3-compatible tool or application
- Global distribution - Data automatically distributed across Cloudflare’s network
- No surprise charges - Predictable pricing with no hidden fees
Cost Comparison
Let’s compare R2 with other S3-compatible solutions:
| Provider | Storage (per GB/month) | Egress (per GB) | Free Tier |
|---|---|---|---|
| Cloudflare R2 | $0.015 | $0.00 | 10GB storage |
| AWS S3 | $0.023 | $0.09 | 5GB (12 months) |
| Hetzner Storage Box | $3.81 (100GB) | $0.00 | None |
| Backblaze B2 | $0.005 | $0.01 | 10GB storage |
Winner: Cloudflare R2 offers the best combination of free storage, zero egress fees, and reliability.
When to Upgrade Beyond Free Tier
If you exceed 10GB, R2’s paid tier is still extremely affordable:
- $0.015 per GB/month for storage ($1.50 for 100GB)
- No egress charges (save hundreds compared to AWS)
- No minimum storage duration
- No retrieval fees
Step 1: Configure Cloudflare R2 Bucket
Now let’s set up your R2 bucket for Dokploy backups. This process is straightforward and takes about 5 minutes.
1.1 Create Your R2 Bucket
- Log into Cloudflare Dashboard: Go to dash.cloudflare.com
- Navigate to R2: Click on “R2” in the left sidebar
- Create Bucket:
- Click “Create bucket” button
- Bucket name: Choose something descriptive like
dokploy-backupsoryourapp-backups - Location: Select the region closest to your VPS for faster uploads
- WNAM (Western North America) - Best for US West Coast
- ENAM (Eastern North America) - Best for US East Coast, Europe
- WEUR (Western Europe) - Best for Europe
- APAC (Asia Pacific) - Best for Asia
- Click “Create bucket”
Bucket naming rules:
- 3-63 characters long
- Lowercase letters, numbers, and hyphens only
- Must start and end with a letter or number
- Cannot contain spaces or special characters
1.2 Create API Token for Dokploy
Now you need credentials for Dokploy to access your R2 bucket:
-
Navigate to API Tokens: Go back to R2 Object Storage overview
-
Manage R2 API Tokens: Click the “Manage R2 API Tokens” button (or select from dropdown)
-
Create New Token:
- Click “Create API token”
- Token name: Enter a descriptive name like “Dokploy Backup Access”
- Permissions: Select “Object Read & Write”
- Specify bucket (Optional but Recommended):
- Enable “Apply to specific buckets only”
- Select your
dokploy-backupsbucket - This restricts the token to only this bucket for better security
- Click “Create API token”
-
Save Your Credentials: You’ll see a screen with important information. Copy these immediately (they won’t be shown again):
Access Key ID: f3811c6d27415a9s6cv943b6743ad784
Secret Access Key: aa55ee40b4049e93b7252bf698408cc22a3c2856d2530s7c1cb7670e318f15e58
Security Best Practice: Store these credentials in a password manager immediately. You cannot retrieve the Secret Access Key again after closing this window.
1.3 Get Your R2 Endpoint URL
The endpoint URL is unique to your Cloudflare account:
- Find Your Account ID: On the R2 overview page, you’ll see your endpoint URL
- Format: It looks like this:
https://8ah554705io7842d54c499fbee1156c1c.r2.cloudflarestorage.com- Copy the entire URL - You’ll need this exact URL for Dokploy configuration
Step 2: Configure S3 Destination in Dokploy
Now let’s connect your Cloudflare R2 bucket to Dokploy as an S3 destination.
2.1 Add New S3 Destination
- Access Dokploy Dashboard: Navigate to your Dokploy installation (e.g.,
https://app.yourdomain.com) - Navigate to Destinations: Click “Settings” → “Destinations” in the sidebar
- Create New Destination: Click “New Destination” → Select “S3 Compatible”
2.2 Configure R2 Connection Details
Fill in the form with your Cloudflare R2 credentials:
| Dokploy Field | Cloudflare R2 Value | Example |
|---|---|---|
| Destination Name | Choose a friendly name | Cloudflare R2 Backups |
| Access Key ID | From API token creation | f3811c6d27415a9s6cv943b6743ad784 |
| Secret Access Key | From API token creation | aa55ee40b4049e93b7252bf698408cc22a3c2856d2530s7c1cb7670e318f15e58 |
| Region | Your bucket location | WNAM, ENAM, WEUR, or APAC |
| Endpoint | Your R2 endpoint URL | https://8ah554705io7842d54c499fbee1156c1c.r2.cloudflarestorage.com |
| Bucket | Your bucket name | dokploy-backups |
| Force Path Style | Enable this option | ✓ Checked |
Configuration Breakdown:
Destination Name:
- This is just a friendly label you’ll see in Dokploy
- Choose something descriptive like “Cloudflare R2 Backups” or “Production Backups”
- This name is local to Dokploy and doesn’t affect your R2 bucket
Access Key ID & Secret Access Key:
- These are the credentials from Step 1.2
- Paste them exactly as shown (no extra spaces)
- Dokploy encrypts these values in its database
Region:
- Must match the region you selected when creating your R2 bucket
- Common values:
WNAM- Western North America (California, Oregon, Washington)ENAM- Eastern North America (Virginia, Ohio, Montreal)WEUR- Western Europe (London, Frankfurt, Paris)APAC- Asia Pacific (Singapore, Tokyo, Sydney)
Endpoint:
- Your unique R2 endpoint URL from your Cloudflare account
- Must include
https://at the beginning - Should end with
.r2.cloudflarestorage.com - Do NOT add the bucket name to the endpoint
Bucket:
- The exact name you gave your R2 bucket
- Case-sensitive (must match exactly)
- Do not include slashes or paths
Force Path Style:
- Always enable this for Cloudflare R2
- Uses path-style URLs (
endpoint/bucket/key) instead of virtual-hosted style (bucket.endpoint/key) - R2 requires this setting to work properly
2.3 Test the Connection
Before saving, test that everything works:
- Click “Test Connection” button
- Wait for response (usually 2-5 seconds)
- Success message: You should see “Connection successful” or similar
- If it fails, check:
- All credentials are correct (no extra spaces)
- Endpoint URL is complete and correct
- Region matches your bucket location
- Force Path Style is enabled
- Your API token has Object Read & Write permissions
2.4 Save the Destination
Once the test succeeds:
- Click “Save” or “Create Destination”
- You’ll see your new destination in the list
- It’s now available for all backup configurations
Step 3: Backup Dokploy System
Your Dokploy system backup is the most critical backup—it contains all your application configurations, settings, and deployment history.
What Gets Backed Up
When you create a Dokploy system backup, it includes:
- PostgreSQL database (dokploy-postgres) with all application definitions, configurations, environment variables, and deployment history
- File system (/etc/dokploy) containing SSL certificates, Traefik configurations, and metadata
- User accounts and authentication settings
- Git provider connections and deployment keys
- All destination configurations (S3 destinations, Git providers, etc.)
Create Automated Backups
- Navigate to Backups: Click “Web Server” → “Backups” in Dokploy dashboard
- Create New Backup: Click “Create Backup” button
- Configure Backup Settings:
Backup Configuration:
| Setting | Recommended Value | Explanation |
|---|---|---|
| Destination | Cloudflare R2 Backups | Select the S3 destination you created |
| Backup Name | dokploy-system-{date} | Auto-generated with timestamp |
| Schedule (Cron) | 0 2 * * * | Daily at 2 AM server time |
| Enabled | ✓ Checked | Enable automated backups |
| Retention | 7 days | Keep last 7 backups (optional) |
Understanding Cron Syntax:
The schedule uses standard cron format: minute hour day month weekday
Common schedules:
0 2 * * *     # Daily at 2:00 AM
0 */6 * * *   # Every 6 hours
0 2 * * 0     # Weekly on Sunday at 2:00 AM
0 3 1 * *     # Monthly on the 1st at 3:00 AM
*/30 * * * *  # Every 30 minutes
Why 2 AM? This is typically a low-traffic period for most applications, minimizing performance impact.
- Test Manual Backup: Before relying on automated backups:
- Click “Run Backup Now” or “Test Backup”
- Wait for completion (usually 1-3 minutes)
- Check your R2 bucket to verify the file was uploaded
- Download and verify the backup is not corrupted
Backup File Structure
Your backups will be stored in R2 with this structure:
dokploy-backups/
  └── dokploy-system-2025-11-12-02-00.zip
      ├── database/
      │   └── dokploy-postgres.sql
      └── filesystem/
          └── etc/
              └── dokploy/
                  └── [all your Dokploy files]
Backup file contents:
- Compressed ZIP archive
- PostgreSQL SQL dump (database backup)
- Complete /etc/dokploy directory
- Typically 10-50 MB depending on your applications
Step 4: Backup Application Databases
Now let’s configure individual database backups for your applications. This is essential for point-in-time recovery and testing.
Prerequisites
Before configuring database backups, ensure you have databases created in Dokploy. Learn how to provision databases in our Dokploy Install Guide or see a practical example in Deploy TanStack Start on Dokploy.
4.1 Configure Database Backup
- Navigate to Your Database: In Dokploy, go to “Databases” → Select your database
- Open Backup Tab: Click on the “Backup” tab
- Create Backup Configuration:
Backup Settings:
| Setting | Value | Description |
|---|---|---|
| Destination | Cloudflare R2 Backups | Your S3 destination |
| Database Name | Auto-filled | The database you’re backing up |
| Schedule (Cron) | 0 */6 * * * | Every 6 hours for production |
| Prefix | prod-db or app-name | Folder prefix in your bucket |
| Enabled | ✓ Checked | Enable automated backups |
Schedule Recommendations by Environment:
# Production database (critical data)
0 */6 * * *    # Every 6 hours (00:00, 06:00, 12:00, 18:00)

# Staging database (moderate importance)
0 2 * * *      # Daily at 2:00 AM

# Development database (low importance)
0 2 * * 0      # Weekly on Sunday at 2:00 AM

# High-frequency production (e-commerce, real-time apps)
0 */3 * * *    # Every 3 hours
4.2 Test Your Database Backup
Before trusting automated backups:
- Click “Test Backup” button
- Monitor Progress: Watch the backup process in real-time
- Verify in R2: Check your R2 bucket for the backup file
- Download and Inspect: Download the backup and verify it’s not corrupted
Backup file naming:
dokploy-backups/
  └── prod-db/
      ├── postgres-backup-2025-11-12-00-00.sql.gz
      ├── postgres-backup-2025-11-12-06-00.sql.gz
      ├── postgres-backup-2025-11-12-12-00.sql.gz
      └── postgres-backup-2025-11-12-18-00.sql.gz
4.3 Understanding Backup Commands
Dokploy uses database-specific commands to create backups. Here’s what happens behind the scenes:
PostgreSQL (pg_dump):
pg_dump -Fc --no-acl --no-owner -h localhost -U ${databaseUser} \
  --no-password '${database}' | gzip
What this does:
-Fc- Creates custom format (faster restore, compressed)--no-acl- Excludes access privileges (cleaner restores)--no-owner- Excludes ownership information| gzip- Compresses the output (saves 70-90% space)
MySQL (mysqldump):
mysqldump --default-character-set=utf8mb4 -u 'root' \
  --password='${databaseRootPassword}' \
  --single-transaction --no-tablespaces \
  --quick '${database}' | gzip
What this does:
--default-character-set=utf8mb4- Supports emojis and international characters--single-transaction- Consistent snapshot without locking tables--no-tablespaces- Avoids permission issues on restore--quick- Streams rows instead of loading all into memory
MariaDB (mariadb-dump):
mariadb-dump --user='${databaseUser}' \
  --password='${databasePassword}' \
  --databases ${database} | gzip
MongoDB (mongodump):
mongodump -d '${database}' -u '${databaseUser}' \
  -p '${databasePassword}' \
  --archive --authenticationDatabase=admin --gzip
What this does:
--archive- Outputs to a single archive file--authenticationDatabase=admin- Uses admin database for authentication--gzip- Compresses the archive
4.4 Multiple Database Backups
If you have multiple databases, configure backups for each:
Best Practices for Multiple Databases
1. Use Descriptive Prefixes:
prod-web-app/     # Main web application database
prod-analytics/   # Analytics database
prod-auth/        # Authentication database
dev-testing/      # Development database
2. Different Schedules by Priority:
- Critical databases: Every 3-6 hours
- Important databases: Daily
- Development databases: Weekly
3. Retention Policies:
- Production: Keep 7+ days of backups
- Staging: Keep 3 days
- Development: Keep 1 backup
4. Monitoring:
- Check backup logs weekly
- Verify backup file sizes (sudden changes indicate issues)
- Test restores monthly for production databases
Step 5: Backup Application Volumes
Volume backups are essential for applications that don’t use traditional databases, such as SQLite-based apps or services with file storage.
When to Use Volume Backups
- SQLite databases - n8n, Memos, Plausible Analytics, Umami Analytics
- File-based storage - Uploaded images, documents, user-generated content
- Configuration files - Application settings stored in volumes
- Embedded databases - LevelDB, RocksDB, LMDB
- Static sites - Generated HTML, CSS, and assets
5.1 Understanding Docker Volumes
Before configuring volume backups, understand your volume structure:
For Single Applications:
- Volumes are defined in Advanced → Mounts
- Named directly (e.g.,
app-data,uploads)
For Docker Compose:
- Volumes defined in
docker-compose.yml - Named with pattern:
{appName}_{volumeName} - Example: If app is
n8n-kqlbleand volume isn8n_data, the full name isn8n-kqlble_n8n_data
5.2 Practical Example: Backing Up n8n
Let’s walk through backing up n8n, a popular workflow automation tool that uses SQLite:
n8n Docker Compose (for reference):
version: "3.8"
services:
  n8n:
    image: docker.n8n.io/n8nio/n8n:1.83.2
    restart: always
    environment:
      - N8N_HOST=${N8N_HOST}
      - N8N_PORT=${N8N_PORT}
    volumes:
      - n8n_data:/home/node/.n8n

volumes:
  n8n_data:
n8n stores its SQLite database and files in the n8n_data volume, making traditional database backups unsuitable.
5.3 Configure Volume Backup
- Navigate to Volume Backups: In your n8n application, find “Volume Backups” section
- Create New Volume Backup: Click “Create Volume Backup”
- Configure Settings:
| Setting | Value | Description |
|---|---|---|
| Name | n8n-daily-backup | Descriptive identifier |
| Destination | Cloudflare R2 Backups | Your S3 destination |
| Schedule (Cron) | 0 3 * * * | Daily at 3:00 AM |
| Service Name | n8n | Auto-complete suggests services |
| Volume Name | n8n_data | Auto-filled after selecting service |
| Backup Prefix | n8n-volumes | Optional folder in bucket |
| Turn off Container | ✓ Checked (Recommended) | See safety section below |
| Enabled | ✓ Checked | Enable automated backups |
5.4 Safety Considerations: Container On vs. Off
This is a critical decision that affects backup integrity:
Turn Off Container During Backup (Recommended)
Advantages:
- Data consistency - No risk of corruption from ongoing writes
- Complete snapshot - All data is in a known state
- File integrity - No partially written files
- Database safety - SQLite and other embedded databases are safely closed
How it works:
- Dokploy stops your container gracefully
- Docker volume is backed up while nothing is writing to it
- Backup is uploaded to R2
- Container is restarted automatically
Downtime:
- Typically 30 seconds to 2 minutes depending on volume size
- Schedule during low-traffic periods (e.g., 3:00 AM)
- Most services reconnect automatically
Best for:
- Production applications where data integrity is critical
- SQLite databases (corruption risk if backed up while running)
- Applications with active file writing
- Financial or transactional systems
Keep Container Running During Backup
Advantages:
- No downtime - Service remains available
- Faster - No container restart overhead
- User transparency - No service interruption
Risks:
- Data inconsistency - Files may be in various states of writing
- Corruption risk - SQLite and other databases may produce corrupted backups
- Incomplete data - Large files being written may be partially backed up
- Failed restores - Backup might be invalid when you need it most
How it works:
- Docker volume is backed up while container is running
- Any ongoing file writes may cause inconsistencies
- Backup is uploaded to R2
Best for:
- Development environments
- Static content that rarely changes
- Services with proper write-ahead logging
- Applications designed for live backups
Mitigation strategies:
- Schedule during known low-activity periods
- Use application-specific backup tools when available
- Test restores regularly to verify integrity
SQLite and Live Backups
Never back up SQLite databases with the container running unless the application explicitly supports live backups. SQLite can produce corrupted backups if backed up while in use. Always stop the container or use the application’s built-in backup tool.
5.5 Finding the Correct Volume Name
For Docker Compose applications, volume names follow a specific pattern:
Pattern: {appName}_{volumeName}
Examples:
# App: n8n-kqlble, Volume: n8n_data
Full name: n8n-kqlble_n8n_data

# App: memos-prod, Volume: memos_data
Full name: memos-prod_memos_data

# App: plausible-analytics, Volume: db-data
Full name: plausible-analytics_db-data
How to find your app name:
- Go to your application in Dokploy
- Look at the URL or page title for the full app name
- It usually includes the service name plus a random suffix
How to find your volume name:
- Check your docker-compose.yml file
- Look under the
volumes:section at the bottom - The volume name is what you defined (e.g.,
n8n_data)
Verify volume exists:
# SSH into your VPS
ssh your-username@your-vps-ip

# List all Docker volumes
docker volume ls

# Look for your volume name pattern
docker volume ls | grep n8n
5.6 Common Applications Using Volumes
Here are popular self-hosted apps that benefit from volume backups:
| Application | Volume Purpose | Backup Priority |
|---|---|---|
| n8n | SQLite database + workflows | High (daily) |
| Memos | SQLite database + attachments | High (daily) |
| Plausible Analytics | ClickHouse database | High (daily) |
| Umami Analytics | SQLite database | Medium (daily) |
| FileBrowser | User uploads + database | High (daily) |
| Stirling PDF | Temporary files | Low (weekly) |
| Uptime Kuma | SQLite database | High (daily) |
| Docmost | Uploads + database | High (daily) |
Step 6: Restore Backups
Having backups is only useful if you can restore them. Let’s cover all restoration scenarios.
Restore Dokploy System
System restore is for disaster recovery—when your Dokploy installation is corrupted or you’re migrating to a new server.
Before You Restore
System restoration is destructive—it will replace all current data with backup data. Make sure you’re restoring the correct backup and understand what will be replaced.
Restoration Process:
-
Navigate to Backups: Click “Web Server” → “Backups”
-
Click “Restore Backup” button
-
Configure Restore:
- Source S3 Bucket: Select your Cloudflare R2 destination
- Search for Backup: Start typing to see available backups
- Select Backup: Choose the backup file you want to restore
- Review Summary: Check what will be restored
-
What Happens During Restoration:
- Existing
/etc/dokploydirectory is deleted and replaced - PostgreSQL database (
dokploy-postgres) is dropped - All database users are disconnected
- Backup database is restored from your backup
- Traefik may restart to apply configurations
- Existing
-
Click “Restore” and wait for completion (usually 2-5 minutes)
-
Post-Restoration Steps:
- You may be logged out—sign in again with your credentials
- Verify all applications appear in your dashboard
- Check that environment variables are present
- Test one application to ensure it works
If restoring to a different server (migration scenario):
Migration Checklist
1. Update Server IP Address:
- Go to “Web Server” → “Server” → “Update IP”
- Enter your new server’s IP address
- Save changes
2. Update DNS Records:
- Point your domain A records to the new server IP
- Wait for DNS propagation (5-15 minutes typically)
3. Recreate Traefik.me Domains (if used):
- If you used Traefik.me domains (e.g.,
app.traefik.me) - Recreate them in your application settings
- They automatically update with your server IP
4. Reconfigure Git Providers (if using IP addresses):
- If your Git provider webhooks used IP addresses
- Update them to use domain names instead
- Or update to the new IP address
5. Test SSL Certificates:
- Traefik will automatically provision new Let’s Encrypt certificates
- Check that HTTPS works for all applications
- May take 5-10 minutes for initial certificate issuance
6. Verify Database Connections:
- Check that all applications can connect to their databases
- Update any external database connection strings if needed
7. Run Application Health Checks:
- Visit each application URL
- Verify functionality
- Check logs for any errors
Restore Database Backups
Database restoration is for recovering specific databases without affecting your entire Dokploy installation.
Common Restoration Scenarios:
- Data corruption - Application bug corrupted your database
- Accidental deletion - Dropped tables or deleted critical data
- Testing recovery - Verify your backups are valid
- Cloning to staging - Create development copy from production backup
- Rolling back changes - Undo a bad migration or update
Restoration Process:
- Navigate to Database: Go to “Databases” → Select your database
- Open Backup Tab: Click “Backup” tab
- Click “Restore” button
- Configure Restoration:
| Setting | Description |
|---|---|
| Source S3 Bucket | Select your Cloudflare R2 destination |
| Search Backup File | Start typing—autocompletes with available backups |
| Database Name | Auto-filled with current database name |
-
Understand Nested Folders:
- If you use folder prefixes (e.g.,
prod-db/), type the prefix - Example: Type
prod-db/to see backups in that folder - Full path:
prod-db/postgres-backup-2025-11-12-06-00.sql.gz
- If you use folder prefixes (e.g.,
-
Select Specific Backup: Choose the exact backup timestamp you want
-
Click “Restore Database”
What Happens:
- Current database is dropped (all data deleted)
- Backup file is downloaded from R2
- Database is recreated from backup
- Permissions are restored
- Connected applications may briefly lose connection (usually auto-reconnect)
Verification Steps:
- Check database logs for any restore errors
- Test your application to ensure it works
- Verify critical data is present
- Check application logs for database connection errors
Restoration Compatibility
Dokploy only guarantees restoration of backups created by its own backup system. Custom backup files or manual dumps may not work with the automated restore process.
Restore Volume Backups
Volume restoration recreates a Docker volume from a backup, useful for recovering lost files or rolling back application state.
Restoration Process:
- Navigate to Application: Go to your application (e.g., n8n)
- Open Volume Backups: Find “Volume Backups” section
- Click “Restore Volume” button
- Configure Restoration:
| Setting | Value | Description |
|---|---|---|
| Source S3 Bucket | Cloudflare R2 Backups | Your backup destination |
| Search Backup | Start typing | Find your volume backup |
| Target Volume Name | n8n-kqlble_n8n_data | Volume to restore to |
Critical: Understanding Target Volume Name
For Docker Compose services, you must use the full volume name: {appName}_{volumeName}
Examples:
# Wrong (will fail)
n8n_data

# Correct
n8n-kqlble_n8n_data
How to find the correct name:
- Check your app name in Dokploy (e.g.,
n8n-kqlble) - Check your docker-compose.yml for volume name (e.g.,
n8n_data) - Combine:
n8n-kqlble_n8n_data
Or verify with Docker:
# SSH into your VPS
ssh your-username@your-vps-ip

# List volumes for your application
docker volume ls | grep n8n

# Output will show the full volume name
n8n-kqlble_n8n_data
Important Restore Considerations:
Volume Restore Prerequisites
Before restoring a volume:
- Stop the container - The target volume must not be in use
- Remove existing volume - If it already exists, delete it first
- Check available space - Ensure sufficient disk space for the restore
- Back up current state - If the volume has important data, back it up first
The restore will fail if the volume is in use or already exists.
Complete Restore Workflow:
# 1. Stop your application in Dokploy dashboard
#    (or via command line)
docker compose -f /opt/stacks/n8n-kqlble/docker-compose.yml down

# 2. Remove the existing volume
docker volume rm n8n-kqlble_n8n_data

# 3. Restore via Dokploy UI (as described above)

# 4. Start your application in Dokploy dashboard
#    (or via command line)
docker compose -f /opt/stacks/n8n-kqlble/docker-compose.yml up -d
Verification:
- Check container logs for startup errors
- Access your application to verify functionality
- Confirm restored data is present and correct
- Test application features that use the restored data
Advanced Backup Strategies
Backup Rotation and Retention
Implement a backup rotation strategy to balance storage costs with recovery options:
3-2-1 Backup Rule:
- 3 copies of your data (original + 2 backups)
- 2 different storage types (local SSD + cloud storage)
- 1 offsite backup (Cloudflare R2)
Retention Schedule Example:
| Backup Type | Frequency | Retention | Storage Used |
|---|---|---|---|
| Hourly | Every 3 hours | 24 hours | ~8 backups |
| Daily | Daily at 2 AM | 7 days | 7 backups |
| Weekly | Sunday at 2 AM | 4 weeks | 4 backups |
| Monthly | 1st of month | 6 months | 6 backups |
This gives you:
- Granular recovery for recent issues (hourly)
- Week-long history for recent problems (daily)
- Monthly snapshots for long-term reference
Total storage: ~25 backups × average backup size
Monitoring Backup Health
Create a monitoring system to ensure backups are working:
Backup Monitoring Checklist
Weekly Checks:
- Verify latest backups exist in R2 bucket
- Check backup file sizes (sudden changes indicate issues)
- Review Dokploy backup logs for errors
- Confirm scheduled backups are running on time
Monthly Tasks:
- Test restore from latest backup
- Download and verify backup integrity
- Review storage usage in Cloudflare R2
- Update backup documentation with any changes
Quarterly Tests:
- Full disaster recovery drill (restore to test server)
- Document restore time and any issues encountered
- Update restore procedures based on lessons learned
Automated Monitoring (Advanced):
- Set up Uptime Kuma or similar to check for new backup files
- Create alerts if backups haven’t run in expected timeframe
- Use Cloudflare R2 webhooks to notify on new uploads
Encryption and Security
Your backups contain sensitive data—protect them:
R2 Bucket Security:
- Use unique API tokens for each application or backup type
- Restrict token permissions to specific buckets only
- Enable token expiration for temporary access
- Rotate tokens annually as a security best practice
Additional Security Measures:
- Enable encryption at rest in R2 (automatic with R2)
- Use HTTPS for all transfers (enforced by R2)
- Store API credentials in password manager
- Never commit credentials to Git repositories
- Audit access logs regularly
Encrypting Backups (Advanced):
# Before uploading to R2, encrypt locally
gpg --symmetric --cipher-algo AES256 backup-file.zip

# This creates backup-file.zip.gpg
# Store the passphrase securely (password manager)
Troubleshooting Common Issues
Backup Fails to Upload
Symptoms: Backup completes but doesn’t appear in R2
Solutions:
- Check credentials: Verify Access Key ID and Secret Access Key
- Test connection: Use “Test Connection” in Dokploy destination settings
- Check bucket name: Ensure it’s spelled exactly correct (case-sensitive)
- Verify region: Must match your bucket’s region (WNAM, ENAM, etc.)
- Check endpoint: Must be your account-specific R2 endpoint URL
- Enable Force Path Style: Required for R2 compatibility
Debug command (SSH into VPS):
# Check Dokploy logs for backup errors
docker logs dokploy | grep -i backup

# Look for S3 upload errors
docker logs dokploy | grep -i "failed\|error"
Backup Takes Too Long
Symptoms: Backup runs for hours or times out
Solutions:
- Check volume size: Large volumes take longer
# Check volume size docker system df -v | grep your-volume-name - Network speed: Slow upload speeds to R2
- Database size: Large databases need more time
- Compress before upload: Ensure compression is enabled
- Schedule during off-hours: Less contention for resources
Optimization tips:
- Split large volumes into multiple smaller volumes
- Exclude temporary files from backups
- Increase server bandwidth if consistently slow
- Use volume snapshots for instant backups (advanced)
Restore Fails
Symptoms: Restore starts but fails to complete
Solutions:
- Check disk space: Ensure sufficient space for restore
df -h - Verify backup integrity: Download backup and check if it’s corrupted
- Stop conflicting services: Ensure no containers are using the target volume
- Database permissions: Ensure Dokploy can drop/create databases
- Network stability: Slow or interrupted downloads from R2
For database restores:
# Check database logs
docker logs dokploy-postgres

# Verify database is accessible
docker exec -it dokploy-postgres psql -U postgres -l
Out of Free Storage (10GB Exceeded)
Symptoms: Backups stop working, R2 returns quota errors
Solutions:
-
Check current usage:
- Go to Cloudflare R2 dashboard
- View storage usage statistics
-
Implement retention policies:
- Delete old backups manually
- Set up lifecycle rules (if R2 supports them)
- Reduce backup frequency for less critical data
-
Optimize backups:
- Ensure compression is enabled
- Exclude unnecessary files from volume backups
- Use database-specific backup tools for better compression
-
Upgrade plan:
- R2 paid tier is $0.015/GB/month ($1.50 for 100GB)
- Still cheaper than most alternatives
- No egress fees (saves money on restores)
Calculate your storage needs:
Dokploy system backup:    10 MB × 7 days = 70 MB
Database backups:         50 MB × 4/day × 7 days = 1,400 MB
Volume backup (n8n):      200 MB × 7 days = 1,400 MB
Volume backup (other):    100 MB × 7 days = 700 MB
------------------------------------------------------
Total:                    ~3.5 GB (fits in free tier)
Conclusions
You’ve now set up a comprehensive, automated backup system for your Dokploy infrastructure using Cloudflare R2. Let’s recap what you’ve accomplished:
✅ Cloudflare R2 configured with 10GB free storage and zero egress fees
✅ Dokploy system backups protecting your complete installation and configurations
✅ Database backups for all your application databases with automated schedules
✅ Volume backups for SQLite databases and file-based storage
✅ Restore procedures tested and documented for disaster recovery
✅ Separate provider strategy ensuring backups survive provider-level failures
Key Takeaways
- Always keep backups with a different provider than your VPS to survive account or provider issues
- Test your restores regularly - backups are only useful if they actually work when you need them
- Stop containers for volume backups when backing up SQLite or embedded databases to prevent corruption
- Monitor backup health with weekly checks of your R2 bucket and backup logs
- Implement retention policies to balance storage costs with recovery needs
Next Steps
Now that your backups are configured:
- Schedule a disaster recovery drill - Test a full Dokploy system restore on a test server
- Document your procedures - Keep notes on restore times and any issues you encounter
- Set up monitoring - Use Uptime Kuma or similar to alert if backups stop running
- Review monthly - Check storage usage and backup health regularly
Related Resources
If you’re new to Dokploy or want to expand your self-hosting setup:
Install Dokploy Guide Deploy Apps on DokployYour data is now protected with automated, offsite backups. Sleep better knowing you can recover from any disaster! 🛡️