How to Self-Host Your Newsletter with Notifuse - Complete Guide
Learn how to self-host your own newsletter platform using Notifuse. Complete guide with Docker Compose and Dokploy deployment options.
In the era of data privacy and platform independence, self-hosting your newsletter platform gives you complete control over your subscriber data, email delivery, and costs. Notifuse is an open-source, self-hostable email platform that combines newsletter functionality with transactional email capabilities, making it a powerful alternative to services like Mailchimp, ConvertKit, or Listmonk.
In this comprehensive guide, I’ll walk you through everything you need to know to get started with Notifuse and self-host your own newsletter platform.
What is Notifuse?
Notifuse is a modern, open-source email platform designed for developers and marketers who want full control over their email infrastructure. Unlike traditional SaaS solutions, Notifuse runs on your own server, giving you complete ownership of your data and the freedom to customize everything.
Key Features of Notifuse
- MJML-Based Visual Email Builder: Create beautiful, mobile-responsive emails with a drag-and-drop interface that guarantees perfect rendering across all email clients (Gmail, Outlook, Apple Mail, etc.)
- Multi-Tenant Workspaces: Perfect for agencies managing multiple clients, with complete database isolation and custom domains per workspace
- Advanced Segmentation: Target the right audience with dynamic segments, real-time updates, and complex filtering rules
- A/B Testing: Optimize your campaigns with built-in A/B testing and automatic winner selection
- Transactional + Marketing Emails: Send both newsletter campaigns and transactional emails from the same platform
- Native ESP Integrations: Connect directly to Amazon SES, Mailgun, Postmark, Mailjet, SparkPost for optimal deliverability
- SMTP Relay: Built-in SMTP server for legacy integrations and third-party applications
- Comprehensive APIs: RESTful APIs with OpenAPI specification for easy integration
- Team Collaboration: Granular permissions and user roles for team management
- Activity Timeline: Complete history of email interactions for each contact
Why Choose Notifuse Over Other Platforms?
Compared to SaaS Platforms (Mailchimp, ConvertKit):
- No monthly fees or per-subscriber pricing
- Complete data ownership and privacy
- No artificial feature limitations
- Unlimited contacts and sends (limited only by your SMTP provider)
Compared to Listmonk:
- MJML-based visual builder (vs basic HTML editor)
- Multi-tenant architecture for agencies
- Advanced segmentation and A/B testing
- Better developer experience with comprehensive APIs
- Modern, tested codebase with >80% test coverage
Compared to Sendy:
- Open-source and free (no $69 license fee)
- Modern UI/UX with better user experience
- Built-in visual email builder
- Multi-tenant workspaces
- Active development and community support
Prerequisites
Before you begin, you’ll need:
- A VPS or Server: At least 2GB RAM and 2 CPU cores recommended. You can use providers like Hetzner, DigitalOcean, or any VPS provider
- A Domain Name: For accessing your Notifuse instance (e.g.,
newsletter.yourdomain.com) - SMTP Provider: For sending emails. Options include:
- Brevo (formerly Sendinblue): Free tier with 300 emails/day
- Mail.Baby: Pay-as-you-go pricing at $1/month + $0.20 per 1,000 emails
- Amazon SES: Extremely cheap at $0.10 per 1,000 emails
- Mailgun: Free tier with 5,000 emails/month
- Any other SMTP service you prefer
- Basic Docker Knowledge: Helpful but not required if using Dokploy
SMTP Provider Recommendation
For testing and small newsletters, Brevo’s free tier (300 emails/day) is perfect to get started. For production use with larger volumes, Mail.Baby offers excellent value with pay-as-you-go pricing, or Amazon SES for the absolute lowest cost at scale.
Option 1: Deploy with Dokploy (Easiest Method)
Dokploy is an open-source Platform as a Service (PaaS) that makes deploying applications incredibly easy. The best part? Dokploy has a built-in Notifuse template that handles all the configuration for you! If you haven’t set up Dokploy yet, check out our comprehensive Dokploy Installation Guide.
Step 1: Set Up Dokploy
If you don’t have Dokploy installed, follow these quick steps:
# Install Dokploy on your VPS
curl -sSL https://dokploy.com/install.sh | sh
Access Dokploy at http://your-vps-ip:3000 and complete the setup wizard.
Step 2: Deploy from Template
- Log in to your Dokploy dashboard
- Click “Create Project” and give it a name (e.g., “Newsletter”)
- Inside the project, click “Templates”
- Search for “Notifuse” in the template gallery
- Click “Deploy” on the Notifuse template
Step 3: Configure Template Variables
Dokploy will present you with a configuration form. Fill in the following:
Required Configuration:
- Domain: Your domain for Notifuse (e.g.,
newsletter.yourdomain.com) - Email: Your root administrator email address
- SMTP Host: Your SMTP provider’s host (e.g.,
smtp-relay.brevo.comfor Brevo) - SMTP Port: Usually
587for STARTTLS - SMTP Username: Your SMTP username
- SMTP Password: Your SMTP password
- SMTP From Email: The email address to send from (e.g.,
[email protected]) - SMTP From Name: Your newsletter name (e.g., “My Newsletter”)
Security Keys (Optional - uses default for testing):
- PASETO Private Key: Leave default or generate new keys at paseto.notifuse.com
- PASETO Public Key: Corresponding public key
PASETO Keys
PASETO keys are used for authentication. The template includes default keys for testing, but you should generate your own for production at https://paseto.notifuse.com/. Unlike SECRET_KEY in manual installs, these can be rotated if needed.
Step 4: Configure DNS
Before deploying, make sure your domain’s DNS is configured:
- Go to your DNS provider (Cloudflare, Namecheap, etc.)
- Add an A record pointing to your VPS IP:
- Type: A
- Name: newsletter (or your subdomain)
- Value: Your VPS IP address
- TTL: 3600 (or Auto)
Step 5: Deploy
-
Review your configuration
-
Click “Deploy”
-
Dokploy will:
- Pull the Notifuse and PostgreSQL images
- Configure the services
- Set up SSL certificates automatically via Traefik
- Start the application
-
Monitor the deployment in the logs tab
-
Once complete, access Notifuse at
https://newsletter.yourdomain.com
Automatic SSL
Dokploy automatically provisions and renews SSL certificates from Let’s Encrypt - no manual configuration needed!
What the Template Includes
The Dokploy template automatically configures:
- PostgreSQL 17 database with health checks
- Notifuse application connected to the database
- Persistent volumes for database and file storage
- Environment variables for all required configuration
- Domain mapping with automatic SSL/TLS
- Port exposure (8080 for web interface)
- Restart policies for high availability
Option 2: Deploy with Docker Compose (Advanced Users)
If you prefer manual control or want to deploy without Dokploy, you can use Docker Compose directly. This method gives you more control but requires manual SSL setup.
Step 1: Prepare Your Server
Update your system and install Docker:
# Update system packages
sudo apt update && sudo apt upgrade -y

# Install Docker
curl -fsSL https://get.docker.com -o get-docker.sh
sudo sh get-docker.sh

# Install Docker Compose
sudo apt install docker-compose -y
Step 2: Create Project Directory
# Create directory for Notifuse
mkdir -p ~/notifuse
cd ~/notifuse
Step 3: Create Docker Compose File
Create a docker-compose.yml file:
nano docker-compose.ymlPaste the following configuration:
services:
  api:
    image: notifuse/notifuse:latest
    ports:
      - '8080:8080'
      - '587:587'
    environment:
      # Server Configuration
      - SERVER_PORT=8080
      - SERVER_HOST=0.0.0.0
      - ENVIRONMENT=production

      # Database Configuration (Required)
      - DB_HOST=postgres
      - DB_PORT=5432
      - DB_USER=postgres
      - DB_PASSWORD=${DB_PASSWORD}
      - DB_PREFIX=notifuse
      - DB_NAME=notifuse_system
      - DB_SSLMODE=disable

      # PASETO Keys (Required) - Generate at https://paseto.notifuse.com/
      - PASETO_PRIVATE_KEY=${PASETO_PRIVATE_KEY}
      - PASETO_PUBLIC_KEY=${PASETO_PUBLIC_KEY}

      # All other settings can be configured through Setup Wizard
      # Or set them here:
      # - ROOT_EMAIL=${ROOT_EMAIL}
      # - API_ENDPOINT=${API_ENDPOINT}
      # - SMTP_HOST=${SMTP_HOST}
      # - SMTP_PORT=${SMTP_PORT}
      # - SMTP_USERNAME=${SMTP_USERNAME}
      # - SMTP_PASSWORD=${SMTP_PASSWORD}
      # - SMTP_FROM_EMAIL=${SMTP_FROM_EMAIL}
      # - SMTP_FROM_NAME=${SMTP_FROM_NAME}
    depends_on:
      - postgres
    volumes:
      - ./data:/app/data
    restart: unless-stopped
    networks:
      - notifuse-network

  postgres:
    image: postgres:17-alpine
    environment:
      - POSTGRES_USER=postgres
      - POSTGRES_PASSWORD=${DB_PASSWORD}
      - POSTGRES_DB=postgres
    volumes:
      - postgres-data:/var/lib/postgresql/data
    restart: unless-stopped
    networks:
      - notifuse-network
    healthcheck:
      test: ['CMD-SHELL', 'pg_isready -U postgres']
      interval: 5s
      timeout: 5s
      retries: 5

volumes:
  postgres-data:
    driver: local

networks:
  notifuse-network:
    driver: bridge
Step 4: Create Environment File
Create a .env file:
nano .envAdd your configuration:
# Database Password
DB_PASSWORD=your_secure_database_password_here

# PASETO Keys - Generate at https://paseto.notifuse.com/
PASETO_PRIVATE_KEY=your_paseto_private_key_here
PASETO_PUBLIC_KEY=your_paseto_public_key_here

# Optional: Configure SMTP here instead of Setup Wizard
# [email protected]
# API_ENDPOINT=https://newsletter.yourdomain.com
# SMTP_HOST=smtp-relay.brevo.com
# SMTP_PORT=587
# [email protected]
# SMTP_PASSWORD=your_smtp_password
# [email protected]
# SMTP_FROM_NAME=My Newsletter
Generate PASETO Keys
Visit https://paseto.notifuse.com/ to generate secure PASETO key pairs. These are used for authentication instead of the older SECRET_KEY approach.
Special Characters in .env Files
If your passwords contain # characters, you must wrap them in quotes:
DB_PASSWORD="mypass#word123"
SMTP_PASSWORD="pass#word123"
This is a limitation of .env file parsing.
Step 5: Start Notifuse
# Start services
docker-compose up -d

# Check logs
docker-compose logs -f api
Step 6: Set Up Reverse Proxy (Nginx)
For production, you should use a reverse proxy with SSL. Install Nginx:
sudo apt install nginx certbot python3-certbot-nginx -yCreate Nginx configuration:
sudo nano /etc/nginx/sites-available/notifuseAdd this configuration:
server {
    listen 80;
    server_name newsletter.yourdomain.com;

    location / {
        proxy_pass http://localhost:8080;
        proxy_http_version 1.1;
        proxy_set_header Upgrade $http_upgrade;
        proxy_set_header Connection 'upgrade';
        proxy_set_header Host $host;
        proxy_cache_bypass $http_upgrade;
        proxy_set_header X-Real-IP $remote_addr;
        proxy_set_header X-Forwarded-For $proxy_add_x_forwarded_for;
        proxy_set_header X-Forwarded-Proto $scheme;
    }
}
Enable the site and get SSL certificate:
# Enable site
sudo ln -s /etc/nginx/sites-available/notifuse /etc/nginx/sites-enabled/

# Test configuration
sudo nginx -t

# Reload Nginx
sudo systemctl reload nginx

# Get SSL certificate
sudo certbot --nginx -d newsletter.yourdomain.com
Setting Up Your SMTP Provider
Notifuse needs an SMTP provider to send emails. Here’s how to configure popular providers:
Option A: Brevo (Free 300 Emails/Day)
- Sign up at Brevo
- Go to SMTP & API → SMTP
- Note your SMTP credentials:
- SMTP Server:
smtp-relay.brevo.com - Port:
587 - Username: Your email
- Password: Your SMTP key
- SMTP Server:
Option B: Mail.Baby (Pay-as-you-go)
Mail.Baby is an excellent choice for production use with affordable pricing. Check out our detailed Mail.Baby Review for more information.
- Sign up at Interserver
- Go to Mail → Order and get Mail.Baby ($1/month + $0.20 per 1,000 emails)
- Get your SMTP credentials from the Mail.Baby admin area
- Configure in Notifuse (either in Dokploy template or Setup Wizard):
- SMTP Server: Provided in Mail.Baby dashboard
- Port:
587(STARTTLS) or465(SSL) - Username: Your Mail.Baby username
- Password: Your Mail.Baby password
Mail.Baby Sending Limits
Mail.Baby has a limit of 6,000 emails per hour per email address. Emails beyond this limit will be discarded, so make sure your sending tools respect this limit.
Option C: Amazon SES (Lowest Cost)
- Sign up for AWS
- Go to Amazon SES console
- Request production access (required for sending to non-verified emails)
- Create SMTP credentials
- Use the credentials in Notifuse
Complete the Setup Wizard
After deploying Notifuse, access it in your browser:
- Navigate to your domain (e.g.,
https://newsletter.yourdomain.com) - You’ll be greeted by the Setup Wizard
- Complete the following steps:
Step 1: Root Administrator Email
Enter your email address - this will be your admin account.
Step 2: API Endpoint
Enter your public URL (e.g., https://newsletter.yourdomain.com)
Step 3: SMTP Configuration
Enter your SMTP provider details:
- SMTP Host: Your provider’s SMTP server (e.g.,
smtp-relay.brevo.com) - SMTP Port: Usually
587for STARTTLS or465for SSL - SMTP Username: Your SMTP username
- SMTP Password: Your SMTP password
- From Email: The email address that will appear as sender
- From Name: Your name or organization name
Already Configured?
If you deployed with Dokploy template and configured SMTP in the template variables, these settings are already pre-filled. You can verify or update them if needed.
Step 4: Create Admin Account
Set a strong password for your administrator account.
Creating Your First Newsletter
Once setup is complete, you’re ready to create your first newsletter campaign!
Step 1: Create a Workspace
- Log in to Notifuse
- Click “Create Workspace”
- Enter workspace name (e.g., “My Newsletter”)
- Configure your workspace settings
Step 2: Add Contacts
You can add contacts in several ways:
Manual Entry:
- Go to Contacts → Add Contact
- Enter email and other details
- Assign to a list
CSV Import:
- Go to Contacts → Import
- Upload your CSV file
- Map fields and import
API Integration: Use Notifuse’s REST API to add contacts programmatically.
Step 3: Create a List
- Go to Lists → Create List
- Enter list name (e.g., “Newsletter Subscribers”)
- Configure opt-in settings (single or double opt-in)
- Set up welcome email (optional)
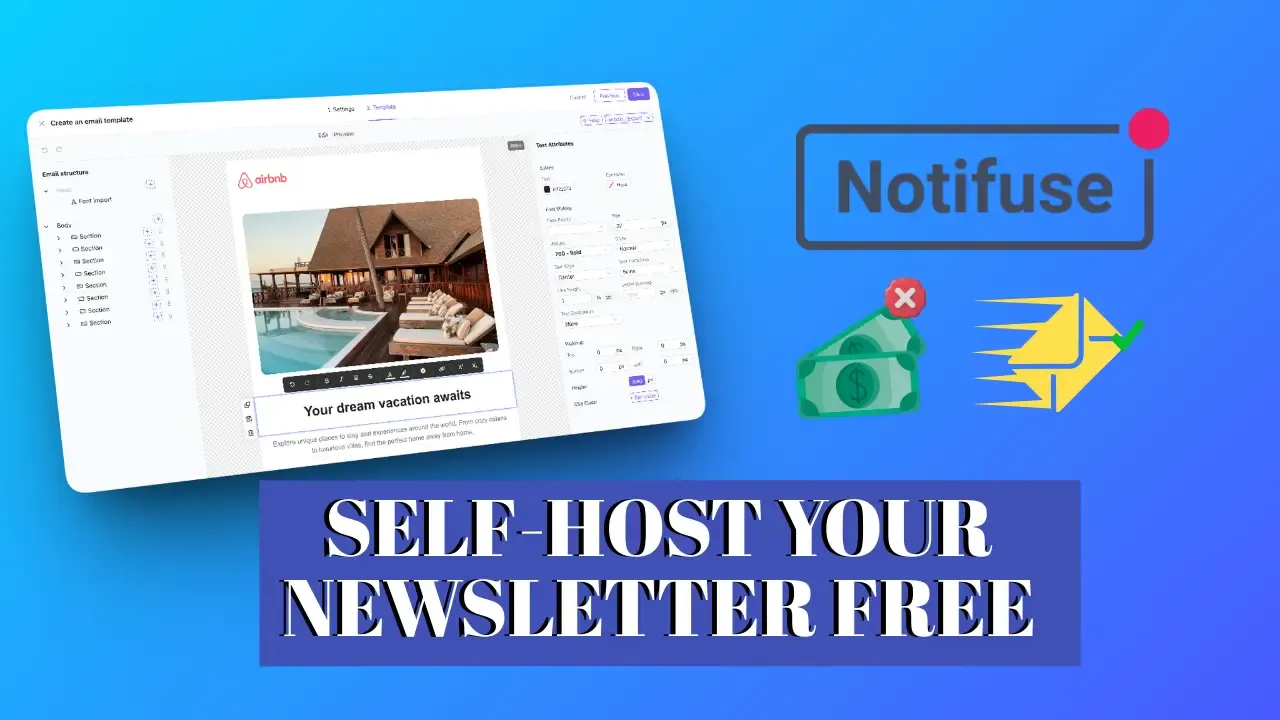
Step 4: Design Your Email
- Go to Templates → Create Template
- Use the MJML visual builder:
- Drag and drop components
- Add text, images, buttons
- Customize colors and styling
- Preview in real-time
- Save your template
MJML Advantage
Notifuse’s MJML-based builder guarantees your emails will look perfect on all devices and email clients - no more broken layouts in Outlook or Gmail!
Step 5: Create a Campaign
- Go to Campaigns → Create Campaign
- Select your template
- Choose recipients (lists or segments)
- Set subject line and preview text
- Schedule or send immediately
Step 6: Track Results
After sending, monitor your campaign performance:
- Open Rate: See who opened your emails
- Click Rate: Track link clicks
- Bounce Rate: Monitor delivery issues
- Unsubscribe Rate: Track opt-outs
Advanced Features
A/B Testing
Test different subject lines or content:
- Create a campaign
- Enable A/B testing
- Create variants (A and B)
- Set test percentage and duration
- Auto-send winner to remaining contacts
Segmentation
Create dynamic segments based on:
- Contact attributes
- Email engagement
- Subscription date
- Custom fields
Example: “Subscribed in last 30 days AND opened any email in last week”
Transactional Emails
Send automated emails via API:
curl -X POST https://newsletter.yourdomain.com/api/v1/send \
  -H "Authorization: Bearer YOUR_API_KEY" \
  -H "Content-Type: application/json" \
  -d '{
    "to": "[email protected]",
    "subject": "Welcome to our platform!",
    "template": "welcome-email",
    "variables": {
      "firstName": "John"
    }
  }'
SMTP Relay for Third-Party Apps
Configure external applications (like Supabase Auth, Ghost, WordPress) to use Notifuse’s SMTP relay:
- Host: Your Notifuse domain
- Port: 587
- Authentication: Workspace API credentials
This gives you full control over all transactional emails through Notifuse’s visual editor.
Best Practices
- Use Double Opt-In: Ensure subscribers genuinely want your emails
- Segment Your Audience: Send targeted content to increase engagement
- Test Before Sending: Always send test emails to check rendering
- Monitor Deliverability: Keep bounce rates low and engagement high
- Clean Your List: Remove inactive subscribers regularly
- Respect Unsubscribes: Make it easy to opt-out and honor requests immediately
- Backup Your Database: Regular PostgreSQL backups are essential
- Monitor Server Resources: Ensure adequate CPU/RAM for your sending volume
- Update Regularly: Keep Notifuse updated for security and features
Troubleshooting
Emails Going to Spam
Solutions:
- Set up SPF, DKIM, and DMARC records for your domain
- Start with low volume and gradually increase
- Maintain good engagement rates (opens/clicks)
- Avoid spam trigger words
- Ensure contacts opted in
- Use a dedicated sending domain
Slow Email Sending
Solutions:
- Check your SMTP provider’s rate limits
- Increase server resources (CPU/RAM)
- Use a dedicated SMTP provider (not shared hosting)
- Consider using Amazon SES for better throughput
- Optimize images in your emails
Database Connection Errors
Solutions:
- Verify PostgreSQL is running:
docker-compose ps - Check database credentials in environment variables
- Ensure database volume has adequate space
- Check logs:
docker-compose logs postgres
Cannot Access Web Interface
Solutions:
- Verify Notifuse container is running:
docker-compose ps - Check if port 8080 is accessible:
netstat -tlnp | grep 8080 - Verify firewall rules allow traffic
- Check Nginx configuration if using reverse proxy
- Review logs:
docker-compose logs api
Cost Comparison
Let’s compare the costs of self-hosting Notifuse vs. SaaS platforms for 10,000 subscribers:
Notifuse (Self-Hosted):
- VPS (Hetzner 2GB): €4.51/month (~$5/month)
- Mail.Baby (20,000 emails/month): $1 + $4 = $5/month
- Domain: ~$1/month
- Total: ~$11/month
Mailchimp:
- 10,000 subscribers: $150/month
- Total: $150/month
ConvertKit:
- 10,000 subscribers: $119/month
- Total: $119/month
Sendy:
- One-time license: $69
- VPS: $5/month
- Amazon SES: ~$2/month
- Total: $7/month (after initial $69)
Savings with Notifuse: Save $100-140/month compared to SaaS platforms!
Maintenance and Updates
Updating Notifuse
With Dokploy Template:
- Go to your Notifuse application in Dokploy
- Click “Redeploy” or “Rebuild”
- Dokploy will automatically pull the latest Notifuse image and restart the services
- Check the logs to ensure everything started successfully
With Docker Compose:
cd ~/notifuse

# Pull latest image
docker-compose pull

# Restart with new image
docker-compose up -d

# Clean old images
docker image prune -a
Database Backups
Manual Backup:
# For Docker Compose deployments
docker-compose exec postgres pg_dump -U postgres notifuse_system > backup.sql

# For Dokploy deployments (find container name first)
docker ps | grep postgres
docker exec <postgres-container-name> pg_dump -U postgres notifuse_system > backup.sql

# Restore database
cat backup.sql | docker exec -i <postgres-container-name> psql -U postgres notifuse_system
Automated Backups (add to crontab):
# Edit crontab
crontab -e

# Add daily backup at 2 AM (adjust path and container name)
0 2 * * * docker exec <postgres-container-name> pg_dump -U postgres notifuse_system > /backup/notifuse-$(date +\%Y\%m\%d).sql
Dokploy Backups
If using Dokploy, you can also configure automated backups through the Dokploy interface under your application’s backup settings.
Security Considerations
- Change Default Passwords: Use strong, unique passwords for database and admin accounts
- Use SSL/TLS: Always use HTTPS for your Notifuse installation
- Keep Updated: Regularly update Notifuse and system packages
- Firewall Configuration: Only expose necessary ports (80, 443, optionally 587)
- Regular Backups: Maintain offsite backups of your database
- API Key Security: Never expose API keys in client-side code
- Monitor Access Logs: Regularly review Nginx and application logs
- Use CrowdSec: Install CrowdSec for automated threat protection (see Dokploy guide)
Conclusion
Self-hosting your newsletter with Notifuse gives you complete control over your email infrastructure while saving significant costs compared to SaaS platforms. With its modern MJML-based visual builder, advanced segmentation, and comprehensive APIs, Notifuse provides enterprise-grade features without the enterprise price tag.
Whether you’re a solo blogger, growing startup, or agency managing multiple clients, Notifuse offers the flexibility and power you need to run successful email campaigns. The multi-tenant workspace architecture makes it perfect for agencies, while the robust API support enables seamless integration with your existing applications.
Getting started is incredibly easy with Dokploy’s built-in Notifuse template - just fill in your configuration and click deploy. For advanced users who want more control, Docker Compose is available. Combined with an affordable SMTP provider like Brevo (free tier) or Mail.Baby (pay-as-you-go), you can start sending professional newsletters in less than 30 minutes.
Ready to Get Started?
Visit Notifuse WebsiteHave questions or need help with your Notifuse setup? Leave a comment below, and I’ll be happy to help!
Frequently Asked Questions
Can I migrate from Mailchimp to Notifuse?
Yes! Export your contacts from Mailchimp as CSV, then import them into Notifuse using the CSV import feature. You’ll need to recreate your email templates using Notifuse’s MJML builder, but this gives you an opportunity to improve your designs with guaranteed mobile responsiveness.
How many emails can I send with Notifuse?
Notifuse itself has no sending limits. Your sending capacity depends on your SMTP provider’s limits and your server resources. With Amazon SES, you can send millions of emails per month. With Mail.Baby, you can send up to 6,000 emails per hour per email address.
Do I need programming knowledge to use Notifuse?
No! While Notifuse offers powerful APIs for developers, the web interface is user-friendly and requires no programming knowledge. The visual email builder, campaign creation, and contact management are all point-and-click.
Can I use Notifuse for transactional emails too?
Absolutely! Notifuse excels at both marketing newsletters and transactional emails. You can use the API to send password resets, welcome emails, receipts, and more - all with the same beautiful templates you design in the visual builder.
How does Notifuse handle unsubscribes?
Notifuse automatically includes unsubscribe links in your emails and manages the unsubscribe process. When someone unsubscribes, they’re immediately removed from future campaigns, and you can configure custom unsubscribe confirmation pages.
Can I use my own domain for sending emails?
Yes! You can configure Notifuse to send from any domain you own. You’ll need to set up SPF, DKIM, and DMARC records with your SMTP provider to ensure good deliverability. Your SMTP provider will guide you through this process.
Is Notifuse suitable for agencies managing multiple clients?
Definitely! Notifuse’s multi-tenant workspace architecture is perfect for agencies. Each client gets their own isolated workspace with separate contacts, templates, and API keys. You can even set up custom domains per workspace.
What server specifications do I need?
Minimum: 2GB RAM, 2 CPU cores, 20GB storage. Recommended: 4GB RAM, 2-4 CPU cores, 50GB storage. Requirements scale with your sending volume and subscriber count. A basic Hetzner VPS ($5/month) is sufficient for most small to medium newsletters.