Run AI CLI Tools in Docker or Podman Safely (2026 Guide)
Run AI CLI tools in Docker or Podman safely: isolated containers for Claude Code, Amp, Gemini CLI and OpenCode, with persistent configs and zero host risk.

Updated Published 78 min read
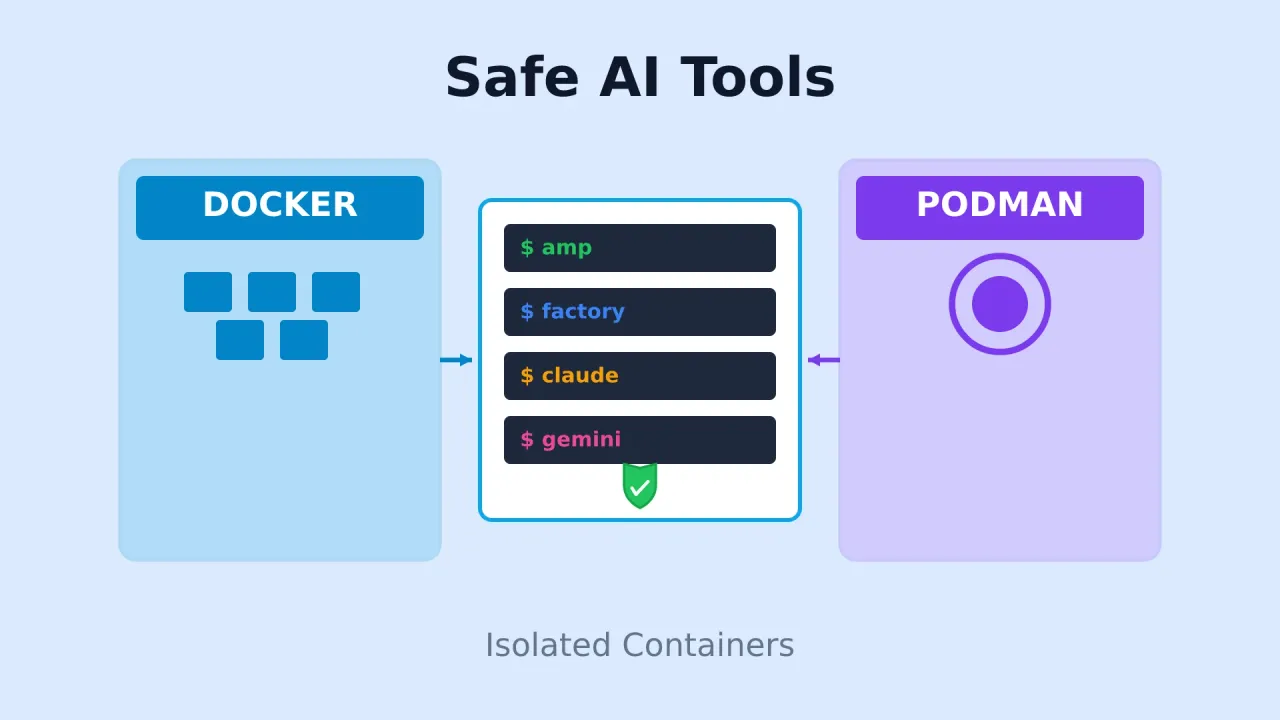
AI coding agents can write files, run shell commands, and read anything your user account can reach. This guide shows you how to run AI CLI tools in Docker or Podman inside a safe, isolated environment, so a hallucinated rm -rf or a bad dependency install can’t touch your machine. You’ll build one container image that hosts Claude Code, Amp, Factory.ai, Gemini CLI, OpenCode, and GitHub Copilot CLI, each with its own configs, API keys, and project mounts.
Why containerize AI CLI tools?
You install a CLI, it asks for a shell command, it wants to run a build, it decides to npm install -g something. Every one of those steps happens with your user’s permissions on your machine. A container turns that into a disposable sandbox: the agent gets a shell, you get to delete the whole thing with docker compose down when you’re done.
The honest version of the pitch: a container is isolation, not a virtual machine. It shares your kernel. If you mount your SSH keys or the Docker socket into it, you’ve handed the agent your host anyway. Everything in this guide is built around not doing that.
If you want the same idea but with the agent living on a server instead of your laptop, our NanoClaw deploy guide covers a container-isolated Claude agent on a VPS.
Why run AI CLI tools in Docker or Podman? (isolation and sandboxing)
The one thing that actually breaks you
Do not bind mount $HOME or $HOME/.ssh into the agent container. Nor ~/.aws, ~/.config/gcloud, or /var/run/docker.sock. An agent with your SSH private key and the Docker socket is an agent with root on your host and the ability to reach every server you can reach. Mount the project folder only.
Sandboxing AI coding agents with containers buys you six things:
- Isolation: the agent’s shell commands run against a container filesystem, not your dotfiles
- Reproducibility: you and a teammate run byte-identical tool versions
- Safety: try an experimental agent without it rewriting your global
~/.zshrc - Multiple configs: separate containers for “work API key” and “personal API key”
- Clean rollback:
docker compose downand the mess is gone - Version pinning: pin Node and Python per project instead of fighting nvm and pyenv
What containers do not give you:
- Kernel isolation. A container escape is a host compromise. If you need a real security boundary, use a VM (this is the same reason we run untrusted code in VMs, not containers).
- Protection from mounted data. The agent can delete anything inside the directories you mount. Mount a project directory, not a directory of projects you can’t afford to lose.
- Protection from the network. The container has outbound internet unless you configure otherwise. An agent can still exfiltrate whatever it can read.
Prerequisites: Docker Desktop or Podman Desktop
Pick one container engine. Docker if you already know it, Podman if you’re on Fedora or you want rootless by default. Everything else in this guide works the same way.
Docker
Docker Desktop (Mac/Windows) or Docker Engine (Linux):
- macOS: Docker Desktop for Mac
- Windows: Docker Desktop for Windows
- Linux: Docker Engine
Docker Engine 29 (November 2025) made the containerd image store the default on fresh installs. Docker Desktop is free for personal use; the paid tiers kick in for larger companies.
Verify:
docker --version
docker compose versionDocker version 29.7.2, build ...
Docker Compose version v2.x.xPodman
Podman Desktop on Mac/Windows, native packages on Linux. Podman 6.0 (2026) removed slirp4netns, CNI, iptables, and cgroups v1 support. Rootful still works fine — what changed is that rootless networking now has exactly one option, pasta (several Gbps instead of the old ~570 Mbps slirp4netns crawl).
# Fedora/RHEL/CentOS
sudo dnf install podman podman-compose

# Ubuntu/Debian
sudo apt install podman podman-compose

# macOS (via Homebrew)
brew install podman podman-compose
On macOS and Windows, initialize the Podman machine:
podman machine init
podman machine start
Verify:
podman --version
podman compose version
podman info --format '{{.Host.Security.Rootless}}'
The last command should print true on a normal Linux install.
Versions in this guide
Verified September 2026: Docker Engine 29.7.2, Podman 6.1.0, base image nikolaik/python-nodejs:python3.14-nodejs26-bookworm (Node 26.8.2, Python 3.14.7). CLI installers change often - if a URL 404s, check the tool’s current docs rather than assuming the command is wrong.
Container architecture overview: the Python and Node base image
One image, both runtimes. Almost every AI CLI tool is a Node package or a shell script that also wants Python for tooling, and rebuilding that stack per tool is wasted time.
We use nikolaik/python-nodejs, which ships:
- Node.js 26.8.2 with npm, plus Corepack for yarn and pnpm
- Python 3.14.7 with pip, pipenv, poetry, and uv
- A non-root user
pnwith UID 1000 and GID 1000 - Starship prompt for a readable shell inside the container
- Auto-seeding of dotfiles on first start, so a bind-mounted empty home still works
Why Node 26 instead of Node 25? Node 25 was an odd-numbered, non-LTS line and it reached end of life in mid-2026. If you built this container from a 2025 guide, your base image is on an EOL runtime with no security patches. That’s the whole reason to rebuild.
The UID 1000 detail matters more than it sounds. Because pn is UID 1000, files it creates inside a bind-mounted ~/websites land owned by UID 1000 on your host, which is your normal Linux user in most distros. If your host user is not 1000, read the permission section in troubleshooting.
Step 1: create the project structure
Running the container without root
Everything below is done as your normal user, including on Podman rootless, where no sudo is involved at any point in the workflow. That’s the reason the docker group and “just run it as root” shortcuts are absent here.
Docker
mkdir -p ~/docker-ai-tools ~/dev-home ~/websites
cd ~/docker-ai-tools
Podman
mkdir -p ~/podman-ai-tools ~/dev-home ~/websites
cd ~/podman-ai-tools
What each directory is for:
~/docker-ai-toolsor~/podman-ai-tools: the container config files (Dockerfile, compose file,.env)~/dev-home: the container user’s home directory, bind mounted. Holds CLI configs, auth state, and installed tools. Survives container rebuilds.~/websites: your actual projects, bind mounted into the container. This is the only thing the agent should be able to touch.
Don't chmod 777 these directories
A lot of older container guides tell you to run chmod 777 on the mount points to fix permission errors. Don’t. It makes every file in your project directory world-writable for anyone on the machine.
The container user is UID 1000 / GID 1000, so on Linux just match ownership:
sudo chown -R 1000:1000 ~/dev-home ~/websitesIf your host user isn’t UID 1000, use $(id -u):$(id -g) instead of the literal numbers and read the troubleshooting section - you’ll hit UID mismatch in the other direction.
On macOS and Windows, Docker Desktop and Podman Desktop handle the mapping for you. No chmod, no chown.
Step 2: create the Containerfile/Dockerfile
Change from the 2025 version
The base image tag moved from python3.14-nodejs25-bookworm to python3.14-nodejs26-bookworm. Node 25 is end of life. If you copy only one thing from this update, copy the FROM line.
Docker
Create ~/docker-ai-tools/Dockerfile:
# Dockerfile
# Base image with Node.js 26, Python 3.14, and package managers
FROM nikolaik/python-nodejs:python3.14-nodejs26-bookworm

SHELL ["/bin/bash", "-c"]

# The image already has a non-root user "pn" (UID 1000)
USER root

# Install system dependencies first
RUN apt-get update && apt-get install -y --no-install-recommends \
    git \
    jq \
    curl \
    vim \
    nano \
    htop \
    tree \
    ripgrep \
    rsync \
    build-essential \
    && rm -rf /var/lib/apt/lists/*

# Install Starship prompt system-wide
# This works even when /home/pn is bind-mounted from the host
RUN curl -sS https://starship.rs/install.sh | sh -s -- -y \
 && mkdir -p /opt/skeleton/.config \
 && starship preset catppuccin-powerline -o /opt/skeleton/.config/starship.toml

# Minimal Bash configuration with Starship
RUN cat > /opt/skeleton/.bashrc <<'BRC'
# Bash initialized for pn user
# Enable Node Corepack and Yarn
corepack enable >/dev/null 2>&1 || true
corepack prepare yarn@stable --activate >/dev/null 2>&1 || true

# Quality of life alias
alias python=python3

# Initialize Starship prompt
if command -v starship >/dev/null 2>&1; then
  eval "$(starship init bash)"
fi
BRC

# Entrypoint script to seed dotfiles on first run
RUN cat > /usr/local/bin/boot.sh <<'SH'
#!/usr/bin/env bash
set -euo pipefail

# Seed ~/.bashrc if missing (e.g. empty bind-mounted /home/pn)
if [ ! -f "/home/pn/.bashrc" ]; then
  cp /opt/skeleton/.bashrc /home/pn/.bashrc
fi

# Seed Starship config if missing
mkdir -p /home/pn/.config
if [ ! -f "/home/pn/.config/starship.toml" ]; then
  cp /opt/skeleton/.config/starship.toml /home/pn/.config/starship.toml
fi

# Default to interactive bash if no command was provided
if [ $# -eq 0 ]; then
  set -- bash
fi
exec "$@"
SH
RUN chmod +x /usr/local/bin/boot.sh

# Switch back to the non-root user
USER pn
WORKDIR /home/pn/app

ENTRYPOINT ["/usr/local/bin/boot.sh"]
CMD ["bash"]
Podman
Create ~/podman-ai-tools/Containerfile. The contents are identical to the Dockerfile above - Podman reads Dockerfiles fine, it just uses the Containerfile name by convention.
# Containerfile
# Base image with Node.js 26, Python 3.14, and package managers
FROM nikolaik/python-nodejs:python3.14-nodejs26-bookworm

SHELL ["/bin/bash", "-c"]

# The image already has a non-root user "pn" (UID 1000)
USER root

# Install system dependencies first
RUN apt-get update && apt-get install -y --no-install-recommends \
    git \
    jq \
    curl \
    vim \
    nano \
    htop \
    tree \
    ripgrep \
    rsync \
    build-essential \
    && rm -rf /var/lib/apt/lists/*

# Install Starship prompt system-wide
# This works even when /home/pn is bind-mounted from the host
RUN curl -sS https://starship.rs/install.sh | sh -s -- -y \
 && mkdir -p /opt/skeleton/.config \
 && starship preset catppuccin-powerline -o /opt/skeleton/.config/starship.toml

# Minimal Bash configuration with Starship
RUN cat > /opt/skeleton/.bashrc <<'BRC'
# Bash initialized for pn user
# Enable Node Corepack and Yarn
corepack enable >/dev/null 2>&1 || true
corepack prepare yarn@stable --activate >/dev/null 2>&1 || true

# Quality of life alias
alias python=python3

# Initialize Starship prompt
if command -v starship >/dev/null 2>&1; then
  eval "$(starship init bash)"
fi
BRC

# Entrypoint script to seed dotfiles on first run
RUN cat > /usr/local/bin/boot.sh <<'SH'
#!/usr/bin/env bash
set -euo pipefail

# Seed ~/.bashrc if missing (e.g. empty bind-mounted /home/pn)
if [ ! -f "/home/pn/.bashrc" ]; then
  cp /opt/skeleton/.bashrc /home/pn/.bashrc
fi

# Seed Starship config if missing
mkdir -p /home/pn/.config
if [ ! -f "/home/pn/.config/starship.toml" ]; then
  cp /opt/skeleton/.config/starship.toml /home/pn/.config/starship.toml
fi

# Default to interactive bash if no command was provided
if [ $# -eq 0 ]; then
  set -- bash
fi
exec "$@"
SH
RUN chmod +x /usr/local/bin/boot.sh

# Switch back to the non-root user
USER pn
WORKDIR /home/pn/app

ENTRYPOINT ["/usr/local/bin/boot.sh"]
CMD ["bash"]
Running as a non-root user with USER pn
The USER pn line at the end is the security-relevant one. Everything installed at runtime, every file the agent creates, and every process the agent spawns runs as UID 1000 inside the container, not as root. The install steps still use USER root temporarily because you need root to run apt-get, but the final image and the running container are non-root.
That matters for sandboxing because most container escapes rely on root inside the container plus either a kernel bug or a misconfiguration (a mounted socket, a privileged flag, a --cap-add). Running as UID 1000 removes the easy path.
If you want the deeper walkthrough of what non-root users inside containers do and don’t protect you from, we have a separate guide on running a container as a non-root user.
Two exceptions worth knowing:
- Ports below 1024. Non-root can’t bind them inside the container. The dev servers you’d run next to an agent (3000, 4321, 5173, 8080) are all above 1024, so this rarely bites.
- System package installs.
apt-get installneeds root. That’s why the “install a missing command” section below usesdocker exec --user root.
What this Containerfile does
- Starts from
nikolaik/python-nodejs: Node 26.8.2 and Python 3.14.7 already wired up - Installs the boring essentials: git, jq, curl, vim, htop, tree, ripgrep, rsync, build tools
- Installs Starship: a prompt that shows git branch and Node/Python version, so you can tell which container you’re in
- Seeds skeleton configs:
boot.shcopies dotfiles into an empty bind-mounted home on first start - Runs as non-root:
USER pn, UID 1000 / GID 1000 - Keeps your real home out: nothing in this image references
$HOMEon the host
Step 3: create the compose configuration
Docker
Create ~/docker-ai-tools/docker-compose.yml:
services:
  ai-tools:
    build:
      context: .
      dockerfile: Dockerfile
    image: ai-tools:latest
    container_name: ai-tools
    restart: unless-stopped
    tty: true
    stdin_open: true
    environment:
      - TZ=Europe/Bucharest      # Change to your timezone
    env_file:
      - .env                     # API keys - do not commit this file
    volumes:
      - ${HOME}/dev-home:/home/pn
      - ${HOME}/websites:/home/pn/app/websites
    security_opt:
      - no-new-privileges:true
    # Uncomment only if a tool needs an OAuth callback or a local server
    # ports:
    #   - "127.0.0.1:3000:3000"  # bind to localhost, not 0.0.0.0
Podman
Create ~/podman-ai-tools/podman-compose.yml:
services:
  ai-tools:
    build:
      context: .
      dockerfile: Containerfile
    image: ai-tools:latest
    container_name: ai-tools
    restart: unless-stopped
    tty: true
    stdin_open: true
    environment:
      - TZ=Europe/Bucharest      # Change to your timezone
    env_file:
      - .env                     # API keys - do not commit this file
    volumes:
      - ${HOME}/dev-home:/home/pn:z
      - ${HOME}/websites:/home/pn/app/websites:z
    security_opt:
      - no-new-privileges:true
    # Uncomment only if a tool needs an OAuth callback or a local server
    # ports:
    #   - "127.0.0.1:3000:3000"  # bind to localhost, not 0.0.0.0
Volume mounting explained
~/dev-home:/home/pn: user configs, CLI auth state, dotfiles. Persists across rebuilds.~/websites:/home/pn/app/websites: your projects. Edit them from the host, the agent edits them from inside.:z(Podman on Linux): relabels the directory for SELinux. Use:zfor shared directories,:Zfor private ones. Skip it entirely outside Linux or if SELinux isn’t enforcing.- No
:rwneeded: read-write is the default. You only ever write:roto take write access away.
Validate the file before you build. Compose silently ignores typos in some fields:
docker compose config
# or: podman compose config
If the merged YAML prints and the ai-tools service has both volumes, you’re good. If a volume is missing from the output, you have an indentation problem.
When to expose ports for OAuth callbacks
Most AI CLI tools authenticate either with an API key in an environment variable or with a device-code flow (print a URL, paste a code). Neither needs a port.
Add a port only when a tool opens a local HTTP listener for an OAuth redirect on localhost:
- A CLI tool requires OAuth authentication via a
localhostcallback - You’re running a local dev server inside the container that you want to open in your host browser
- A tool ships a browser-based UI for login or configuration
Bind the published port to 127.0.0.1, not to all interfaces. "3000:3000" publishes on every interface the host has, which on a VPS means the internet. "127.0.0.1:3000:3000" doesn’t.
Step 4: build and start the container
Docker
cd ~/docker-ai-tools

# Build the image
docker compose build

# Start the container detached
docker compose up -d

# Enter the container
docker exec -it ai-tools bash
To stop it:
docker compose downPodman
cd ~/podman-ai-tools

# Ensure the Podman machine is running (macOS/Windows only)
podman machine start

# Build the image
podman compose build

# Start the container detached
podman compose up -d

# Enter the container
podman exec -it ai-tools bash
To stop it:
podman compose downVerify it’s actually running:
docker compose psNAME IMAGE COMMAND SERVICE STATUS
ai-tools ai-tools:latest "/usr/local/bin/boot.…" ai-tools Up 12 secondsUp is what you want. Restarting in a loop means the entrypoint is crashing - see troubleshooting.
The first build takes a few minutes (it downloads a ~580 MB base image). Subsequent builds are cached. Use --no-cache only when you actually changed the base image; it throws away every layer and re-downloads everything.
Step 5: verify the container environment
Inside the container, check that the versions are what the tag promised:
# You should not be root
whoami
id -u
# Expected: pn
# Expected: 1000

# Node and package managers
node -v            # v26.8.2
npm -v             # 11.x
yarn -v            # 4.x (via Corepack)

# Python and package managers
python3 -V         # Python 3.14.7
pip --version      # 25.x
poetry --version
uv --version

# Shell tooling
which starship
# Expected: /usr/local/bin/starship

# Mounts
ls -la ~/app/websites
touch ~/app/websites/.mount-test && ls -la ~/app/websites/.mount-test
That touch is the test that matters. If it fails, the mount is wrong and you’d only find out later, when the agent writes a file into a container-local directory that vanishes on the next docker compose down.
Verify from the host too
ls -la ~/websites/.mount-testIf the file exists on your host, the bind mount works in both directions. Delete it and move on:
rm ~/websites/.mount-testStep 6: install AI CLI tools (Claude Code, Amp, Gemini CLI, OpenCode)
Not sure which agent to pick? We compared the best AI coding tools and agents in 2026. Install more than one - they’re 10-100 MB each and there’s no downside to having Claude Code, Amp, and OpenCode side by side.
From here on, everything runs inside the container, so the commands are identical for Docker and Podman. Enter once:
docker exec -it ai-tools bash # or: podman exec -it ai-tools bashIf an installer needs root
A few installers write to /usr/local/bin and fail as pn. Exit and re-enter as root, run just that install, then come back:
# Docker
docker exec -it --user root ai-tools bash
# Podman
podman exec -it --user root ai-tools bash
Install the tool, then exit and re-enter as the normal pn user. Tools installed as root in /usr/local/bin stay on PATH for pn, since read and execute are world-permitted there. Anything installed into root’s home is lost to you - so prefer the installer scripts and sudo npm install -g style paths over manual downloads.
Install Claude Code in the container
The native installer is the one to use. It doesn’t care about your Node version and it self-updates.
# Native installer (recommended)
curl -fsSL https://claude.ai/install.sh | bash

# Verify
claude --version
If your base image Node setup fights the native binary, the npm route still works:
npm install -g @anthropic-ai/claude-code
claude --version
Where things land: the native installer puts the binary in ~/.local/bin by default, so it survives a container rebuild only because ~/.local lives inside the bind-mounted /home/pn. That’s the reason the home mount exists.
Install Amp and Factory.ai
# Amp
curl -fsSL https://ampcode.com/install.sh | bash

# Factory.ai CLI
curl -fsSL https://app.factory.ai/cli | sh

# Verify
amp --version
droid --version
Amp dropped a free tier during 2025, so check current pricing before you build a workflow around it. Background on how it works in the editor: Amp Code AI coding agent.
Factory’s Droid CLI is the other one worth installing here, especially if you want to point it at your own model endpoints instead of a bundled subscription:
Factory Droid CLIYou can configure Factory to hit your own providers (including a local Ollama) - the config file example is further down.
Install Gemini CLI, OpenCode and GitHub Copilot CLI
# Gemini CLI
npm install -g @google/gemini-cli

# GitHub Copilot CLI (needs a Copilot subscription)
npm install -g @github/copilot

# OpenCode
curl -fsSL https://opencode.ai/install | bash

# Verify all three
gemini --version
copilot --version
opencode --version
Two notes from the 2025 version of this guide:
- GitHub Copilot CLI moved packages. The old
@githubnext/github-copilot-clibeta package is dead. The current one is@github/copilot. If you get a deprecation warning, you’re on the old package. - OpenCode installs to
~/.opencode/binin recent versions, not/usr/local/bin. Ifopencode: command not foundafter a clean install, add~/.opencode/binto yourPATHin the seeded.bashrc.
Want to skip managing six API keys? The OpenCode Go subscription bundles a pile of models behind one key, which is the cheapest way to run a containerized agent without a wallet full of tokens:
OpenCode GoFull setup, including Zen sign-in and provider config: OpenCode setup guide. For Copilot specifics (models, plan limits, the $10 tier), see our GitHub Copilot Pro CLI setup.
And if you’d rather route Claude Code, Codex, and Gemini CLI through a single endpoint with one key and per-model billing, that’s what an aggregator is for:
Agent RouterAuthenticate with CLI tools (OAuth and API keys)
# Device-code or browser flows
claude          # then /login inside the session
amp login
droid           # then /login inside the session
opencode auth login
copilot         # then /login
gemini          # follow the auth prompt
OAuth inside a container
Browser-based OAuth fails when the tool expects a localhost callback and the port isn’t reachable from your host browser. Three fixes, in order of preference:
- Prefer the device-code flow (prints a URL and a code) - it needs no port at all.
- Copy the URL out of the terminal and paste it into your host browser. Most tools accept this.
- Publish the callback port to
127.0.0.1in the compose file, thendocker compose up -dto recreate the container.
If the tool insists on a port, bind it to loopback:
ports:
  - "127.0.0.1:3000:3000"
Auth state lives in ~/dev-home, so you authenticate once per token lifetime and keep it across rebuilds. If you wipe ~/dev-home, you’ll log in again to everything.
Working with projects
~/websites on your host is /home/pn/app/websites inside the container. That means:
- You edit files on the host with Zed, VS Code, Cursor, or vim
- The agent edits the same files inside the container
- Changes appear on both sides immediately (bind mounts are live, not synced copies)
- Git works from either side against the same
.gitdirectory
Example workflow: host edits, container runs
# On the host
cd ~/websites
mkdir my-new-project && cd my-new-project
git init

# Inside the container
cd ~/app/websites/my-new-project
amp "Create a Next.js app with TypeScript"
One footgun: don’t run the same package manager on both sides of the mount. If the host runs npm install and the container runs pnpm install in the same directory, they fight over node_modules. Pick one side to be authoritative - inside the container is the sane choice, since the runtime versions are pinned there.
Configuring AI tools inside the container
Configs persist because ~/dev-home maps to /home/pn. Edit them from either side; a nano session inside the container and code ~/dev-home/... on the host are touching the same file.
Example: Factory.ai custom models
# Inside the container
nano ~/.factory/config.json{
"custom_models": [
{
"model_display_name": "Claude Sonnet 4.5",
"model": "claude-sonnet-4-5-20250929",
"base_url": "https://api.anthropic.com",
"api_key": "your-api-key-here",
"provider": "anthropic",
"max_tokens": 8192
},
{
"model_display_name": "GPT-5 Codex",
"model": "gpt-5-codex",
"base_url": "https://api.openai.com/v1",
"api_key": "your-openai-key-here",
"provider": "openai",
"max_tokens": 8192
},
{
"model_display_name": "Qwen 3 (Local Ollama)",
"model": "qwen3:14b",
"base_url": "http://ollama:11434/v1",
"api_key": "ollama",
"provider": "generic-chat-completion-api",
"max_tokens": 4096
}
]
}Note the base_url for Ollama: http://ollama:11434/v1, not http://localhost:11434/v1. Inside a container, localhost is the container itself. If you run Ollama as a separate compose service (recommended, see below), the service name is the hostname.
Factory.ai provider types explained
Three provider types:
-
anthropic: Claude models via Anthropic’s API- Base URL:
https://api.anthropic.com - Uses the Messages API (
v1/messages)
- Base URL:
-
openai: GPT models via OpenAI’s API- Base URL:
https://api.openai.com/v1 - Uses the Responses API (required for GPT-5)
- Base URL:
-
generic-chat-completion-api: everything OpenAI-compatible- Works with OpenRouter, Fireworks, Together AI, Ollama, vLLM, and most aggregators
- Uses the OpenAI Chat Completions format
If a model 404s, the usual cause is picking the wrong provider type for that endpoint’s API shape, not a bad key.
Accessing host files from the container
# Inside the container
ls -la ~/.factory/     # Factory.ai configs
ls -la ~/.amp/         # Amp configs
ls -la ~/.config/      # everything else
cat ~/.bashrc          # shell config
Edit the same files from the host:
# On the host
code ~/dev-home/.factory/config.json
code ~/dev-home/.bashrc
code ~/dev-home/.config/starship.toml
Changes take effect on the next shell inside the container (or immediately, for config files tools re-read per request).
The 0600 file problem
Config files you create on the host as your user are readable by UID 1000 inside the container, since that’s the same UID in the common case. If your host UID is not 1000, a file with mode 0600 owned by e.g. UID 1002 will be unreadable by pn. Fix the ownership when you hit it:
sudo chown 1000:1000 ~/dev-home/.factory/config.jsonDon’t fix it with chmod 666. API keys don’t belong in world-readable files.
Advanced configuration
Running local AI models with Ollama
The 2025 version of this guide told you to install Ollama inside the agent container. Don’t. It bloats the agent image, and the model weights end up in a volume that gets wiped when you rebuild. Run Ollama as its own service and let the agent talk to it over the compose network.
Add a second service to your compose file:
services:
  ai-tools:
    # ... your existing config ...
    environment:
      - TZ=Europe/Bucharest
      - OLLAMA_HOST=http://ollama:11434
    depends_on:
      - ollama

  ollama:
    image: ollama/ollama:latest
    container_name: ollama
    restart: unless-stopped
    volumes:
      - ${HOME}/ollama:/root/.ollama
    # Only publish this if you want to reach it from the host too.
    # Don't publish it on a VPS.
    # ports:
    #   - "127.0.0.1:11434:11434"
Then pull a model and point a tool at it:
docker compose up -d
docker exec -it ollama ollama pull qwen3:14b
docker exec -it ollama ollama list

# From inside ai-tools, confirm the name resolves
docker exec -it ai-tools curl -s http://ollama:11434/api/tags | jq '.models[].name'
RAM math before you start
A 14B model at Q4 needs roughly 9-10 GB of RAM to load and run. A 7B model needs about 5 GB. On a 4 GB VPS this will OOM and take the container down with it. Set a memory limit on the Ollama service so it can’t drag the whole host under:
    deploy:
      resources:
        limits:
          memory: 12g
If you want the full Ollama stack with a web UI, our self-hosting Ollama with Docker Compose guide covers Open WebUI, model management, and the GPU setup.
Multiple container configurations
Separate containers per context keeps API keys and contexts from bleeding together:
~/docker-ai-tools-personal/
  ├── docker-compose.yml     # container_name: ai-tools-personal
  ├── Dockerfile
  └── .env                   # personal keys

~/docker-ai-tools-work/
  ├── docker-compose.yml     # container_name: ai-tools-work
  ├── Dockerfile
  └── .env                   # work keys, separate ~/websites mount
Change container_name and the mount paths in each file. Two containers with the same container_name will refuse to start - Compose errors with a name conflict, which is at least a clear failure.
Sharing containers with teams
cd ~/docker-ai-tools
git init
Create a .gitignore before the first commit:
cat > .gitignore <<'EOF'
.env
dev-home/
websites/
EOF

git add Dockerfile docker-compose.yml .gitignore
git commit -m "Add AI tools container config"
Never commit the .env file
The .env file holds live API keys. If you committed one by accident, rotating the keys is the fix - removing the file from a later commit doesn’t remove it from history. Add .env to .gitignore before the first commit, not after.
A teammate then runs:
git clone <your-repo>
cd <your-repo>
cp .env.example .env    # fill in their own keys
mkdir -p ~/dev-home ~/websites
docker compose up -d
docker exec -it ai-tools bash
Same Node, same Python, same installed tools. That’s the reproducible dev environment part of this, and it’s why committing the Dockerfile is worth the five minutes.
IDE integration
The container is where tools execute. Your editor stays on the host, where your font rendering, extensions, and keybindings already live.
VS Code Dev Containers for AI agents
Dev Containers let VS Code run its server inside the same container the agent uses, so the integrated terminal, the tasks, and the agent all see identical runtimes. Create ~/docker-ai-tools/.devcontainer/devcontainer.json:
{
  "name": "ai-tools",
  "dockerComposeFile": ["../docker-compose.yml"],
  "service": "ai-tools",
  "workspaceFolder": "/home/pn/app/websites",
  "remoteUser": "pn",
  "shutdownAction": "stopCompose",
  "customizations": {
    "vscode": {
      "extensions": ["esbenp.prettier-vscode", "dbaeumer.vscode-eslint"]
    }
  }
}
Steps:
- Install the Dev Containers extension (the old “Remote - Containers” name is gone).
- Open the
~/docker-ai-toolsfolder in VS Code. - Run Dev Containers: Reopen in Container.
If VS Code complains that the container already exists, you have it running from docker compose up -d. Run docker compose down first - Dev Containers wants to own the lifecycle.
For a terminal-based alternative on macOS aimed at agent workflows, see our cmux terminal for AI coding agents guide. And if you’d rather have the AI in the editor itself than in a container shell:
WindsurfDirect file editing from the host
The simpler option, and the one most people end up using:
# On the host
code ~/websites/my-project

# In the container, the agent sees the changes immediately
cd ~/app/websites/my-project
amp "Refactor this component"
Bind mounts don’t sync - they are the same inode. There is no “waiting for sync” step, and no chance of a stale copy on one side.
Troubleshooting
Permission denied on ~/dev-home or ~/websites
On Linux, the fix is almost always UID mismatch. Check both sides:
# On the host
id -u
ls -lan ~/websites | head -3

# In the container
docker exec -it ai-tools id
The container user pn is UID 1000. If your host user is also 1000, just fix ownership once:
sudo chown -R 1000:1000 ~/dev-home ~/websitesIf your host UID is different, either chown the mount to 1000 as above, or change the user: in the compose file to your host UID and set HOME:
    user: "1002:1002"
    environment:
      - HOME=/home/pn
On Linux with SELinux, add the label to the volume (Podman needs this more often than Docker):
chcon -Rt container_file_t ~/dev-home ~/websitesOr use :z / :Z in the compose volume list instead of relabeling manually.
On macOS and Windows, this is nearly always a path problem, not a permission problem. Confirm the directories exist on the host and that you didn’t use ~ inside the compose file - ~/websites in YAML is not expanded by Compose, which is why the examples use ${HOME}/websites.
Container won't start or keeps restarting
Check the logs first, always:
Docker
docker compose logs --tail 50
docker logs ai-tools
Podman
podman compose logs --tail 50
podman logs ai-tools
Common causes:
- Port already in use:
Error starting userland proxy: listen tcp4 0.0.0.0:3000: bind: address already in use. Find the owner withss -ltnp | grep 3000and either stop it or change the published port. - Image pull failed: usually a typo in the base image tag, or no network. Confirm the tag exists on the python-nodejs tags page.
- Volume mount failed: the host path doesn’t exist. Compose creates missing directories when the source is a relative path, but a
${HOME}/...path that doesn’t exist can produce a confusing error.mkdir -p ~/dev-home ~/websitesand retry. - Status
Exited (0): the entrypoint ran and bash exited because there’s no TTY. Make suretty: trueandstdin_open: trueare both in the compose file.
AI tool authentication fails
- Try the device-code flow before touching ports. It’s the least fragile option.
- Copy the auth URL into the host browser and complete it there.
- Publish the callback port to
127.0.0.1and recreate the container. - Check the clock. OAuth flows reject tokens when the container time drifts.
dateinside the container should match the host; theTZvariable handles the display, not the clock itself.
Example, Factory.ai:
droid
# then /login; if it prints a URL, paste that URL into your host browser
Changes not syncing between host and container
Confirm the mounts actually exist:
Docker
docker inspect ai-tools --format '{{json .Mounts}}' | jq
docker inspect ai-tools --format '{{.HostConfig.Privileged}}'
Podman
podman inspect ai-tools --format '{{json .Mounts}}' | jqExpected shape:
/home/you/dev-home  ->  /home/pn
/home/you/websites  ->  /home/pn/app/websites
If the mount is present but writes go nowhere, check whether the agent was run from a container-local path. /home/pn/app outside /home/pn/app/websites is not mounted - only the subdirectory is. Files the agent writes to /home/pn/app/foo.txt vanish on the next docker compose down.
Privileged must be false. If it’s true, remove privileged: true from the compose file before you do anything else.
The agent deleted something it shouldn't have
If it deleted files inside ~/websites, they’re gone from the host too - bind mounts are not snapshots.
What saves you:
- Git. Commit before you hand an agent a task.
git statusafter,git checkout -- .if it went badly. - A backup that isn’t on the same disk. For
~/dev-home, that’s configs and auth state: annoying to lose, not catastrophic. - Narrow mounts. If you mount one project directory instead of a directory of twelve, the blast radius is one project.
What doesn’t save you: docker compose down. It removes the container, not the files on the bind mount.
Installing missing commands in the container
Base images are minimal on purpose. You’ll hit command not found the first time an agent wants rg, ffmpeg, or a Postgres client:
bash: rg: command not found
bash: psql: command not found
Two ways to fix it.
Option 1: install temporarily (quick fix)
Docker
# Enter as root
docker exec -it --user root ai-tools bash

# Always update the index first, or apt can't find the package
apt-get update
apt-get install -y ripgrep postgresql-client

exit
docker exec -it ai-tools bash
Podman
# Enter as root
podman exec -it --user root ai-tools bash

apt-get update
apt-get install -y ripgrep postgresql-client

exit
podman exec -it ai-tools bash
Temporary means temporary
Packages installed this way live in the container’s writable layer and disappear on the next docker compose down or rebuild. Fine for “I need psql right now”, wrong for anything you’ll need next week.
Forgetting apt-get update first is the most common cause of Unable to locate package. Run it every time - a cached index from a previous layer is often stale.
Option 2: update the Dockerfile and rebuild (permanent)
Add the package to the apt-get install line and rebuild:
RUN apt-get update && apt-get install -y --no-install-recommends \
    git \
    jq \
    curl \
    vim \
    nano \
    htop \
    tree \
    ripgrep \
    rsync \
    postgresql-client \
    ffmpeg \
    build-essential \
    && rm -rf /var/lib/apt/lists/*
Then:
Docker
cd ~/docker-ai-tools
docker compose build
docker compose up -d
docker exec -it ai-tools bash

# Verify
rg --version
psql --version
Podman
cd ~/podman-ai-tools
podman compose build
podman compose up -d
podman exec -it ai-tools bash

# Verify
rg --version
psql --version
What survives a rebuild
- System packages (git, rg, psql, ffmpeg): rebuilt into the image, permanently there
- AI CLI tools: reinstalled - they live in the bind-mounted home, so most survive if the installer put them in
~/.local/binor~/.opencode/bin, but npm globals inside the image do not - Authentication: usually survives in
~/dev-home, re-run the login command if it doesn’t - Configs in
~/dev-home: preserved - Projects in
~/websites: preserved
If an AI tool dies after a rebuild, just re-run its installer. It’s 30 seconds and it’s the reason the install steps are one-liners.
Common packages you might need
git: version control, and most agents write commit messagescurl/wget: HTTP requests and downloadsjq: JSON parsing, useful for API responsesripgrep(rg): fast search - several agents shell out to itvim/nano: in-container editinghtop: see what’s eating memory when a build stallstree: directory overviewrsync: file syncbuild-essential: C/C++ toolchain for native npm modulespostgresql-client:psqlfor database workffmpeg: media handling
Security best practices for sandboxed AI agents
Your container config is a capability set. Everything in this list reduces what the agent can do if it goes wrong.
- Never commit API keys. Use
.env+env_file, or better, a Docker Compose secrets setup - Rotate keys you’ve used inside the container, especially ones that touched a shared container
- Mount only
~/websitesand~/dev-home. Not$HOME, not~/.ssh, not~/.aws - Never mount
/var/run/docker.sock. It’s root on the host - Run as non-root. Already configured with
USER pn(UID 1000) - Keep the base image updated. Rebuild with
--no-cachewhen the base tag moves - Bind published ports to
127.0.0.1. Not0.0.0.0 - Set resource limits. A runaway agent should be slow, not fatal
Read-only mounts and resource limits
Two compose changes that cut the blast radius without breaking anything:
services:
  ai-tools:
    # ... your existing config ...
    security_opt:
      - no-new-privileges:true   # blocks setuid escalation inside the container
    mem_limit: 8g                # kill the process instead of the host
    cpus: 4
    pids_limit: 512              # stops fork bombs from taking down the host
Verify the flags actually applied:
docker inspect ai-tools \
  --format 'mem={{.HostConfig.Memory}} pids={{.HostConfig.PidsLimit}} sec={{.HostConfig.SecurityOpt}}'
Expected: mem=8589934592, pids=512, and [no-new-privileges:true]. If mem=0, the limit didn’t take and the agent can consume all host RAM.
Now the stronger version, for when the agent only needs to read a reference tree:
    volumes:
      - ${HOME}/dev-home:/home/pn
      - ${HOME}/websites:/home/pn/app/websites
      - ${HOME}/reference-docs:/home/pn/reference:ro   # read-only
docker exec -it ai-tools sh -c 'touch /home/pn/reference/x' should fail with Read-only file system. That’s the test.
cap_drop: ALL is not free
Dropping all Linux capabilities (cap_drop: [ALL]) is a real hardening step, and it also breaks apt-get install inside the running container, because root loses CAP_CHOWN, CAP_SETUID, and friends. Pick one:
- Laptop / dev use: skip
cap_drop. You want to install packages on the fly. - Long-lived agent container: add
cap_drop: [ALL]and do every package install by rebuilding the image.
The Docker default capability set is already reduced; cap_drop: ALL is the last 10% of the win and the first 90% of the annoyance.
Environment variables and API keys
Keep keys out of the image and out of git. Compose reads .env automatically for variable substitution, and env_file injects the values into the container:
# docker-compose.yml or podman-compose.yml
services:
  ai-tools:
    env_file:
      - .env
    environment:
      - ANTHROPIC_API_KEY=${ANTHROPIC_API_KEY}
      - OPENAI_API_KEY=${OPENAI_API_KEY}
- GEMINI_API_KEY=${GEMINI_API_KEY}# ~/.env - never commit this
ANTHROPIC_API_KEY=sk-ant-...
OPENAI_API_KEY=sk-...
GEMINI_API_KEY=...env vars are visible to the process
Environment variables are readable from /proc/<pid>/environ inside the container and show up in docker inspect. That’s fine for a single-user container on your laptop. For anything multi-tenant, use file-based secrets instead. For the full picture of what works and what doesn’t:
The other direction matters too: don’t pass your whole host environment into the container. env_file: .env with five named keys is deliberate. docker run -e $(env) is handing the agent your AWS session token.
If you want the mechanics of ARG vs ENV vs Compose substitution, our guide on using ARG and ENV for environment variables in Docker Compose covers the differences and the override order.
Cleaning up
Remove container and images
Docker
# Stop and remove the container
docker compose down

# Remove the built image
docker rmi ai-tools:latest

# Remove dangling images, stopped containers, and unused networks
docker system prune

# Also remove unused volumes - read the warning below first
docker system prune -a --volumes
Podman
podman compose down
podman rmi ai-tools:latest
podman system prune
prune -a --volumes removes named volumes
docker system prune -a --volumes deletes every unused image and volume on the machine, not just this project’s. If another compose project uses a named volume it hasn’t touched in a month, that data is gone. Run docker volume ls first and read the list.
Bind mounts (~/websites) are never touched by prune - they live on the host filesystem, not in Docker’s data directory.
If Docker’s disk usage keeps climbing and prune isn’t enough, the culprit is usually the overlay2 layer store. We covered reclaiming disk space from /var/lib/docker/overlay2 separately.
For a quick reference of the commands you’ll actually type, our essential Docker commands list is worth bookmarking.
Start fresh
docker compose down
docker rmi ai-tools:latest

# Optional: reset configs and auth state
# This deletes every CLI config and login in the container home
rm -rf ~/dev-home/*

# Optional: reset the image cache entirely
docker builder prune -af

# Rebuild
docker compose build --no-cache
docker compose up -d
That rm -rf ~/dev-home/* is the one irreversible step in this whole guide. It wipes your auth tokens and tool configs. ~/websites is untouched.
Docker vs Podman for AI tooling
The honest summary: for this use case the difference is smaller than the internet suggests. Both run this exact compose file, both support the same image, and both give you the isolation you’re here for.
| Docker | Podman | |
|---|---|---|
| Architecture | Client-server (daemon) | Daemonless, per-command fork |
| Default privilege | Daemon runs as root; daemonless rootless mode needs setup | Rootless by default |
| Idle resource use | ~50-100 MB for the daemon | ~0 MB, nothing persistent |
| Compose syntax | docker compose |
podman compose |
| Desktop GUI | Docker Desktop | Podman Desktop |
| SELinux | Basic | Native (:z / :Z) |
| Rootless networking | RootlessKit with slirp4netns by default (pasta supported) | pasta only in 6.x |
| Licensing | Docker Desktop paid for larger companies | Free, CNCF Sandbox project |
| Docker socket risk | Daemon socket exists and is the classic escalation path | No daemon, no socket |
Pick Docker if: your team already runs it, you want the largest ecosystem of examples and CI integrations, or you’re on macOS and want the smoothest Desktop experience.
Pick Podman if: you’re on Fedora/RHEL, you want rootless containers without extra configuration, or you care that there’s no always-on root daemon to target.
For a container that runs an agent with shell access, the “no persistent root process and no Docker socket” argument is the one that actually matters for security. The mechanism is simple: if the agent finds /var/run/docker.sock inside its container, it can start a privileged container and be root on your host in about three commands.
The full breakdown of architecture, licensing, and migration paths is in our Podman vs Docker compared article.
Real-world usage examples
Example 1: Factory.ai with custom models
# Inside the container
cd ~/app/websites/my-app

droid

# In the Droid prompt, pick your model
/model
# Choose "Claude Sonnet 4.5" from custom models

"Add user authentication with Supabase, including sign-up, login, and protected routes"
The value of the custom model config: you can point Factory at a cheap aggregator for routine edits and at a frontier model only when you need it, without changing anything on the host.
Example 2: Amp with project context
cd ~/app/websites/nextjs-blog

cat > AGENTS.md <<'EOF'
# Project: Next.js Blog

## Tech stack
- Next.js 15
- TypeScript
- Tailwind CSS
- MDX for blog posts

## Architecture
- App Router
- Server Components by default
- Client Components only when needed

## Commands
- Dev: npm run dev
- Build: npm run build
- Test: npm test
EOF

amp "Add a comments section using Supabase"
AGENTS.md is the cheapest context win available. It’s a file in the project, so it works for every agent that reads it, and it works identically inside the container.
Example 3: multiple AI tools in sequence
# One agent implements
amp "Create a React component for a product card"

# Another reviews
claude "Review the ProductCard component and suggest performance improvements"

# A third writes tests
droid "Generate unit tests for ProductCard.tsx"
Different models are good at different things, and running them against the same checkout means each one sees the previous one’s work. It’s also a cheap way to sanity-check an agent’s output against a second opinion.
If you want the next step - letting an assistant drive Docker deployments on a server - that’s a different problem with a bigger blast radius, and we wrote about letting an AI assistant deploy Docker apps separately.
Best practices for AI CLI tools in containers
- One container per project or context, not one container for everything
- Commit before you hand over a task. Git is your rollback, not the container
- Mount narrow. A project folder, not a directory of projects
- Add a
.dockerignore/.containerignoresonode_modulesand.gitdon’t get sent to the build context - Pin the base image tag -
python3.14-nodejs26-bookworm, neverlatest - Set memory and pid limits so a runaway agent degrades one service, not the host
- Back up
~/dev-homeif re-authenticating to six tools would annoy you - Rebuild monthly to pick up base image security patches
- Keep
.envout of git and rotate anything that ever leaked
Frequently asked questions
Can I run multiple AI tools simultaneously?
Yes, and it’s the normal way to use this setup. All the CLIs are installed in the same container and share the mounted project:
# Terminal 1
docker exec -it ai-tools bash
cd ~/app/websites/project1
amp "Implement feature X"

# Terminal 2, same container
docker exec -it ai-tools bash
cd ~/app/websites/project2
claude "Review the auth code"
Each exec is an independent session. The one thing to avoid is two agents editing the same file in the same project at the same time - they’ll clobber each other, and that’s a git problem you have to untangle by hand.
Will containers slow down my AI tools?
No measurable slowdown for CLI work, with one exception.
- File I/O on bind mounts is close to native on Linux. On macOS and Windows, Docker Desktop and Podman Desktop route through a VM, and heavy
node_modulesinstalls are noticeably slower there. Keepnode_modulesinside the container filesystem rather than on a bind mount if that hurts. - CPU and memory are shared with the host on Linux - no VM tax.
- Network requests to AI APIs go straight out. Latency is dominated by the model, not the container.
The real performance factor is the model and your network, not the container engine.
Is this as safe as a VM?
No, and anyone who tells you otherwise is selling something.
A container shares the host kernel. Kernel exploits, misconfigured capabilities, and privileged flags are container escape vectors. What this setup gives you is protection against the realistic failure mode: an agent running rm -rf, installing a broken global package, or rewriting your shell config. It’s a very good boundary for accidents and an okay boundary for malicious code.
If you need to run genuinely untrusted code, use a VM (or a microVM). If you need an agent to work on your own projects, a non-root, capability-limited container with narrow mounts is the right cost/benefit point.
How much RAM and disk does this use?
For the agent container on its own: roughly 1-2 GB of RAM at rest with a few CLIs installed, and 3-5 GB of disk for the base image plus node_modules caches. It runs fine on a 2 GB VPS if you’re not also running local models.
Add Ollama and the math changes completely: a 7B model at Q4 is ~5 GB, a 14B model is ~9-10 GB, before you count the KV cache. Don’t run local models on anything under 16 GB of RAM if you want them to be usable.
Do I need to update the container when an AI CLI updates?
No. Rebuilds are for the base OS, Node, and Python versions only.
# Inside the container
claude update
amp update
droid update

# npm-installed tools
npm update -g @google/gemini-cli
npm update -g @github/copilot
Anything installed into ~/dev-home (which is where the native installers put their binaries and where self-updaters write) persists across container restarts. A docker compose down and up won’t lose it.
Can I use this setup in CI/CD?
Yes, and it’s a better fit than a long-lived agent container because the runner is already ephemeral. The pattern: build the image, run the agent with the repo mounted, capture the diff.
# .github/workflows/ai-review.yml
name: AI Code Review
on: [pull_request]

jobs:
  review:
    runs-on: ubuntu-latest
    steps:
      - uses: actions/checkout@v4
      - name: Build AI tools image
        run: docker compose build
      - name: Run AI review
        env:
          ANTHROPIC_API_KEY: ${{ secrets.ANTHROPIC_API_KEY }}
        run: |
          docker compose up -d
          docker exec ai-tools claude -p "Review this PR for code quality and list any bug risks"
Two things to be careful about: don’t give CI agents write credentials to your repo (they should review, not push), and remember that anything the agent produces is untrusted output - treat it as a comment on the PR, not as a gate that can block merges.
What if I need a different Node.js or Python version?
Change the base image tag. Both runtimes come from one image, so you choose a combination:
# Python 3.14 with Node 26 (what this guide uses)
FROM nikolaik/python-nodejs:python3.14-nodejs26-bookworm

# Python 3.13 with Node 26
FROM nikolaik/python-nodejs:python3.13-nodejs26-bookworm

# Slim variant - smaller, no build toolchain
FROM nikolaik/python-nodejs:python3.14-nodejs26-slim
Available combinations are listed on the nikolaik/python-nodejs tags page. Pin the full tag and rebuild; don’t use latest, or your “reproducible” environment stops being reproducible at an arbitrary moment.
That same trick is also convenient: if you have no reason to run Python 3.14 and want a much smaller image, python3.14-nodejs26-slim plus the packages you actually need is several hundred MB smaller.
Where should I run the agent container if I want it on a server?
Any VPS with 2 GB of RAM is enough for the agent container alone. This is the setup people use for “an agent on a server that I can reach from anywhere” - the container runs next to your other services, holds a git checkout, and you attach with docker exec.
A €4-5/month box is plenty for this. Beyond that you’re paying for local model inference, not for the container.
Hetzner CloudVPS prices jumped across the board in 2026 — if you’re rethinking a rented box, see what changed and when a mini PC wins.
Two rules if you go remote: never publish the container’s ports to the internet, and never mount the host’s Docker socket into it. A remote agent container with the Docker socket mounted is a remote root shell for anyone who can prompt it.
Conclusion
Containerizing AI CLI tools gives you a sandbox you can afford to be careless in. Not a security boundary against a determined attacker, but a boundary against the failure mode that actually happens: an agent that runs a command it shouldn’t have.
What you end up with:
- Isolation: agent shell commands run against the container, not your dotfiles
- Persistence: configs and auth state live in
~/dev-home, projects in~/websites - Reproducibility: the same Dockerfile gives you and a teammate identical runtimes
- Rollback:
docker compose downand a rebuild gets you a clean slate - Multiple setups: one container per context, with separate keys and mounts
- A host left alone: your Node, Python, and global npm packages stay untouched
The three things worth doing differently from the 2025 version of this guide: move to python3.14-nodejs26-bookworm for the base image, stop installing Ollama inside the agent container, and don’t bind mount anything you wouldn’t hand over in a shell prompt.
If you’re building out the rest of the stack, the follow-ups that matter most are Podman vs Docker compared if you’re still choosing an engine, OpenCode setup guide or Amp Code AI coding agent for the tool side, and the best AI coding tools and agents in 2026 if you’d rather compare before committing.
Ready to build it?
mkdir -p ~/docker-ai-tools ~/dev-home ~/websites- Drop in the Dockerfile and compose file from steps 2 and 3
docker compose up -d && docker exec -it ai-tools bash- Install the agent you want and authenticate
- Close the lid, walk away, and know the worst case is a rebuild