Zerobyte Restic GUI: Self-Hosted Backup Automation
Deploy Zerobyte, a Restic-powered backup dashboard, with Dokploy or Docker Compose. Create repositories, schedule jobs, and restore data safely.
If you run a VPS, homelab, or any Linux server, backups are the only insurance that matters. Disks fail, updates break, and mistakes happen. Zerobyte gives you the reliability of Restic with a clean web UI, so you can automate backups without living in the terminal.
What is Zerobyte?
Zerobyte is an open-source backup automation platform that wraps the Restic engine with a modern dashboard. It lets you create repositories, schedule jobs, and monitor snapshots from a web interface instead of managing everything by hand.
Why Restic plus Zerobyte works
| Layer | Responsibility | What you get |
|---|---|---|
| Restic | Encryption, deduplication, compression, repo format | Secure and efficient backups |
| Zerobyte | Web UI, scheduling, retention, logs | A usable control plane |
Together they deliver fast, encrypted backups with a workflow you can revisit months later and still understand.
Key features
- Automated backups with retention policies powered by Restic
- End-to-end encryption by default
- Flexible schedules for daily, weekly, or custom jobs
- Multi-backend repositories: local, S3, GCS, Azure, rclone remotes
- Source volumes from local directories, NFS, SMB, or WebDAV
- Clear job logs and snapshot visibility in the UI
Early-stage project
Zerobyte is still in the 0.x series. Expect breaking changes between versions and keep a close eye on release notes.
Zerobyte UI tour
The UI is simple and task-focused. Here is what the main sections look like and how to use them.
Volumes: connect data sources

Volumes define the data you want to back up. Add local directories, NFS, SMB, or WebDAV sources, then reference them when creating backup jobs.
Repositories: choose storage backends
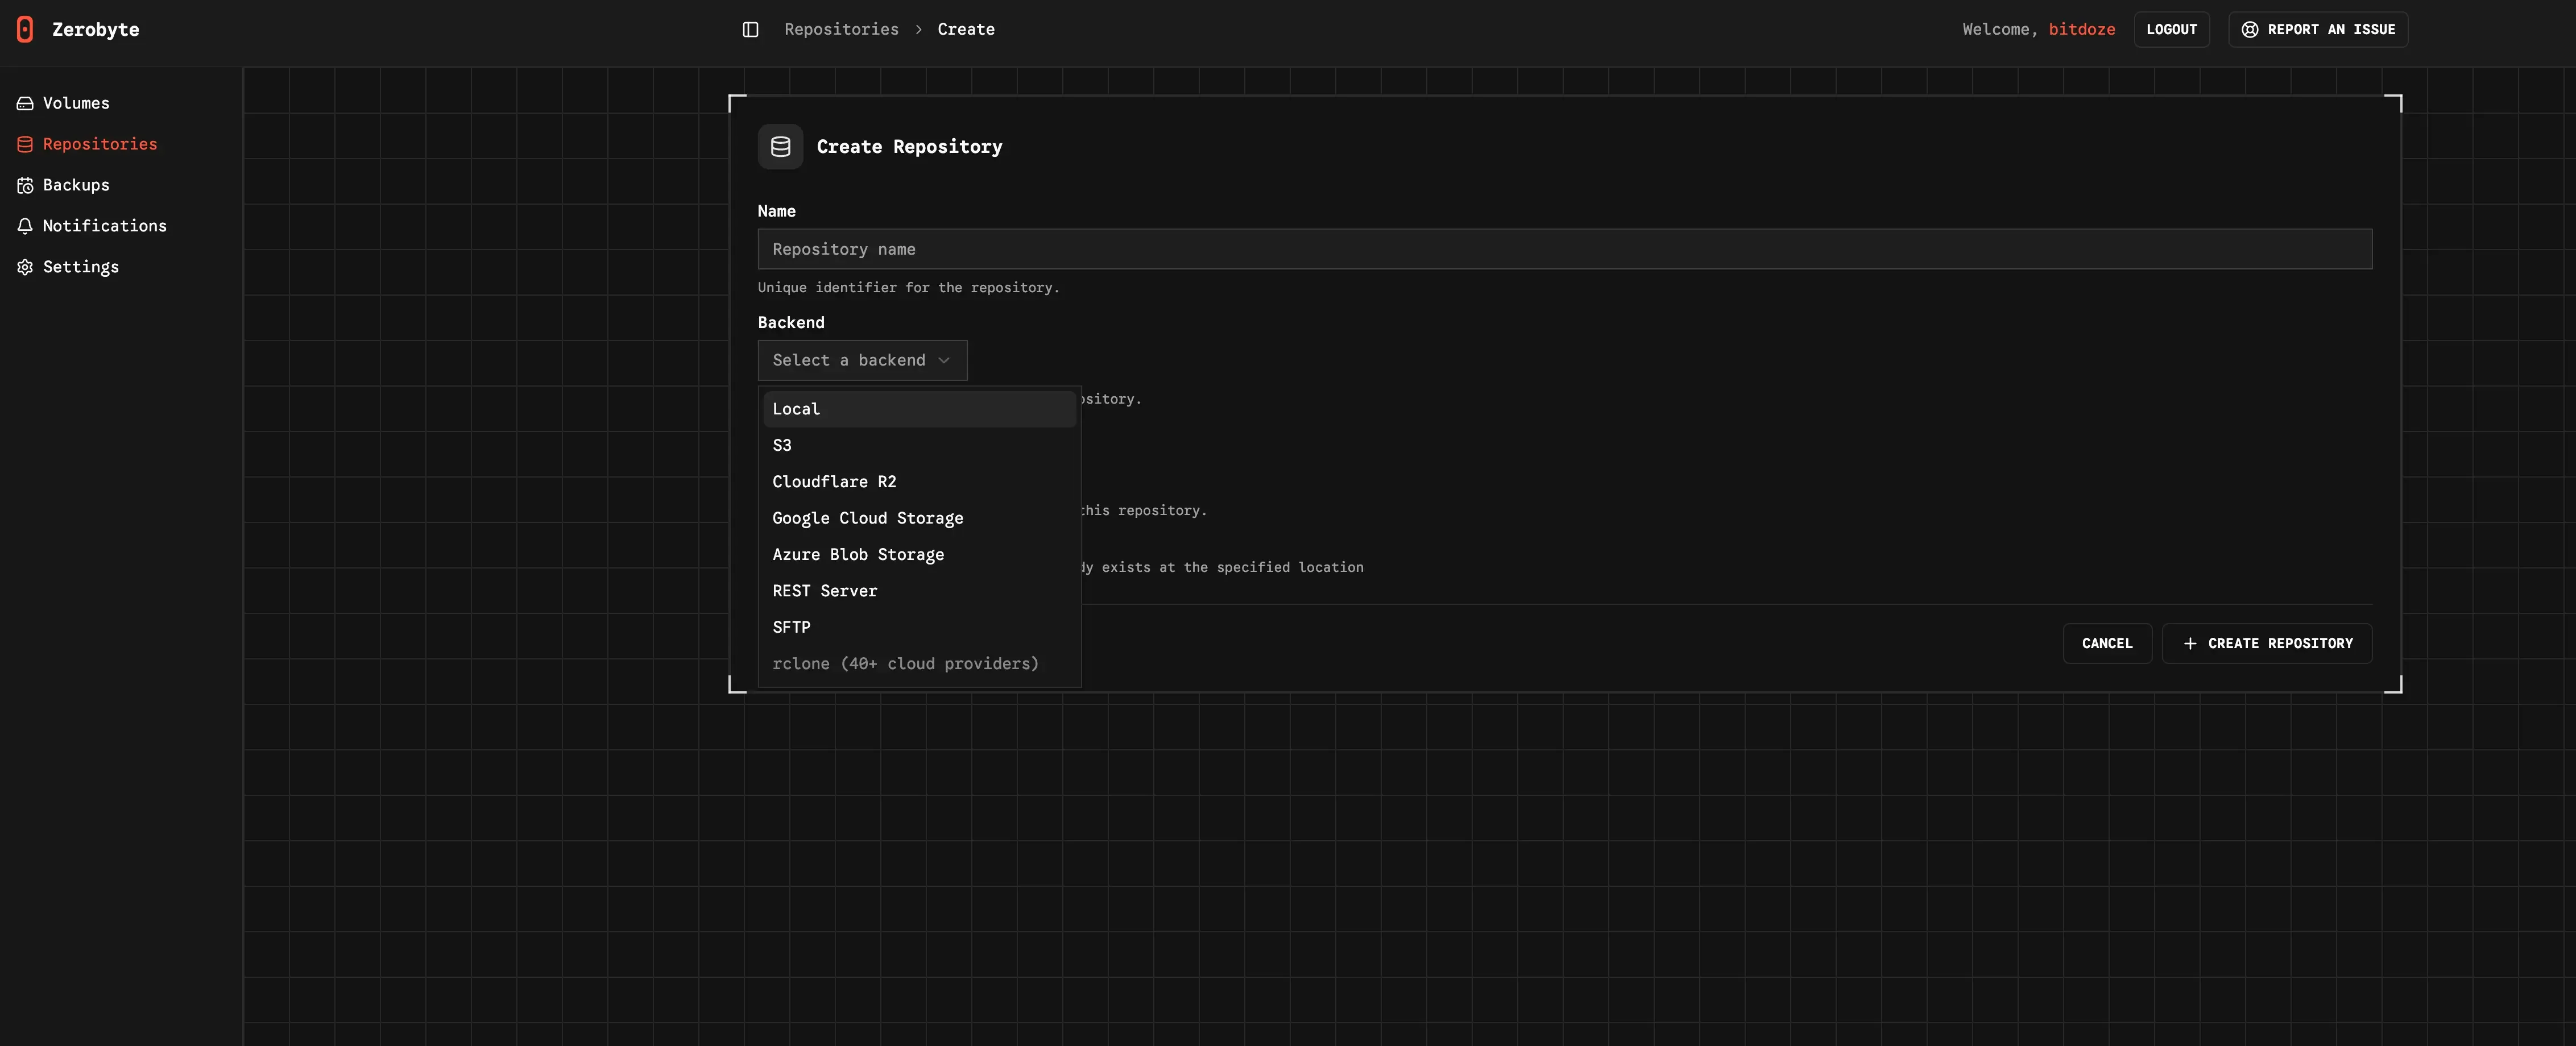
Repositories are the encrypted destinations for your snapshots. Configure local paths, S3-compatible storage, or rclone remotes depending on where you want backups to live.
Backups: monitor jobs and snapshots
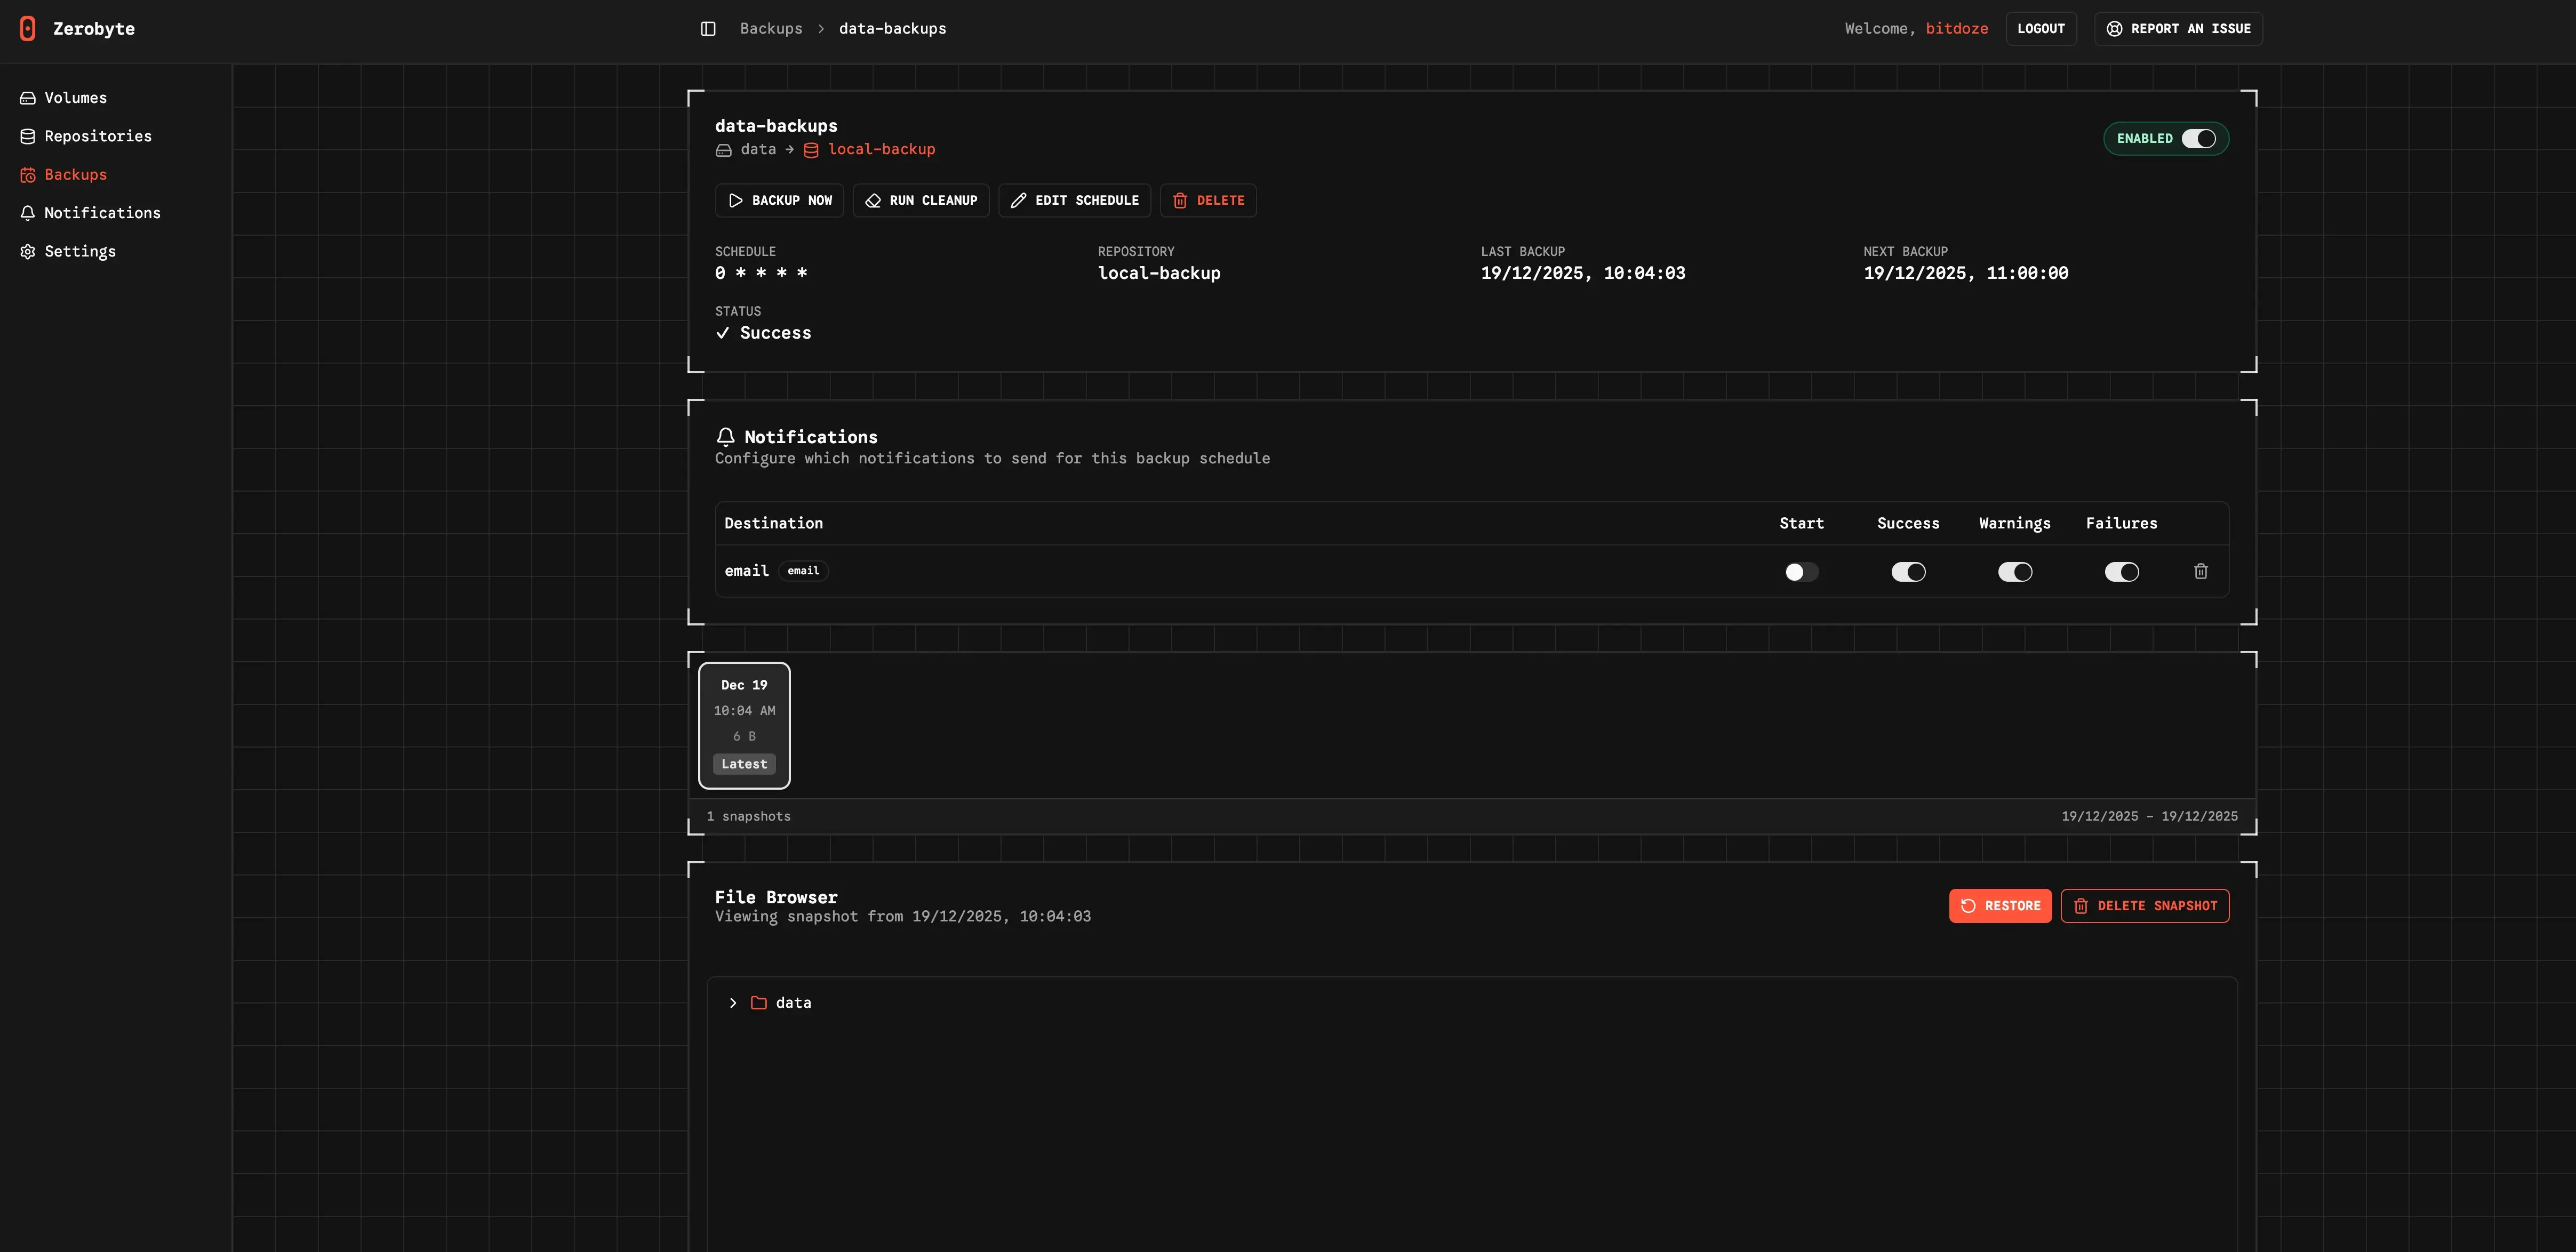
This is your operational view. Track job status, verify recent runs, and confirm snapshots are being created on schedule.
Notifications: avoid silent failures
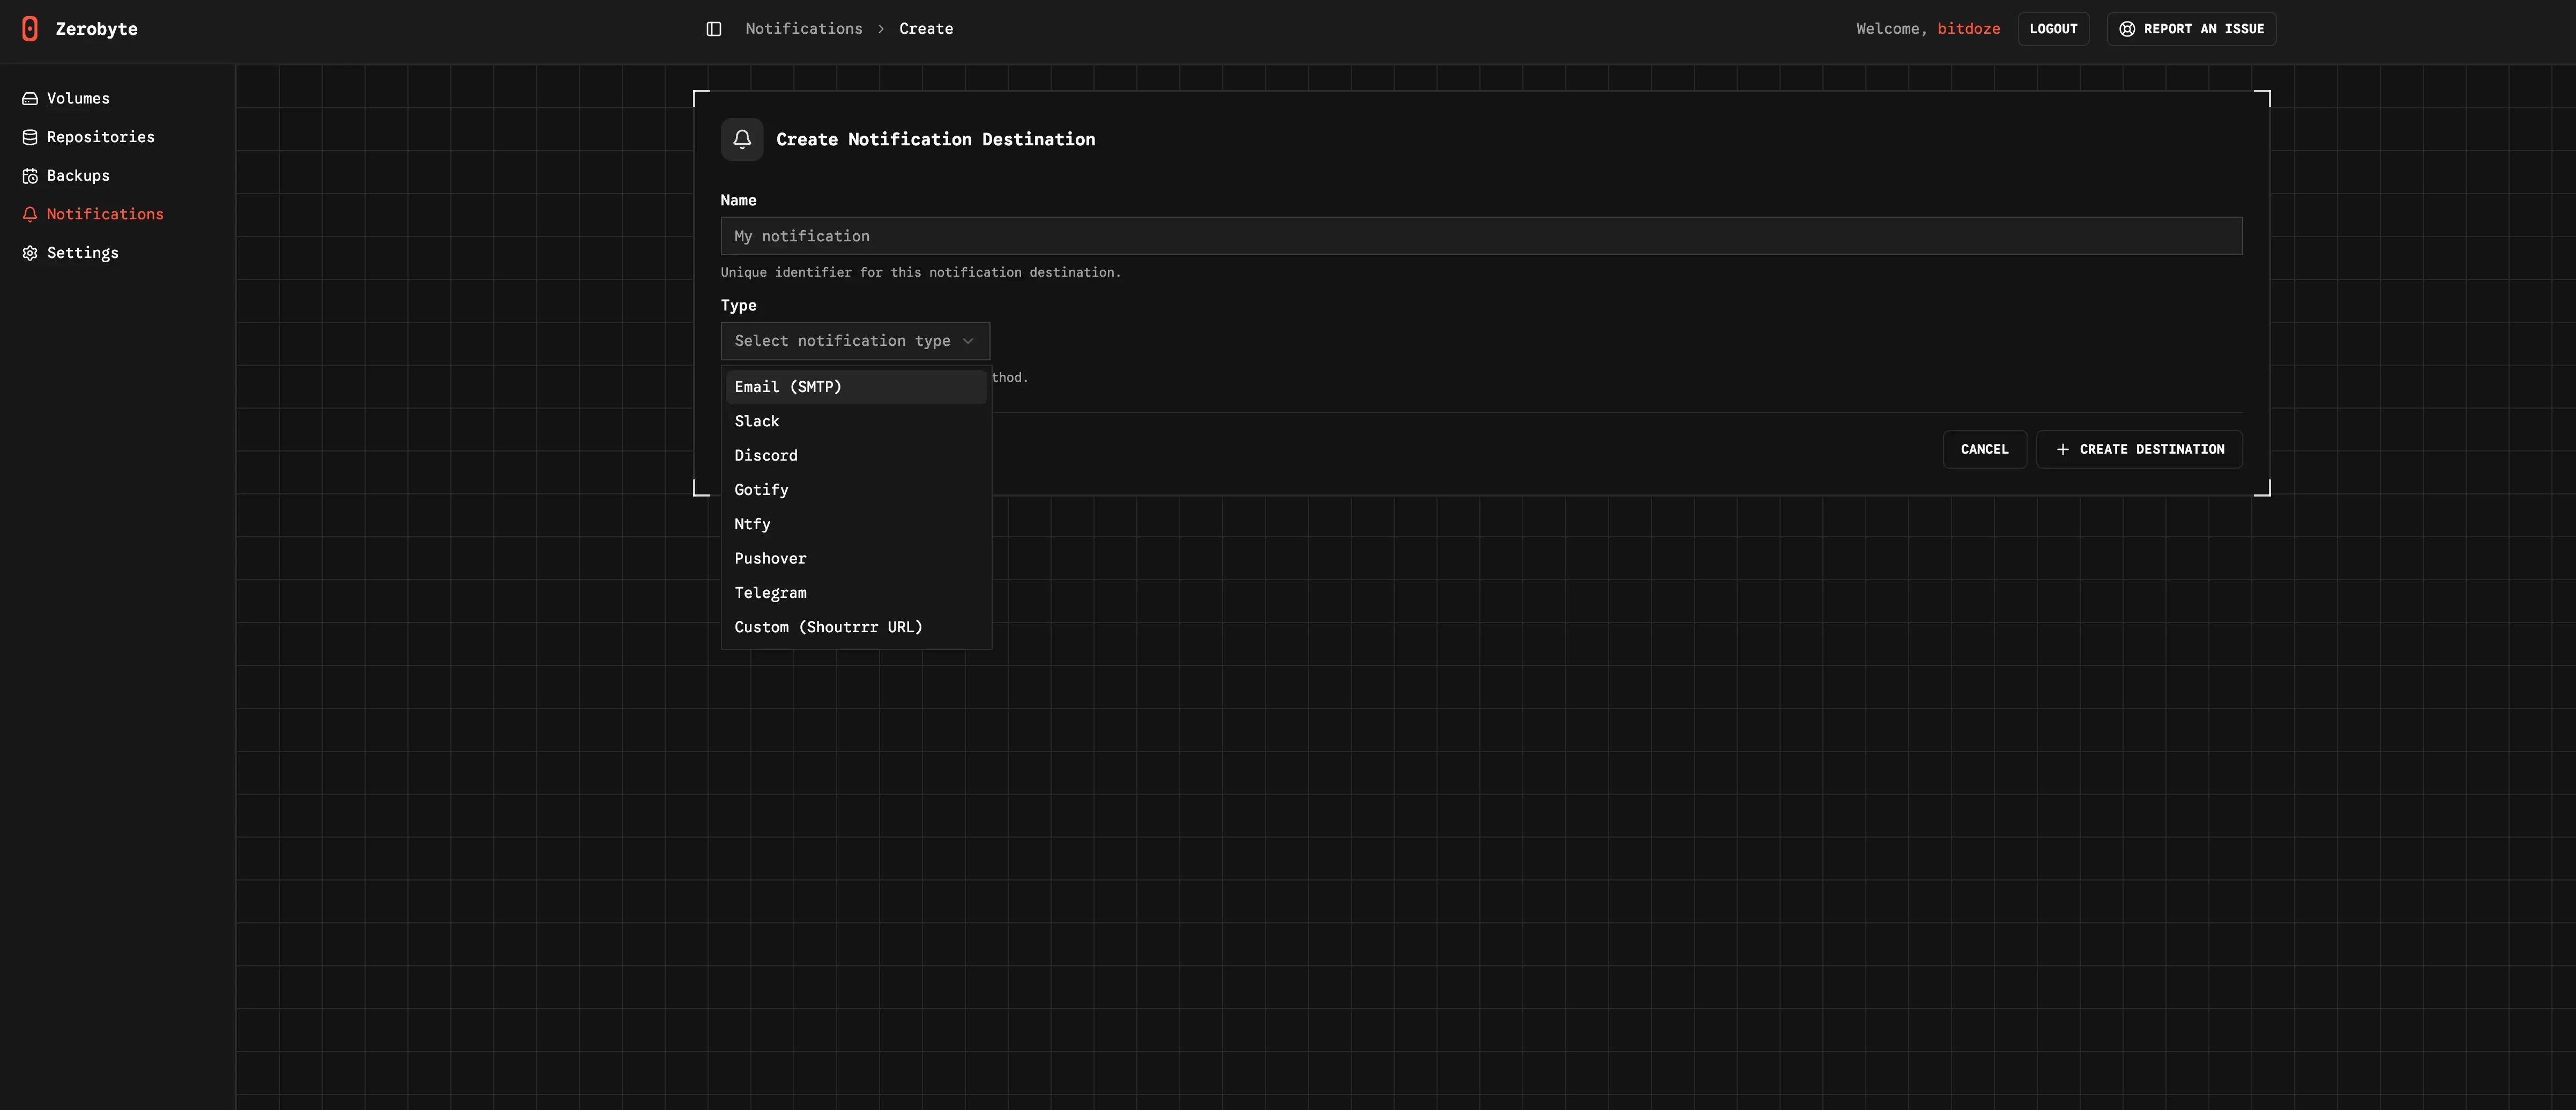
Notifications let you control how Zerobyte reports job events. Set them up early so failed backups never go unnoticed.
Prerequisites
- Linux server or VPS with Docker and Docker Compose installed
- At least 2 GB RAM recommended for smooth UI and backup jobs
- Local disk space for
/var/lib/zerobyte(avoid network shares) - Optional: rclone if you want cloud storage backends
Option 1: Deploy with Dokploy
Dokploy is an easy way to deploy Docker apps with managed domains and SSL. If you do not have it yet, start here: Dokploy install guide.
Step 1: Create the service
- Open your Dokploy project
- Click Add Service and choose Compose
- Name it
zerobyte
Step 2: Paste the compose file
services:
  zerobyte:
    image: ghcr.io/nicotsx/zerobyte:v0.19
    networks:
      - dokploy-network
    restart: unless-stopped
    cap_add:
      - SYS_ADMIN
    devices:
      - /dev/fuse:/dev/fuse
    environment:
      - TZ=UTC
    volumes:
      - /etc/localtime:/etc/localtime:ro
      - zerobyte-data:/var/lib/zerobyte
      - /srv/backups:/backups
      - /srv/data:/data:ro
      - /etc/rclone:/root/.config/rclone:ro

networks:
  dokploy-network:
    external: true

volumes:
  zerobyte-data:
Step 3: Domain and port
Create a domain in Dokploy and map it to port 4096. After deploy, open https://your-domain.com to access the UI.
Notes about the compose file
/srv/backupsis a sample local repository path. Change it to your storage location./srv/datais the source data to back up. Mount it read-only when possible./etc/rcloneis optional. Remove it if you do not use rclone remotes.- The UI listens on port
4096by default.
Storage warning
Keep /var/lib/zerobyte on local disk. Pointing it to a network share often causes permission issues and poor performance.
Option 2: Docker Compose (standalone)
Full setup (remote mounts enabled)
Use this if you need Zerobyte to mount NFS, SMB, or WebDAV shares inside the container.
services:
  zerobyte:
    image: ghcr.io/nicotsx/zerobyte:v0.19
    container_name: zerobyte
    restart: unless-stopped
    cap_add:
      - SYS_ADMIN
    ports:
      - "4096:4096"
    devices:
      - /dev/fuse:/dev/fuse
    environment:
      - TZ=UTC
    volumes:
      - /etc/localtime:/etc/localtime:ro
      - /var/lib/zerobyte:/var/lib/zerobyte
Start it:
docker compose up -dSimplified setup (local folders only)
If you only back up local directories, drop the FUSE device and extra capabilities:
services:
  zerobyte:
    image: ghcr.io/nicotsx/zerobyte:v0.19
    container_name: zerobyte
    restart: unless-stopped
    ports:
      - "4096:4096"
    environment:
      - TZ=UTC
    volumes:
      - /etc/localtime:/etc/localtime:ro
      - /var/lib/zerobyte:/var/lib/zerobyte
      - /srv/data:/data:ro
Trade-offs
- Pros: Better security with fewer privileges
- Pros: Works for local directories
- Cons: No direct NFS, SMB, or WebDAV mounts
Add your first volume
Zerobyte backs up data from volumes (source locations). To back up a local directory, mount it into the container and then pick it from the UI.
Example host path:
services:
  zerobyte:
    volumes:
      - /var/lib/zerobyte:/var/lib/zerobyte
+     - /srv/projects:/projects:ro
Then go to Volumes in Zerobyte and create a new “Directory” volume that points to /projects.
Create a repository
Repositories are where your encrypted backups live. Zerobyte supports multiple backends:
| Repository type | Example |
|---|---|
| Local directory | /var/lib/zerobyte/repositories/myrepo |
| S3 compatible | AWS S3, MinIO, Wasabi, Backblaze |
| Google Cloud Storage | GCS buckets |
| Azure Blob Storage | Azure containers |
| rclone remotes | Google Drive, Dropbox, OneDrive, etc |
Using rclone for cloud storage
- Install rclone on your host:
curl https://rclone.org/install.sh | sudo bash - Configure a remote:
rclone config - Mount the config into the container:
services:
  zerobyte:
    volumes:
      - /var/lib/zerobyte:/var/lib/zerobyte
+     - ~/.config/rclone:/root/.config/rclone
After restarting the container, choose rclone as the repository type and select your remote.
Create your first backup job
- Pick a source volume and a repository
- Set a schedule (daily, weekly, or custom)
- Add include and exclude paths
- Configure retention (keep daily, weekly, monthly, yearly)
- Run the job once manually to verify credentials and performance
Restore data
Open Backups, select a snapshot, and restore files back to their original paths. For partial restores, pick only the files you need and Zerobyte will pull them from Restic.
Post-deploy checklist
- Create at least one repository and test a manual backup
- Validate restores with a small file set
- Schedule jobs during low-usage windows for the first run
- Keep Zerobyte updated and review logs for failures
Restic CLI commands you should know
# initialize a local repo
export RESTIC_REPOSITORY=/srv/backups/restic-repo
export RESTIC_PASSWORD="strong-password"
restic init

# create a backup
restic -r $RESTIC_REPOSITORY backup /home /etc

# list snapshots
restic -r $RESTIC_REPOSITORY snapshots

# forget and prune with a retention policy
restic -r $RESTIC_REPOSITORY forget --prune \
  --keep-daily 7 --keep-weekly 4 --keep-monthly 12 --keep-yearly 3
Practical retention tips
- Test restores regularly. A backup you cannot restore is useless.
- Keep Zerobyte metadata on local disk for performance and permissions.
- Expect the first backup to be heavy on I/O and bandwidth.
- Keep at least one independent offline copy for critical data.
- Use
restic checkand inspect logs when a job fails.
FAQ
Do I need SYS_ADMIN and /dev/fuse?
Only if you want Zerobyte to mount NFS, SMB, or WebDAV shares inside the container. For local folders, remove the capability and device for a safer setup.
Where does Zerobyte store repositories?
Local repositories live under /var/lib/zerobyte/repositories by default. Cloud repositories are stored in the backend you configure.
Final thoughts
Restic gives you trustworthy, encrypted backups. Zerobyte adds the convenience of a modern dashboard and scheduling layer. If you want a low-maintenance, self-hosted backup system, this combo is hard to beat.
View Zerobyte on GitHub