Build a Real-Time App with Astro and Convex (2026 Tutorial)
Build a real-time app with Astro and Convex in this 2026 tutorial. Create a live chat app using Astro islands, real-time queries, and Vercel deployment.
 Dragos44 min read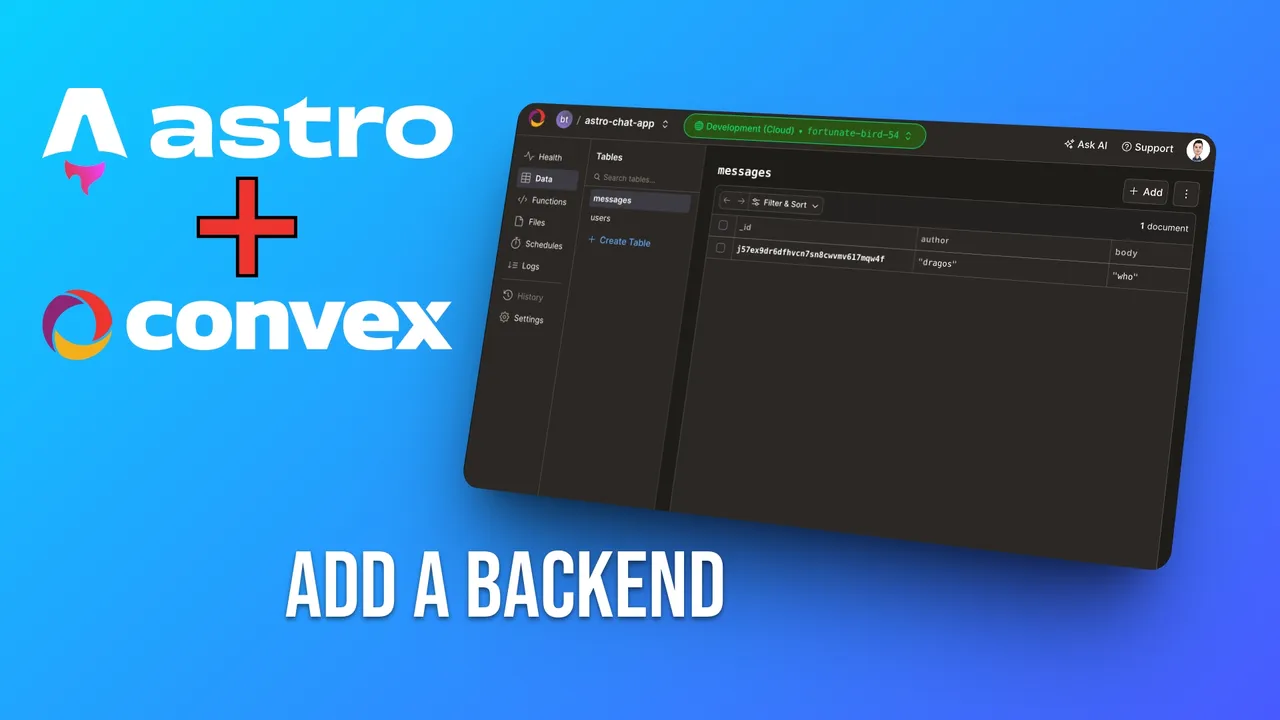
Astro and Convex
Part 1 of 2
In this tutorial you’ll build a real-time app with Convex and Astro, a chat application that loads instantly and updates live across every connected user the moment a message is sent. You’ll use Astro islands for the static shell and Convex’s real-time queries for the interactive parts. By the end you’ll have a working chat app deployable to Vercel.
This is the 2026 edition, updated for Astro 7.2, Convex 1.45, React 19, and Tailwind v4. If you’re wondering how Astro compares to Next.js and TanStack Start, the short answer is: Astro ships zero JavaScript by default and lets you hydrate only the components that need interactivity. New to Astro? You can build a free blog with Astro first to get comfortable with the basics.
Why Astro + Convex for real-time apps
Astro ships zero JS by default
Astro ships HTML with JavaScript only where you need it, unlike frameworks that send megabytes of JavaScript. Astro 7 brings a Rust compiler that makes builds 15-61% faster. See the Astro 7 build performance benchmarks for details.
- Zero JavaScript by default - Pages load with pure HTML/CSS
- Islands Architecture - Interactive components are hydrated independently
- Framework agnostic - Use React, Vue, Svelte, or plain JavaScript components
- Built-in optimizations - Image optimization, CSS bundling, and more out of the box
Convex: real-time as a first-class primitive
Convex handles backend development with real-time as a first-class primitive:
- Real-time by default - Queries become live subscriptions
- Strong consistency - No more race conditions or data inconsistencies
- TypeScript everywhere - End-to-end type safety from database to frontend
- Serverless and scalable - Zero infrastructure management required
- ACID transactions - Your data stays consistent even under heavy load
Convex is also now open source. You can self-host Convex with Docker Compose if you want full control over your data.
What we’re building today
We’re building a real-time chat application:
- Fast initial page load with Astro
- Real-time message updates across all connected users
- Type-safe API from database to frontend
- Deployable to Vercel, covered in part 2: deploy your Astro + Convex app to Vercel
- Responsive UI with Tailwind CSS
What’s changed in 2026
If you’re coming from the original 2025 version of this tutorial, here’s what’s new:
- Astro 7.2.x: Rust compiler for
.astrofiles, Vite 8 with Rolldown under the hood, stricter HTML validation (unclosed tags now error instead of being auto-corrected), andcompressHTML: 'jsx'as the new whitespace default. - Convex 1.45.x: CLI deployment management (
npx convex deployment create/select), EU hosting (Ireland region, launched Feb 2026), and Convex is now open source. - React 19 + Tailwind v4: both are the defaults when scaffolding today.
- Node.js 22.12.0+: required by both Astro 6+ and Convex.
Astro 7 breaking change
Astro 7’s Rust compiler is stricter than the old JS compiler. If your build suddenly fails with HTML errors, check for unclosed tags or invalid HTML in your .astro templates. Also, Astro 7 changed the default whitespace handling to compressHTML: 'jsx'. If you notice missing spaces between inline elements, add explicit {" "} separators.
Nothing in this tutorial uses removed APIs. The code patterns are unchanged, only the tooling is newer.
Prerequisites and setup
Before starting, make sure you have:
- Node.js 22.12.0+ (LTS) installed — check with
node --version - Git installed
- A GitHub account (for Convex authentication)
- About 45 minutes of focused coding time
New to TypeScript?
The TypeScript here is straightforward, and Convex’s type safety catches errors at compile time rather than runtime.
Prefer a starter?
You can scaffold this entire tutorial instantly with npx create-convex@latest -t astro. It sets up the Astro + Convex project with the same patterns we’ll build manually here. See the Convex Astro template for details.
Step 1: Create your Astro project
Create a new Astro project:
# Create a new Astro project
npm create astro@latest astro-convex-chat

# When prompted, choose:
# - "Empty" / minimal template
# - Yes to TypeScript
# - Yes to install dependencies
# - Yes to initialize git repository

# Navigate to your project
cd astro-convex-chat
Now let’s add React integration for our interactive components:
# Add React support to Astro
npx astro add react

# Add Tailwind CSS for styling
npx astro add tailwind

# Install additional utilities we'll need
npm install npm-run-all clsx
Pro Tip
The npx astro add commands configure TypeScript types and build settings automatically.
Verify: Run ls — you should see src/, public/, astro.config.mjs, and package.json.
Step 2: Install and configure Convex
Add Convex to the project:
# Install Convex
npm install convex

# Initialize Convex (this will prompt you to sign in with GitHub)
npx convex dev
During the Convex setup process:
- Sign in with GitHub — Convex uses GitHub for authentication
- Create a new project — Name it something like “astro-chat-app”
- Accept the default configuration — Convex will create a
convex/folder
This creates several important files:
convex/folder — Where your backend functions live.env.local— Contains your Convex deployment URLconvex/_generated/— Auto-generated TypeScript types
Keep convex dev Running
Make sure to keep the npx convex dev command running throughout development. It watches your backend functions and keeps everything in sync. If you stop it, the convex/_generated/ types will go stale and your build will break.
Verify: ls convex/ should show a _generated/ folder. .env.local should contain a CONVEX_URL value.
Step 3: Design your database schema
Convex uses a schema-first approach for type safety. Define the chat app’s data structure in convex/schema.ts:
import { defineSchema, defineTable } from "convex/server";
import { v } from "convex/values";

export default defineSchema({
  // Users table to store user information
  users: defineTable({
    name: v.string(),
    email: v.optional(v.string()),
    avatar: v.optional(v.string()),
  }).index("by_email", ["email"]),

  // Messages table for chat messages
  messages: defineTable({
    author: v.string(),
    body: v.string(),
    timestamp: v.number(),
  }).index("by_timestamp", ["timestamp"]),

  // Rooms table for different chat rooms (future enhancement)
  rooms: defineTable({
    name: v.string(),
    description: v.optional(v.string()),
    isPrivate: v.boolean(),
  }),
});
What this schema does:
- defineSchema creates our database schema with type safety
- defineTable defines individual tables with their fields
- v.string(), v.number() are Convex’s type validators
- v.optional() makes fields optional
- .index() creates database indexes for efficient queries
The indexes help performance. by_timestamp lets you query messages in chronological order.
Step 4: Create backend functions
Create backend functions for the chat app. In Convex, functions run on the server and are exposed as APIs.
Message functions
Create convex/messages.ts:
import { v } from "convex/values";
import { mutation, query } from "./_generated/server";

// Query to get all messages (with real-time updates!)
export const getMessages = query({
  args: {},
  handler: async (ctx) => {
    // Get the last 50 messages, ordered by timestamp
    const messages = await ctx.db
      .query("messages")
      .withIndex("by_timestamp")
      .order("desc")
      .take(50);

    // Return them in chronological order (oldest first)
    return messages.reverse();
  },
});

// Mutation to send a new message
export const sendMessage = mutation({
  args: {
    author: v.string(),
    body: v.string()
  },
  handler: async (ctx, args) => {
    // Validate input
    if (!args.author.trim()) {
      throw new Error("Author name is required");
    }

    if (!args.body.trim()) {
      throw new Error("Message cannot be empty");
    }

    // Insert the message with current timestamp
    await ctx.db.insert("messages", {
      author: args.author.trim(),
      body: args.body.trim(),
      timestamp: Date.now(),
    });
  },
});

// Query to get message count (for stats)
export const getMessageCount = query({
  args: {},
  handler: async (ctx) => {
    const messages = await ctx.db.query("messages").collect();
    return messages.length;
  },
});
Here’s what’s happening in this code:
- query functions can only read data and automatically provide real-time updates
- mutation functions can modify data and run as atomic transactions
- ctx.db gives you access to your database with full type safety
- withIndex() uses our predefined indexes for efficient queries
- Error handling is built-in — thrown errors are automatically sent to the client
User functions
Create convex/users.ts for user management:
import { v } from "convex/values";
import { mutation, query } from "./_generated/server";

// Get or create a user
export const getOrCreateUser = mutation({
  args: {
    name: v.string(),
    email: v.optional(v.string()),
  },
  handler: async (ctx, args) => {
    // Check if user already exists
    let user = null;
    if (args.email) {
      user = await ctx.db
        .query("users")
        .withIndex("by_email", (q) => q.eq("email", args.email))
        .first();
    }

    // Create new user if not found
    if (!user) {
      const userId = await ctx.db.insert("users", {
        name: args.name,
        email: args.email,
      });
      user = await ctx.db.get(userId);
    }

    return user;
  },
});

// Get online users count
export const getActiveUsersCount = query({
  args: {},
  handler: async (ctx) => {
    const users = await ctx.db.query("users").collect();
    return users.length;
  },
});
Step 5: Create the Convex provider for Astro
Astro’s component islands need a way to connect to Convex. Let’s create a provider wrapper in src/lib/convex.tsx:
import { CONVEX_URL } from "astro:env/client";
import { ConvexProvider, ConvexReactClient } from "convex/react";
import { type FunctionComponent, type JSX } from "react";

const client = new ConvexReactClient(CONVEX_URL);

// Astro context providers don't work when used in .astro files.
// See this and other related issues: https://github.com/withastro/astro/issues/2016#issuecomment-981833594
//
// This exists to conveniently wrap any component that uses Convex.
export function withConvexProvider<Props extends JSX.IntrinsicAttributes>(
  Component: FunctionComponent<Props>,
) {
  return function WithConvexProvider(props: Props) {
    return (
      <ConvexProvider client={client}>
        <Component {...props} />
      </ConvexProvider>
    );
  };
}
Why not use ConvexProvider directly?
Astro’s component islands run outside React’s context tree. If you place a <ConvexProvider> inside an .astro file, child components won’t have access to the Convex context. The withConvexProvider HOC wraps each island component in its own provider, keeping the React context intact. This is the official pattern from the Convex Astro template and the #1 gotcha when combining Astro with Convex.
Step 6: Build the chat interface components
Now let’s create our React components for the chat interface. These will be used as Astro islands.
Message list component
Create src/components/MessageList.tsx:
import { useQuery } from "convex/react";
import { api } from "../../convex/_generated/api";
import { withConvexProvider } from "../lib/convex";
import { clsx } from "clsx";

function MessageListComponent() {
  const messages = useQuery(api.messages.getMessages);
  const messageCount = useQuery(api.messages.getMessageCount);

  if (messages === undefined) {
    return (
      <div className="flex-1 flex items-center justify-center">
        <div className="text-center">
          <div className="animate-spin rounded-full h-8 w-8 border-b-2 border-blue-500 mx-auto mb-2"></div>
          <p className="text-gray-500">Loading messages...</p>
        </div>
      </div>
    );
  }

  return (
    <div className="flex-1 overflow-y-auto p-4 space-y-4">
      {/* Chat header with stats */}
      <div className="text-center text-sm text-gray-500 mb-6">
        {messageCount} messages in this chat
      </div>

      {messages.length === 0 ? (
        <div className="text-center py-12">
          <div className="text-6xl mb-4">💬</div>
          <h3 className="text-lg font-medium text-gray-900 mb-2">
            No messages yet
          </h3>
          <p className="text-gray-500">
            Be the first to start the conversation!
          </p>
        </div>
      ) : (
        <div className="space-y-3">
          {messages.map((message) => (
            <div
              key={message._id}
              className={clsx(
                "max-w-xs lg:max-w-md px-4 py-2 rounded-2xl",
                "bg-blue-500 text-white ml-auto"
              )}
            >
              <div className="flex items-center justify-between mb-1">
                <span className="text-xs font-medium opacity-90">
                  {message.author}
                </span>
                <span className="text-xs opacity-75">
                  {new Date(message.timestamp).toLocaleTimeString([], {
                    hour: '2-digit',
                    minute: '2-digit'
                  })}
                </span>
              </div>
              <p className="text-sm">{message.body}</p>
            </div>
          ))}
        </div>
      )}
    </div>
  );
}

// Export the wrapped component as default
const MessageList = withConvexProvider(MessageListComponent);
export default MessageList;
Message input component
Create src/components/MessageInput.tsx:
import { useMutation } from "convex/react";
import { useState, useRef, useEffect } from "react";
import { api } from "../../convex/_generated/api";
import { withConvexProvider } from "../lib/convex";
import { clsx } from "clsx";

function MessageInputComponent() {
  const sendMessage = useMutation(api.messages.sendMessage);
  const [author, setAuthor] = useState("");
  const [body, setBody] = useState("");
  const [isLoading, setIsLoading] = useState(false);
  const [error, setError] = useState<string | null>(null);
  const messageInputRef = useRef<HTMLInputElement>(null);

  // Load author name from localStorage
  useEffect(() => {
    const savedAuthor = localStorage.getItem("chat-author-name");
    if (savedAuthor) {
      setAuthor(savedAuthor);
    }
  }, []);

  // Save author name to localStorage when it changes
  useEffect(() => {
    if (author) {
      localStorage.setItem("chat-author-name", author);
    }
  }, [author]);

  const handleSubmit = async (e: React.FormEvent) => {
    e.preventDefault();
    setError(null);

    if (!author.trim() || !body.trim()) {
      setError("Please enter both your name and a message");
      return;
    }

    setIsLoading(true);
    try {
      await sendMessage({
        author: author.trim(),
        body: body.trim()
      });

      // Clear message input and focus it
      setBody("");
      messageInputRef.current?.focus();

    } catch (err) {
      console.error("Failed to send message:", err);
      setError(err instanceof Error ? err.message : "Failed to send message");
    } finally {
      setIsLoading(false);
    }
  };

  return (
    <div className="border-t bg-white p-4">
      {error && (
        <div className="mb-3 p-2 bg-red-50 border border-red-200 rounded-md text-red-700 text-sm">
          {error}
        </div>
      )}

      <form onSubmit={handleSubmit} className="space-y-3">
        {/* Author name input */}
        <div>
          <input
            type="text"
            placeholder="Your name"
            value={author}
            onChange={(e) => setAuthor(e.target.value)}
            className="w-full px-3 py-2 border border-gray-300 rounded-lg focus:outline-none focus:ring-2 focus:ring-blue-500 focus:border-transparent"
            disabled={isLoading}
          />
        </div>

        {/* Message input */}
        <div className="flex gap-2">
          <input
            ref={messageInputRef}
            type="text"
            placeholder="Type your message..."
            value={body}
            onChange={(e) => setBody(e.target.value)}
            className="flex-1 px-3 py-2 border border-gray-300 rounded-lg focus:outline-none focus:ring-2 focus:ring-blue-500 focus:border-transparent"
            disabled={isLoading}
          />
          <button
            type="submit"
            disabled={isLoading || !author.trim() || !body.trim()}
            className={clsx(
              "px-6 py-2 rounded-lg font-medium transition-colors",
              "focus:outline-none focus:ring-2 focus:ring-blue-500 focus:ring-offset-2",
              isLoading || !author.trim() || !body.trim()
                ? "bg-gray-300 text-gray-500 cursor-not-allowed"
                : "bg-blue-500 text-white hover:bg-blue-600"
            )}
          >
            {isLoading ? (
              <div className="flex items-center gap-2">
                <div className="w-4 h-4 border-2 border-white border-t-transparent rounded-full animate-spin"></div>
                Sending...
              </div>
            ) : (
              "Send"
            )}
          </button>
        </div>
      </form>
    </div>
  );
}

// Export the wrapped component as default
const MessageInput = withConvexProvider(MessageInputComponent);
export default MessageInput;
Step 7: Create the main layout
Create src/layouts/ChatLayout.astro:
---
import '../styles/global.css'
export interface Props {
  title: string;
}

const { title } = Astro.props;
---

<!DOCTYPE html>
<html lang="en">
  <head>
    <meta charset="UTF-8" />
    <meta name="description" content="Real-time chat built with Astro and Convex" />
    <meta name="viewport" content="width=device-width, initial-scale=1.0" />
    <link rel="icon" type="image/svg+xml" href="/favicon.svg" />
    <title>{title}</title>
  </head>
  <body class="bg-gray-50 min-h-screen">
    <slot />
  </body>
</html>
Step 8: Build the main chat page
Update src/pages/index.astro:
---
import ChatLayout from '../layouts/ChatLayout.astro';
import MessageList from '../components/MessageList';
import MessageInput from '../components/MessageInput';
---

<ChatLayout title="Astro + Convex Chat">
  <div class="min-h-screen flex flex-col">
    <!-- Header -->
    <header class="bg-white shadow-sm border-b">
      <div class="max-w-4xl mx-auto px-4 py-4">
        <div class="flex items-center justify-between">
          <div>
            <h1 class="text-2xl font-bold text-gray-900">
              ⚡ Astro + Convex Chat
            </h1>
            <p class="text-sm text-gray-600">
              Real-time messaging with Astro and Convex
            </p>
          </div>
          <div class="flex items-center gap-2 text-sm text-gray-500">
            <div class="w-2 h-2 bg-green-500 rounded-full animate-pulse"></div>
            <span>Live</span>
          </div>
        </div>
      </div>
    </header>

    <!-- Chat Container -->
    <main class="flex-1 max-w-4xl mx-auto w-full bg-white shadow-lg flex flex-col">
      <MessageList client:load />
      <MessageInput client:load />
    </main>

    <!-- Footer -->
    <footer class="bg-gray-100 border-t">
      <div class="max-w-4xl mx-auto px-4 py-3">
        <p class="text-center text-sm text-gray-600">
          Built with
          <a href="https://astro.build" class="text-blue-600 hover:underline">Astro</a>
          and
          <a href="https://convex.dev" class="text-blue-600 hover:underline">Convex</a>
        </p>
      </div>
    </footer>
  </div>
</ChatLayout>
The client:load directive
The client:load directive tells Astro to hydrate these React components on the client side. This gives us the interactivity we need while keeping the initial page load fast. The rest of the page (header, footer, layout) ships as static HTML with zero JavaScript.
Step 9: Configure environment variables
Update your astro.config.mjs to handle environment variables properly:
// @ts-check
import react from "@astrojs/react";
import tailwindcss from "@tailwindcss/vite";
import { defineConfig, envField } from "astro/config";

// https://astro.build/config
export default defineConfig({
  integrations: [react()],
  env: {
    schema: {
      CONVEX_URL: envField.string({
        access: "public",
        context: "client",
      }),
    },
  },
  vite: {
    plugins: [tailwindcss()],
  },
});
Create or update .env.local with your Convex deployment URL:
# Your Convex deployment URL (auto-generated by convex dev)
CONVEX_URL=https://your-deployment.convex.cloud
Build will fail without CONVEX_URL
With astro:env, CONVEX_URL is a required build-time variable. If it’s missing, astro build will fail with a hard error. Make sure .env.local is set locally and that CONVEX_URL is configured as a build-time environment variable on your deploy host (CI, Vercel, etc.).
Verify: After running npm run dev, check the browser console — no Convex connection errors means the URL is correct.
Step 10: Run your application
Now let’s run the app. Update your package.json scripts:
{
  "scripts": {
    "dev": "run-p dev:*",
    "dev:astro": "astro dev",
    "dev:convex": "convex dev",
    "build": "astro build",
    "preview": "astro preview",
    "convex": "convex"
  }
}
Start your development environment:
# This runs both Astro and Convex in parallel
npm run dev
Open your browser to http://localhost:4321 and you should see your chat app.
Testing real-time updates
Open multiple browser tabs or windows to test the real-time sync. Messages sent from one tab will instantly appear in all other tabs.
Verify it works
Run through these checks to confirm everything is wired up:
- Open
http://localhost:4321— the chat UI should render (not a blank page or spinner). - Open a second browser tab — both tabs should show the same empty state.
- Send a message in tab 1 — it should appear instantly in tab 2. That’s the real-time proof.
- Run
npx convex dashboard— open the Convex dashboard, navigate to Data → messages table, confirm the message row exists. - Run
npx convex functions— list deployed functions;messages:getMessagesandmessages:sendMessageshould appear.
Troubleshooting
UI stuck on spinner forever
convex dev isn’t running. Both Astro and Convex must run in parallel. Restart with npm run dev (which uses run-p to start both). Check the terminal for errors from the Convex process.
ConvexProvider not found error
A <ConvexProvider> was placed inside an .astro file. Astro’s component islands run outside React’s context tree — you must use the withConvexProvider HOC pattern from Step 5. Every Convex-using component needs its own provider wrapper.
Build fails with env error
CONVEX_URL is not set in the build environment. With astro:env, a missing required public env var causes a hard build failure. Set it in .env.local for local development and as a build-time env var on your deploy host (CI, Vercel, etc.).
_generated types out of sync
Schema or functions changed but convex dev wasn’t running. Restart convex dev to regenerate convex/_generated/. The types are auto-generated from your schema and function signatures — they must stay in sync.
Astro build fails on HTML errors
Astro 7’s Rust compiler is stricter than the old JS compiler. Unclosed tags and invalid HTML that were previously auto-corrected now cause build errors. Check your .astro templates for proper HTML structure.
Patterns worth knowing
Error handling
Handle errors in your components:
// In your components
const [error, setError] = useState<string | null>(null);

try {
  await sendMessage({ author, body });
} catch (err) {
  if (err instanceof ConvexError) {
    setError(err.data);
  } else {
    setError("Something went wrong. Please try again.");
  }
}
Performance optimization
- Use Astro’s partial hydration — Only hydrate interactive components
- Implement pagination for large message lists using Convex’s built-in
.paginate()andusePaginatedQuery - Add debouncing for real-time features like typing indicators
- Use Convex’s built-in caching — Queries are automatically cached and invalidated
Security best practices
- Input validation — Always validate data in your Convex functions (already implemented in Step 4)
- Rate limiting — Use
@convex-dev/rate-limiter(first-party component, type-safe, transactional, fair queuing) - Authentication — Use
@convex-dev/auth(beta) for GitHub/Google OAuth, magic links, OTP via Auth.js - Content moderation — Add filters for inappropriate content before production
Costs and limits for side projects
Before you ship, know what the free tier gives you and where the walls are.
Convex free tier
The free tier includes function executions, bandwidth, database storage, and file storage with hard caps. Once you hit a limit, new mutations may fail. Check the current numbers at docs.convex.dev/production/state/limits. EU hosting (Ireland region) is available but priced at 1.3× the US rate.
A few things worth knowing:
- Concurrency: Free and Starter plans get S16 = 16 concurrent queries/mutations. Fine for a tutorial or small side project. Worth knowing if you’re planning a bursty launch.
- EU hosting: Launched Feb 2026 in EU West (Ireland). Good news if your audience is in Europe — lower latency, though at 1.3× US pricing.
- Open-source escape hatch: Convex is now open source (
get-convex/convex-backend, 11.9k+ stars). You can self-host Convex with Docker Compose on your own infrastructure. If you want to compare performance, see the Convex self-hosted vs cloud free tier benchmarks.
Production deployment
The tutorial gets you to a working dev environment. Here’s the shortest path to production:
- Create a production deployment:
npx convex deployment create prod - Generate a deploy key in the Convex dashboard (Settings → Deploy Keys)
- Set
CONVEX_URLpointing at the prod deployment in your hosting platform’s build environment
For one-shot production deploys, run npx convex deploy with your deploy key configured.
Full Vercel deployment guide
The step-by-step Vercel deployment walkthrough is in part 2 of this series.
What you built
- Astro’s Islands Architecture: fast loading with selective interactivity
- Convex’s real-time database: automatic synchronization across clients
- Type-safe development: end-to-end TypeScript with auto-generated types
- Modern React patterns: hooks, error handling, and performance optimization
- Production deployment workflow: from dev to production with Convex CLI
Next steps and enhancements
The chat app works, but there’s a lot you can add. These are all first-party Convex components — no need to build from scratch.
Authentication with Convex Auth
@convex-dev/auth (beta) gives you GitHub/Google OAuth, magic links, OTP, and email+password via Auth.js. It replaces the hand-rolled users table and getOrCreateUser mutation from Step 4 with proper auth flows. See convex.dev/auth for setup.
Convex Auth is in beta
The API may change. It’s functional and actively maintained, but pin your version and test upgrades before merging.
Rate limiting
@convex-dev/rate-limiter is a type-safe, transactional rate limiter with fair queuing. Drop it in to prevent spam without writing custom logic. See convex.dev/components/rate-limiter.
Typing indicators and presence
@convex-dev/presence provides a usePresence hook for typing indicators and “online now” status. Directly relevant to this chat app — it’s the drop-in answer to the “typing indicators” feature you’d otherwise build manually. See convex.dev/components/presence.
Pagination for large message lists
The take(50) limit in Step 4 works for a demo, but production apps need pagination. Convex provides server-side .paginate(opts) returning a cursor, paired with the usePaginatedQuery hook on the client. See the Convex pagination docs.
Agent-first development
If you use AI coding agents: Convex has an MCP server for Claude Code and similar tools, plus npx convex ai-files for generating agent context files. Astro 7 adds astro dev --background with JSON logs, which agents can parse.
Other frameworks
Convex works with more than Astro. If you want to try a different frontend framework paired with Convex, see Getting Started with TanStack Start and Convex.
Conclusion
You’ve built a real-time chat application that:
- Loads instantly thanks to Astro’s static generation
- Updates in real-time across all connected users
- Scales automatically with Convex’s serverless architecture
- Maintains data consistency even under heavy load
- Stays type-safe from database to frontend
The patterns here (Astro islands, Convex real-time queries, the withConvexProvider HOC) apply to any real-time app: collaborative tools, live dashboards, multiplayer games, inventory systems.
Ready to go live? The next step is deploying to production.
Next: Deploy to Vercel →Want to go deeper with Astro? Check out the best Astro.js courses and tutorials to level up your skills.