How to Deploy Astro on Your VPS with EasyPanel
Learn how to deploy Astro static website on your own VPS with EasyPanel

Astro is a web framework that lets you build fast and scalable websites with your favorite UI library. Astro can render your pages to static HTML for better performance, SEO, and accessibility. You can also use Astro to create dynamic web applications and APIs with any backend service. Astro supports multiple UI frameworks, such as React, Svelte, Vue, and more.
You can mix and match them in the same project, or use Astro’s template syntax. Astro also has a rich ecosystem of plugins, themes, and integrations that make it easy to extend and customize your website. Whether you want to create a blog, a portfolio, a marketing site, or a web app, Astro can help you achieve your goals.
In this tutorial, we are going to see how you can deploy Astro on your own VPS with the help of EasyPanel. I have created a detailed article and video of how you can install EasyPanel and what has to offer it can be found under: Easypanel.io: A Modern Hosting Panel for Applications and Databases
Other useful Astro articles you may want to check:
- How To Deploy Static Website Astro.JS on VPS Servers
- Coolify Install A Free Heroku and Netlify Self-Hosted Alternative
- How To Deploy An Astro.JS Blog On Cloudflare
In case you are interested to monitor server resources like CPU, memory, disk space you can check: How To Monitor Server and Docker Resources
Deploy Astro on Your VPS with EasyPanel
In this part, we are going to see all the steps we need to do to have an Astro static website deployed in EasyPanel and have it hosted on your server.
1. Instal EasyPanel
The first step is to have EasyPanel installed and used in a VPS, this can be done with a simple command you can check the full tutorial in: Easypanel.io: A Modern Hosting Panel for Applications and Databases
2. Create a GitHub Repo
To deploy Astro you need a GitHub account and you need to create a repo where you will add Astro with all the packages. You can follow the Link GitHub with A SSH Key to MacOS or Linux it has all the details you need to create the repo and link it to your laptop.
3. Install Astro and Make the Configs
Now the fun part is coming and we will start installing Astro. You can create a new installation or you can use a predefined theme, in this tutorial we are going to deploy it from scratch.
3.1 Deploy An Astro Blog
First, you need to go into the repo you have created and be sure is empty, then you can run:
npm create astro@latestYou just use the ”.” for the project name as already you are in the repo that will be used for GitGub. You can also initiate a new repo with Astro is up to you.
3.2 Configure Astro Static
To have this working on EasyPanel we will need to install a node.js package and make some configurations in the package.json file so EasyPanel knows how to work with Astro. First, install serve package:
npm install serveServe will be needed in the start option so it tells to use /dist folder as: “start”: “serve dist/”
The package.json will look like this:
{
  "name": "",
  "type": "module",
  "version": "0.0.1",
  "scripts": {
    "dev": "astro dev",
    "start": "serve dist/",
    "build": "astro build",
    "preview": "astro preview",
    "astro": "astro"
  },
  "dependencies": {
    "@astrojs/mdx": "^1.1.5",
    "@astrojs/node": "^6.0.3",
    "@astrojs/rss": "^3.0.0",
    "@astrojs/sitemap": "^3.0.3",
    "astro": "^3.5.4",
    "serve": "^14.2.1"
  }
}
In the script section, you see the command and in dependencies you see the serve package.
You can check that everything is working fine with :
npm run dev
npm run build
The above commands will be used by EasyPanel and in case there are issues you will want to know before pushing everything to the repo.
3.3 Push to GitHub
Now we finished with the configs and we will need to update the repo with the changes and Astro, just follow the below commands:
git add .
git commit -m "added astro"
git push
4. Add Astro to EasyPanel
4.1 Configure Astro Repo
Now what you need to do is to add your repo in EasyPanel, to do that you need to create a project then on Service add an App in the video you will see the details.
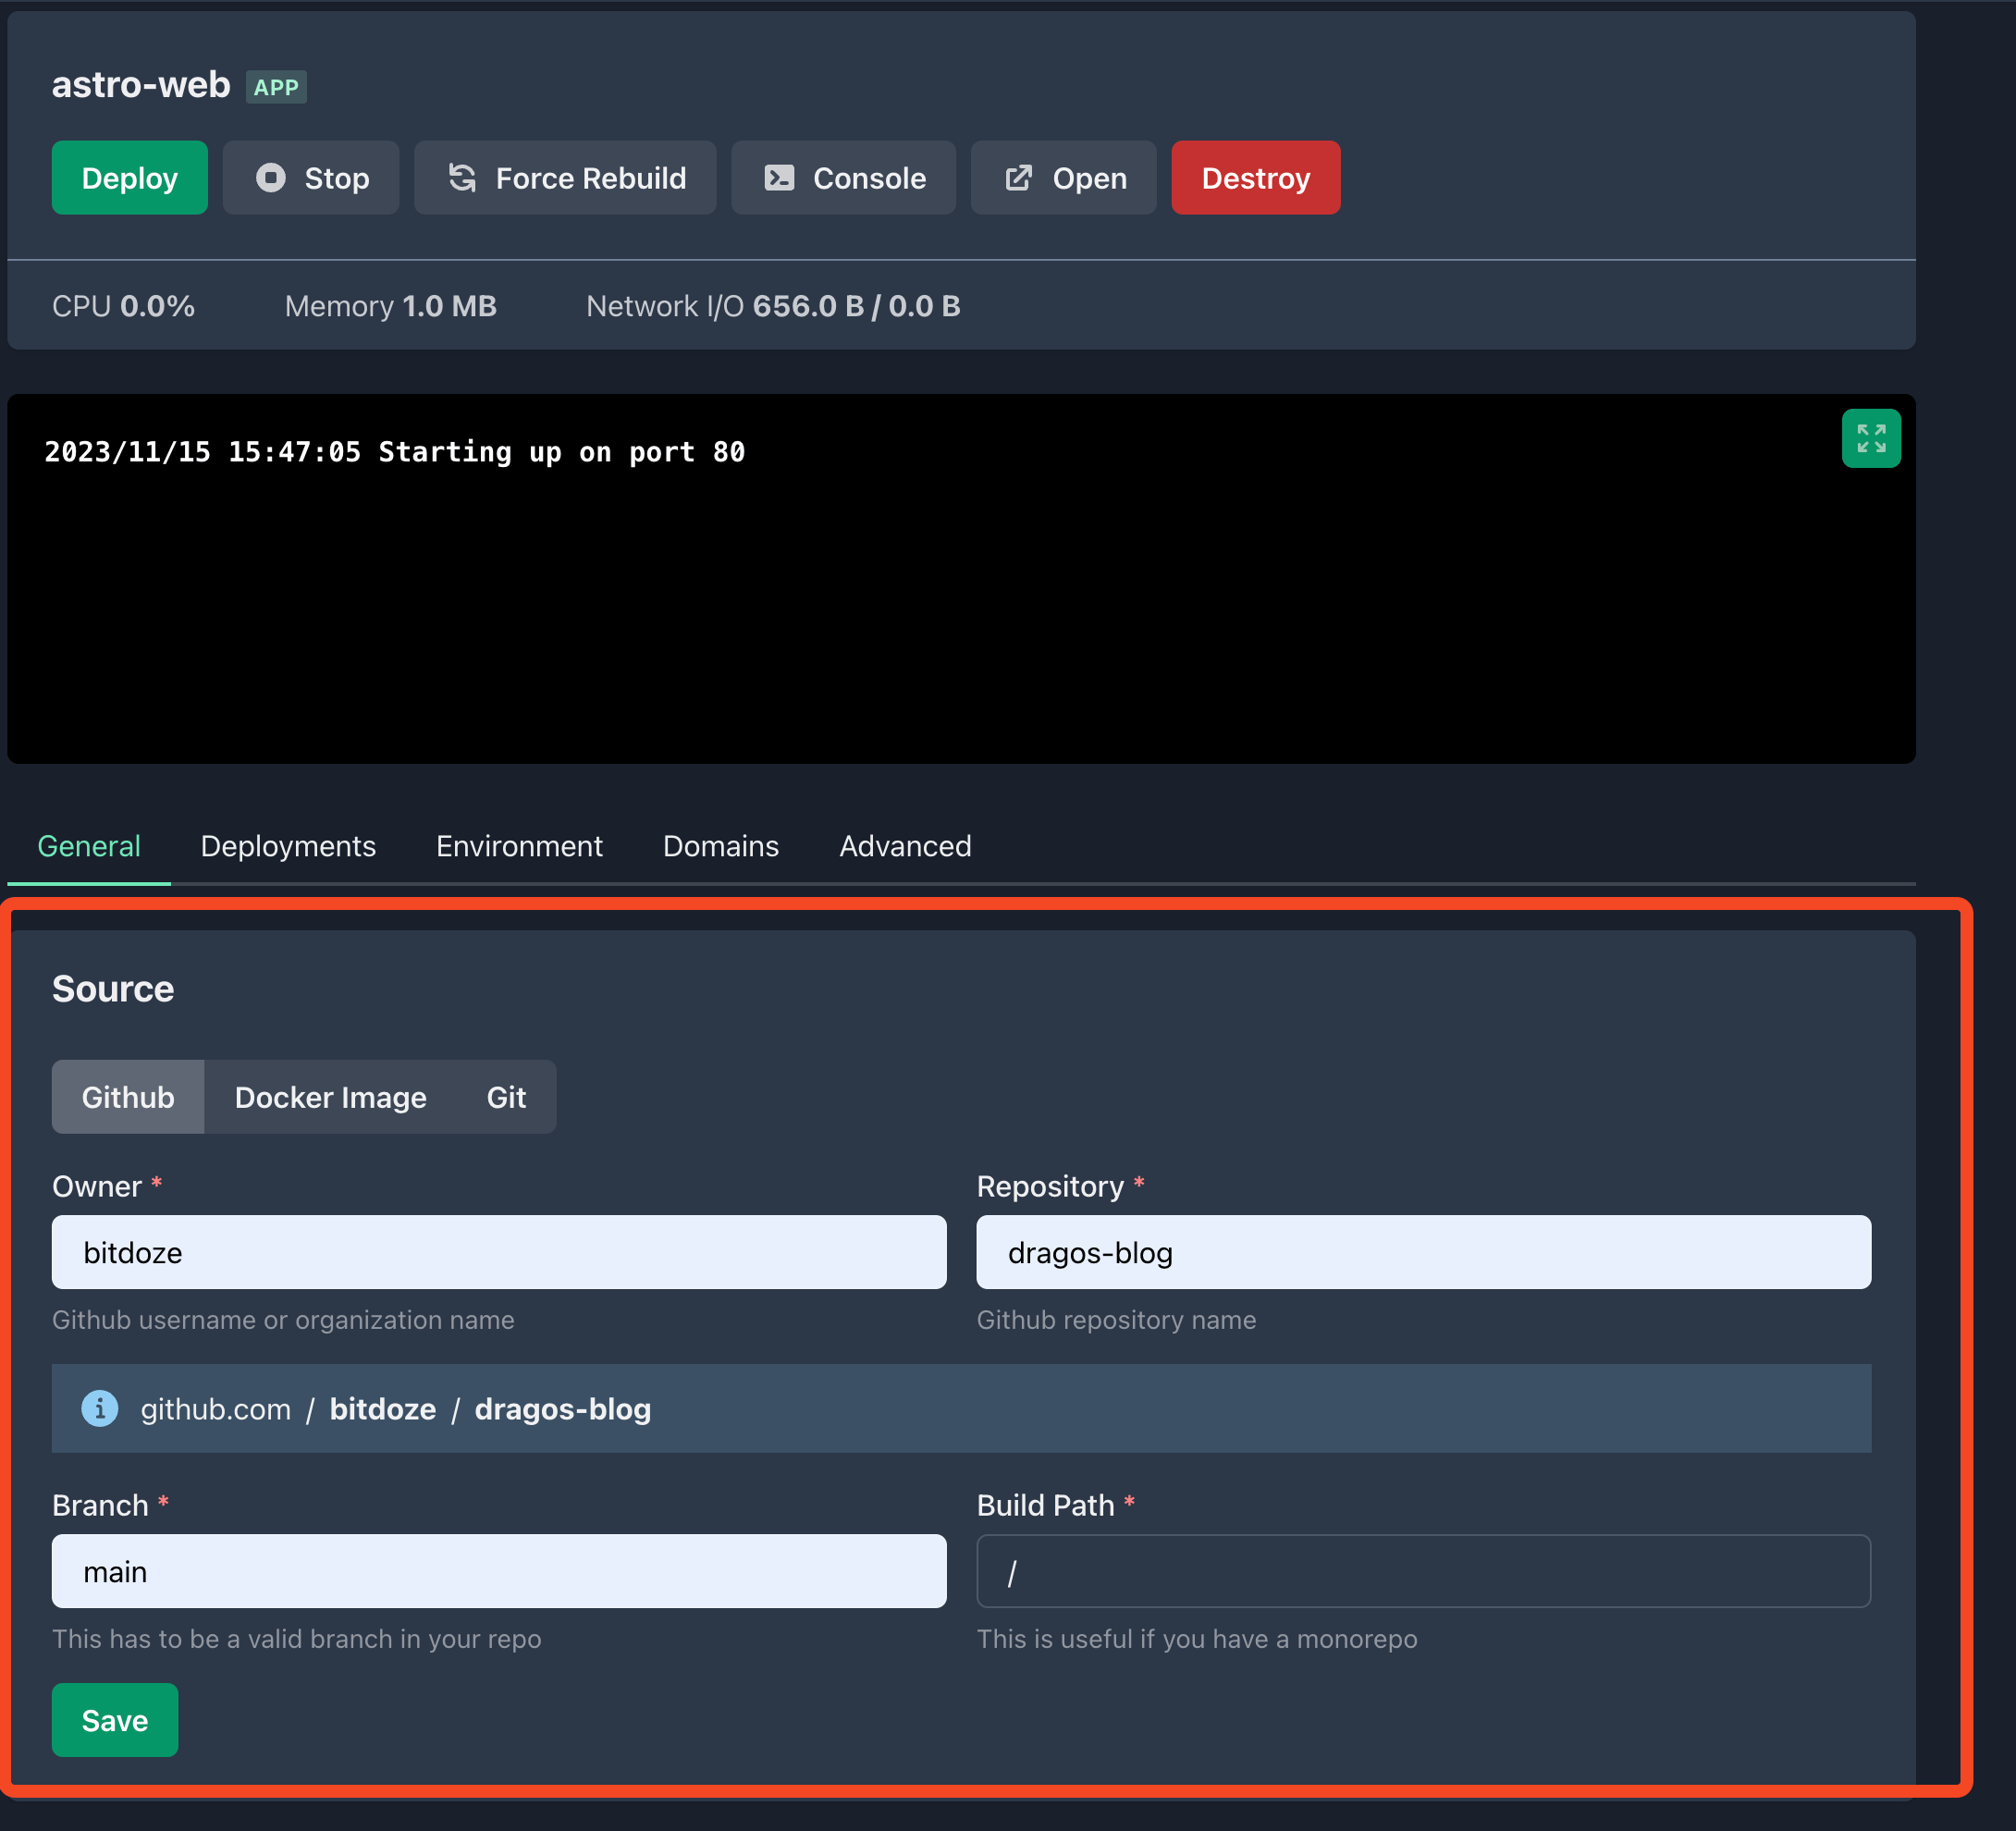
In the Project - General - Source you configure your GitHub repo with the owner and repo like in the picture:

After just hit Save.
Then another window will appear called Build** where you should choose the Nixpacks and Save
After you hit Deploy and under Deployments you watch how the magic is happening and the Astro application starts to be deployed.
The GitHub repo needs to be public, in case you have a private one you will need to add a GitHub token in EasyPanel - Settings - GitHub.
4.2 Enable Auto Deploy
The auto update will make the image to be updated with the latest changes from the repo. So in case you modify a file or add a new one EasyPanel will pull the latest version. This can be done in 2 ways:
- Hitting Auto Deploy - in case you are using a token with EasyPanel you can just hit Auto Deply. This will add a webkook on the GitHub repo and EasyPanel will get notified when the update is happening.
- Add The WebHook - you can manually fetch the Webhook from General in the project and add it to your repo.
4.3 Add A Domain
Now you can check that everything is working by opening the domain that EasyPanel is assigning and add your own. You can go under Domains and add your URL. You need first to point the domain to the server IP with an A record.

Conclusions
Now you should have a fully functional static Astro website working on your VPS server with the help of EasyPanel. You can deploy as many you want including in the free option.
Related Posts

Best Astro.js Online Courses/Tutorials
If you want to learn Astro.js you should check these online courses that can help you get started.

How to Migrate Astro to Bun on CloudFlare
Learn how you can migrate your Astro project to Bun in CloudFlare Pages

How To Add A Contact Form To Astro
See how you can easily add a contact form to an astro website or any static website and get notified via email with no spam.