
NetBird Self-Hosted Setup Guide: Full Open-Source Mesh VPN with Docker
Deploy NetBird self-hosted with Docker using the unified netbird-server stack. Covers embedded IdP, Traefik HTTPS, setup keys, routing, and NetBird Proxy.
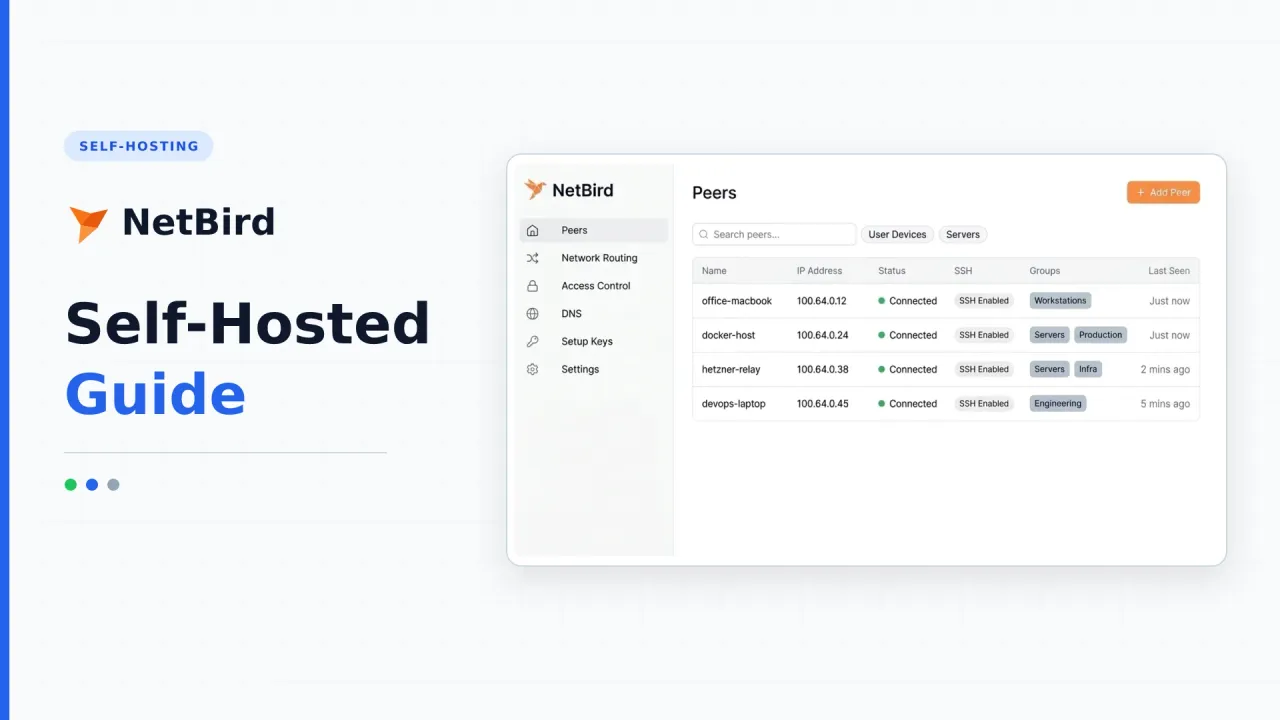
Quick result
curl -fsSL https://github.com/netbirdio/netbird/releases/latest/download/getting-started.sh | bash -> unified netbird-server + dashboard + Traefik TLS on your domain
Disclosure: this guide contains referral links. If you buy through them, I may earn a commission at no extra cost to you.
If you like the idea of Tailscale but want to own every piece of the stack, NetBird is the cleanest open-source alternative available. Unlike Headscale, which relies on Tailscale’s proprietary control protocol and desktop/mobile apps, NetBird ships its own open-source clients, control server, relay, and web dashboard.
Self-hosting NetBird used to be notoriously fiddly. You had to wire up separate management, signal, relay, and coturn containers alongside an external identity provider like Zitadel or Keycloak. That architecture is gone. NetBird now ships a unified netbird-server container with a single config.yaml, an embedded identity provider out of the box, and automatic Traefik TLS.
I switched a test cluster over to the new unified stack, and the install went from an afternoon project to about 15 minutes. Here is how to deploy it.
What makes NetBird different
Before jumping into commands, here is why people pick NetBird over Tailscale or Headscale:
- Zero vendor lock-in: Both the server and every client (Linux, macOS, Windows, iOS, Android, Docker) are open source.
- Real mobile support: Unlike Headscale, NetBird’s official iOS and Android apps let you type in your self-hosted domain cleanly during login.
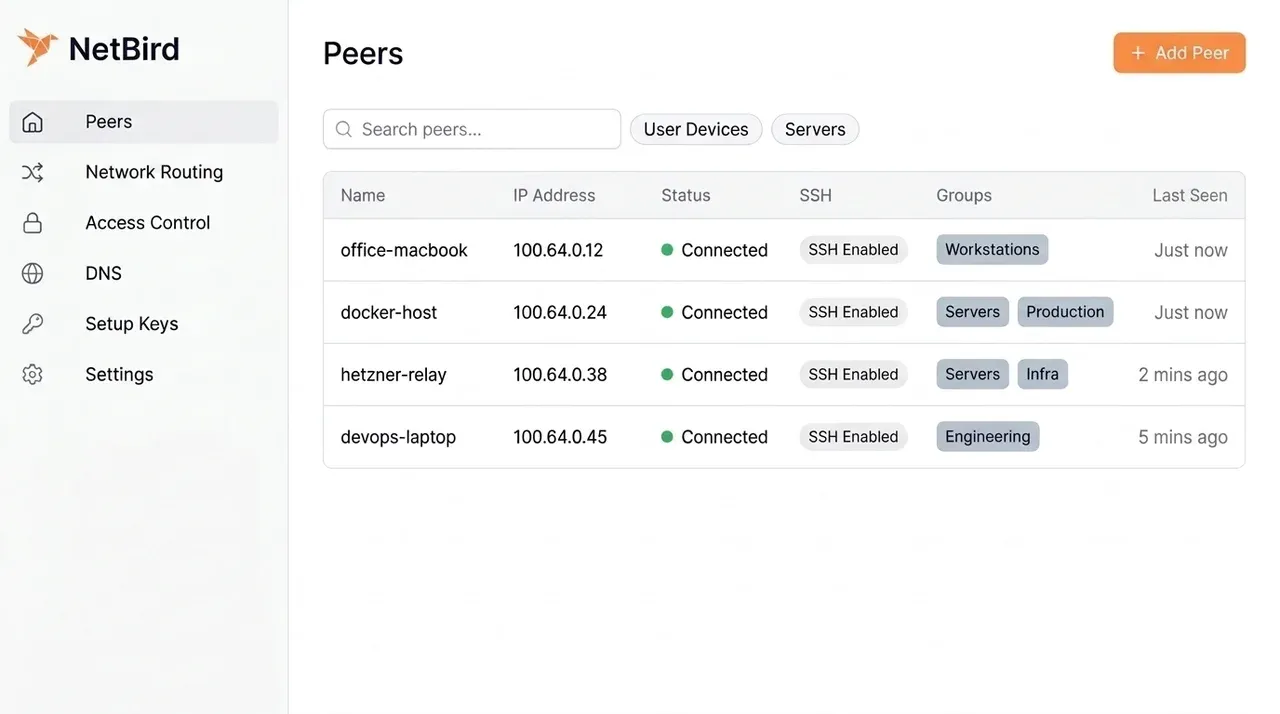
- Polished web dashboard: Peers are split with quick-filter toggles for User Devices and Servers, and you manage groups, ACLs, DNS, and routing in the UI rather than editing JSON files over SSH.
- Built-in extras: Modern NetBird includes identity-aware SSH and NetBird Proxy for exposing internal web services over TLS without opening ports on your home router.
For a side-by-side breakdown of all three options, see our NetBird vs Headscale vs Tailscale comparison.
Prerequisites
- A Linux VPS with at least 1 vCPU and 2 GB RAM (Ubuntu 24.04 or Debian 12). Hetzner or Hostinger are solid choices.
- A domain name with an
Arecord pointing to your VPS IP (for example,netbird.example.com). - Docker with the Compose v2 plugin,
curl, andjqinstalled. - Firewall ports 443/TCP, 80/TCP (for Let’s Encrypt), and 3478/UDP (for STUN/relay) open.
Keep NetBird at v0.76.0 or newer
Earlier NetBird client releases (v0.5.0 through v0.75.1) had a local gRPC privilege issue (GHSA-qcpp-8vwj-hhwr). Make sure both your netbird-server container and all connected client binaries are on v0.76.0 or newer.
Step 1: Deploy NetBird with the unified quickstart
NetBird provides an official getting-started.sh script that generates docker-compose.yml, config.yaml, and dashboard.env, configures Traefik for HTTPS, and sets up the embedded identity provider.
Create a directory for your deployment and run the script:
mkdir -p /opt/netbird && cd /opt/netbird
curl -fsSL https://github.com/netbirdio/netbird/releases/latest/download/getting-started.sh | bash
The installer will ask for your domain name (for example netbird.example.com) and your admin email/password for the embedded IdP. Once it finishes, it brings up three core pieces:
netbird-server: The unified backend (management, signal, embedded IdP, and relay) driven byconfig.yaml.dashboard: The web UI configured throughdashboard.env.traefik: Automatic Let’s Encrypt TLS termination on ports 80 and 443.
Verify that all containers are running and healthy:
docker compose ps
docker compose logs -f netbird-server
If you also use UFW on your VPS, remember that Docker manipulates iptables directly. Check our Docker and UFW firewall rules guide to make sure only 80/TCP, 443/TCP, and 3478/UDP are exposed publicly.
Step 2: Log into the NetBird dashboard
Open https://netbird.example.com in your browser and sign in with the admin credentials you created during setup.
Inside the dashboard you will see:
- Peers: All connected devices, with quick-filter buttons for User Devices and Servers plus chip-based filtering by group or OS.
- Network Routing: Subnet routes and exit nodes for reaching local LANs or routing internet traffic through a specific peer.
- Access Control: Group-based firewall policies (for example, letting
devopsreachprod-serverson port 22 and 443 only). - DNS: Custom internal domains and nameservers pushed to clients.
- Settings: Setup keys, OIDC/SSO settings, and authentication controls.
If you already run an external OIDC provider like Authentik or Keycloak, you can point config.yaml to it later. For most homelabs and small teams, the embedded IdP works fine on its own.
Step 3: Connect your devices
Linux
Install the NetBird client and point it to your self-hosted management URL:
curl -fsSL https://pkgs.netbird.io/install.sh | sh
sudo netbird up --management-url https://netbird.example.com
This prints an authentication link. Open it in your browser, sign in, and the machine joins your mesh immediately.
macOS & Windows
- Download the NetBird desktop client from
netbird.io/download(orbrew install --cask netbird-uion macOS). - Open the NetBird tray/menu-bar app, go to Settings, and change the Management URL to
https://netbird.example.com. - Click Connect and log in through your browser.
Docker / Headless Servers
For headless servers or containers, create a Setup Key in Settings > Setup Keys inside the web dashboard (choose reusable if you want to enroll multiple servers with one key), then run:
sudo netbird up \
  --management-url https://netbird.example.com \
  --setup-key YOUR-SETUP-KEY
For a Docker container running alongside your home server containers:
services:
  netbird:
    image: netbirdio/netbird:latest
    container_name: netbird
    hostname: docker-node
    network_mode: host
    restart: unless-stopped
    cap_add:
      - NET_ADMIN
      - SYS_MODULE
    environment:
      - NB_MANAGEMENT_URL=https://netbird.example.com
      - NB_SETUP_KEY=YOUR-SETUP-KEY
    volumes:
      - ./netbird-client:/etc/netbird
iOS & Android
Install the NetBird app from the App Store or Google Play. Tap the settings icon on the welcome screen, enter https://netbird.example.com as the Management URL, and sign in.
Verify peer connectivity and inspect NAT/relay status from any connected device:
netbird status -dThe -d (detailed) flag shows Management: Connected, Signal: Connected, your STUN/ICE candidates, and whether each peer is running P2P (direct WireGuard) or Relayed through your VPS.
Already running Nginx, Caddy, or Traefik on port 443?
If your VPS already hosts websites or panels like Coolify on ports 80 and 443, the bundled Traefik container will collide with your existing reverse proxy. When running getting-started.sh, choose the external/manual reverse proxy option so the script omits Traefik and exposes netbird-server and dashboard internally instead.
Two details matter when wiring up your own proxy:
- Enable HTTP/2 and gRPC proxying (
application/grpcwith buffering off) for NetBird’s management and signal paths. - Keep UDP 3478 forwarded directly on the VPS firewall so STUN and relay discovery still work.
Backups and custom internal DNS
Inside DNS in the NetBird dashboard, you can assign a custom private domain (such as lab.internal) and push upstream resolvers like NextDNS or Pi-hole to specific peer groups.
Before updating your stack, back up /opt/netbird (config.yaml, dashboard.env, docker-compose.yml) and the netbird-data Docker volume so you can restore your peers and policies cleanly if an upgrade goes sideways:
cd /opt/netbird
docker compose stop
docker run --rm -v netbird_netbird-data:/data -v /opt/netbird/backups:/backup alpine \
  tar czf /backup/netbird-$(date +%F).tar.gz -C /data .
docker compose up -d
Step 4: Set up groups, ACLs, and subnet routing
By default, NetBird places peers in an All group. Before adding servers or teammates, tighten your policies:
- Create groups in the dashboard, such as
laptops,homelab-servers, andexit-nodes. - Assign each peer to its group from the Peers table.
- Under Access Control > Policies, replace the wide-open default rule with explicit rules (for example,
laptops -> homelab-serverson TCP22, 80, 443).
To reach devices on your home LAN that cannot run NetBird (like a printer, IPMI interface, or NAS), enable Network Routing:
- Ensure IP forwarding is enabled on your home Linux peer (
net.ipv4.ip_forward = 1). - In the dashboard under Network Routing, click Add Route, enter your LAN subnet (such as
192.168.1.0/24), and pick your home server as the routing peer.
To use a peer as an Exit Node for safe browsing on hotel Wi-Fi, add a route for 0.0.0.0/0 assigned to that peer.
Identity-aware SSH and NetBird Proxy
Two newer features make NetBird much more useful than a plain WireGuard wrapper:
- NetBird SSH: Enable the built-in SSH server on a Linux peer (
sudo netbird up --allow-server-ssh) and toggle SSH access in the dashboard. NetBird authenticates SSH sessions through your IdP identity, so you don’t need to distribute SSH keys across servers. - NetBird Proxy: Lets you expose internal web apps running behind your mesh via HTTPS with automatic TLS certificates, similar to Pangolin or Tailscale Serve/Funnel.
NetBird vs Headscale vs Tailscale
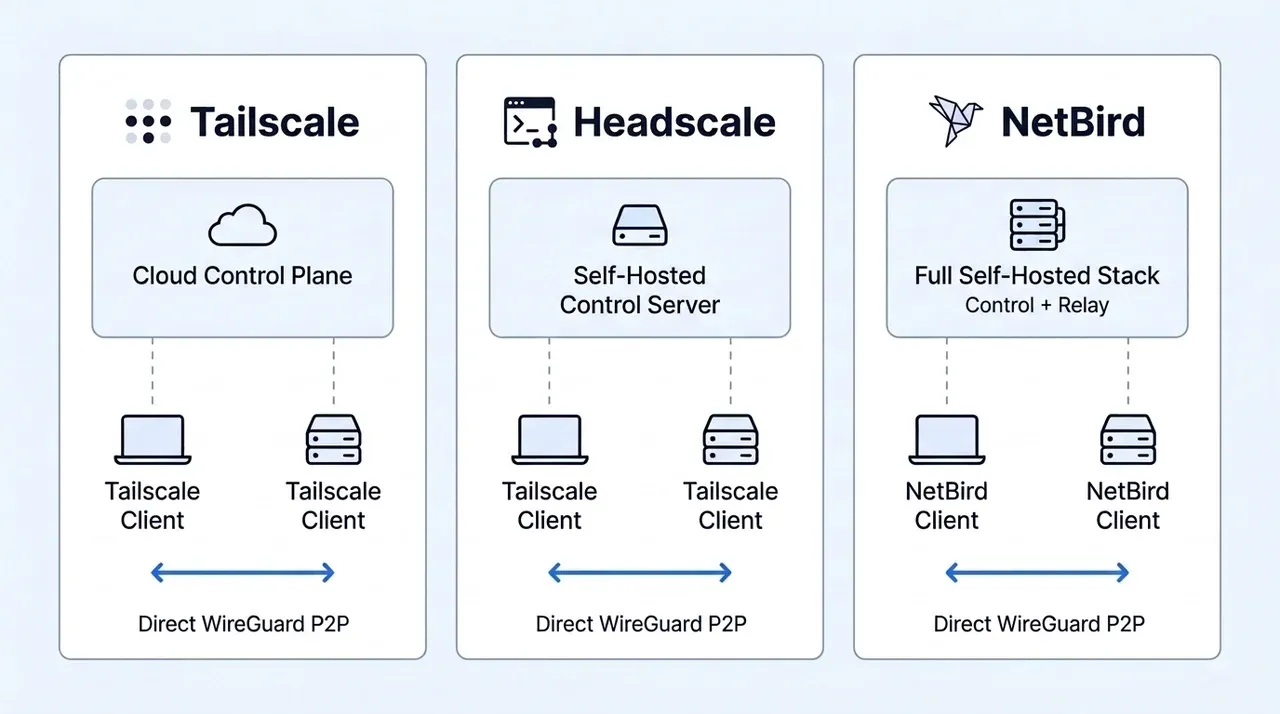
If you are still weighing your options:
- Pick Tailscale if you want zero server maintenance and five-minute setup (Tailscale setup guide).
- Pick Headscale if you already have Tailscale clients everywhere and only want to self-host the control plane (Headscale setup guide).
- Pick NetBird if you want a unified, 100% open-source self-hosted mesh VPN with a clean web dashboard and proper mobile apps.
For the full feature and cost breakdown, read NetBird vs Headscale vs Tailscale.
FAQ
How much RAM and CPU does self-hosted NetBird need?
A 1 vCPU, 2 GB RAM VPS is plenty for a homelab or small team of 10 to 50 peers. Most traffic flows peer-to-peer over WireGuard, so the VPS only handles signaling, auth, and relayed traffic when direct NAT traversal fails.
Can I run NetBird on a mini PC at home instead of a VPS?
You can, provided your home connection has a public IP (not behind CGNAT) and you can forward ports 443/TCP and 3478/UDP to it. Otherwise, a cheap $5/month VPS is much more reliable as a coordination and relay point. See our VPS price increases breakdown if you are comparing VPS vs local hardware costs.
Do I need Keycloak or Zitadel to self-host NetBird anymore?
No. Current versions of netbird-server include an embedded identity provider configured automatically by getting-started.sh. You only need external OIDC if you want to tie NetBird into an existing corporate SSO setup.
How do I update my self-hosted NetBird server?
Run docker compose pull && docker compose up -d inside /opt/netbird, and keep your desktop/server clients updated with your OS package manager or netbird update.
Related Posts
Did this guide work for you?

Written by Dragos
Dragos is the author of Bitdoze — practical DevOps, programming, and self-hosting guides.
More guides from Dragos →Need help with Astro, VPS, or a self-hosted app? View services →