Traefik Wildcard Certificate: Free Let's Encrypt + Cloudflare
Set up Traefik with a free Let's Encrypt wildcard SSL certificate using Cloudflare DNS challenge. Docker Compose guide with auto-renewal.
 Dragos21 min read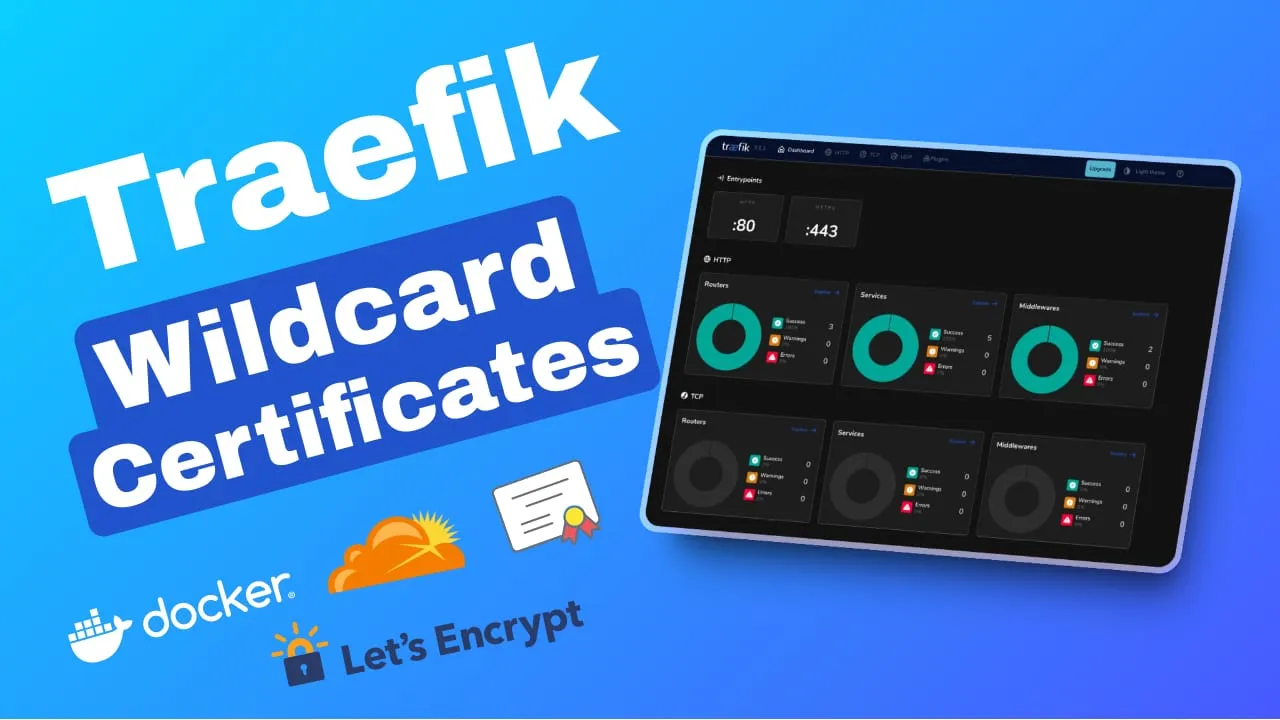
A wildcard certificate covers *.domain.com with a single cert, so every subdomain gets HTTPS without requesting individual certificates from Let’s Encrypt. For self-hosters running multiple services behind Traefik, this means less rate-limit risk, zero per-service certificate management, and automatic HTTPS for any new subdomain the moment you add it.
This guide walks through setting up Traefik v3.7 as a reverse proxy with a free Let’s Encrypt wildcard certificate using the Cloudflare DNS challenge. Everything runs in Docker Compose with auto-renewal handled by Traefik internally. If you need the foundational Traefik setup first, check our Traefik reverse proxy guide.
Why use a wildcard certificate with Traefik?
With per-subdomain certificates, every new service you deploy triggers a separate Let’s Encrypt request. Hit 50 certs per domain per week and you’re rate-limited, stuck waiting. A wildcard certificate sidesteps this entirely. One certificate covers every subdomain you’ll ever add.
Wildcard certs also solve a problem HTTP-01 challenges can’t: services that don’t expose HTTP. Databases, TCP proxies, internal APIs. None of them can respond to an HTTP challenge. DNS-01 challenge (required for wildcards) works by creating a TXT record via the Cloudflare API, so the service itself never needs to be web-accessible.
Traefik matches the wildcard certificate to any Host('sub.domain.com') route automatically. You add a container with the right labels, and HTTPS works. No certificate request, no wait.
Prerequisites for Traefik wildcard SSL setup
VPS prices jumped across the board in 2026 — if you’re rethinking a rented box, see what changed and when a mini PC wins.
Create a Cloudflare API token for DNS challenge
Log in to Cloudflare, go to your Profile → API Tokens → Create Token.
Use the “Edit zone DNS” template. It pre-configures the right permissions. Then adjust:
- Permissions: Zone / Zone / Read + Zone / DNS / Edit
- Zone Resources: Specific zone → your domain
- Client IP Filtering (optional): Is in → your server’s public IP (defense in depth)

Copy the token immediately. Cloudflare only shows it once. You’ll store it as a Docker secret later.
CF_API_EMAIL is not required
When using API tokens (as this guide does), CF_API_EMAIL is not needed. The older Global API Key required email, but token-based auth is simpler and more secure. We’ll skip the email secret entirely.
Install Docker and Docker Compose
Update the OS first, then install Docker with the official repository. These commands auto-detect your distro codename (works on Ubuntu 22.04, 24.04, and Debian 12):
sudo apt-get update
sudo apt-get install ca-certificates curl
sudo install -m 0755 -d /etc/apt/keyrings
sudo curl -fsSL https://download.docker.com/linux/ubuntu/gpg -o /etc/apt/keyrings/docker.asc
sudo chmod a+r /etc/apt/keyrings/docker.asc

echo "deb [arch=$(dpkg --print-architecture) signed-by=/etc/apt/keyrings/docker.asc] https://download.docker.com/linux/ubuntu \
  $(. /etc/os-release && echo "$VERSION_CODENAME") stable" | \
  sudo tee /etc/apt/sources.list.d/docker.list > /dev/null

sudo apt-get update
sudo apt-get install docker-ce docker-ce-cli containerd.io docker-buildx-plugin docker-compose-plugin
sudo apt-get update
sudo apt-get install ca-certificates curl
sudo install -m 0755 -d /etc/apt/keyrings
sudo curl -fsSL https://download.docker.com/linux/debian/gpg -o /etc/apt/keyrings/docker.asc
sudo chmod a+r /etc/apt/keyrings/docker.asc
echo "deb [arch=$(dpkg --print-architecture) signed-by=/etc/apt/keyrings/docker.asc] https://download.docker.com/linux/debian \
$(. /etc/os-release && echo "$VERSION_CODENAME") stable" | \
sudo tee /etc/apt/sources.list.d/docker.list > /dev/null
sudo apt-get update
sudo apt-get install docker-ce docker-ce-cli containerd.io docker-buildx-plugin docker-compose-pluginIf you’re running on ARM (Raspberry Pi, Oracle ARM), see how to install Docker on Ubuntu ARM.
Add SWAP if your VPS doesn’t have any (common on cheap VPS plans):
sudo fallocate -l 4G /swapfile
sudo chmod 600 /swapfile
sudo mkswap /swapfile
sudo swapon /swapfile
echo '/swapfile none swap sw 0 0' | sudo tee -a /etc/fstab
Reboot after install:
sudo apt update && sudo apt upgrade -y
reboot
Traefik Docker Compose configuration for wildcard certificates
Traefik runs as a Docker container, discovers other containers via Docker labels, obtains wildcard certs through the Cloudflare DNS challenge, and terminates TLS. You can configure it with CLI arguments in the Docker Compose file or with a static traefik.yml file. Both approaches are shown below.

Configure Let’s Encrypt DNS challenge with Cloudflare
Create the project directory:
sudo mkdir -p /opt/stacks/traefik
cd /opt/stacks/traefik
Always test with staging first
Uncomment the caServer line below to use the Let’s Encrypt staging server for your first run. This avoids hitting rate limits (5 failures per host per hour on production). Once you see certs obtained in the logs, comment it out and restart to get real certificates.
Create docker-compose.yml:
secrets:
  cloudflare-token:
    file: "./secrets/cloudflare-token.secret"

services:
  traefik:
    image: traefik:v3.7
    container_name: traefik
    restart: unless-stopped
    command:
      # - --log.level=DEBUG
      - --providers.docker=true
      - --api.dashboard=true
      - --providers.docker.exposedbydefault=false
      # Let's Encrypt DNS challenge with Cloudflare
      - --certificatesresolvers.letsencrypt.acme.dnschallenge=true
      - --certificatesresolvers.letsencrypt.acme.dnschallenge.provider=cloudflare
      - --certificatesResolvers.letsencrypt.acme.dnschallenge.resolvers=1.1.1.1:53,1.0.0.1:53
      - --certificatesresolvers.letsencrypt.acme.dnschallenge.propagation.delayBeforeChecks=20
      - [email protected]
      - --certificatesresolvers.letsencrypt.acme.storage=/letsencrypt/acme.json
      - --certificatesresolvers.letsencrypt.acme.certificatesDuration=2160
      # staging environment, uncomment for first run, then remove
      #- --certificatesresolvers.letsencrypt.acme.caserver=https://acme-staging-v02.api.letsencrypt.org/directory
      # Entrypoints
      - --entrypoints.http.address=:80
      - --entrypoints.http.http.redirections.entrypoint.to=https
      - --entrypoints.http.http.redirections.entrypoint.scheme=https
      - --entryPoints.https.address=:443
      # TLS
      - --entrypoints.https.http.tls=true
      - --entrypoints.https.http.tls.certResolver=letsencrypt
      - --entrypoints.https.http.tls.domains[0].main=domain.com
      - --entrypoints.https.http.tls.domains[0].sans=*.domain.com
    security_opt:
      - no-new-privileges:true
    networks:
      - traefik-net
    ports:
      - 80:80
      - 443:443
    environment:
      TRAEFIK_DASHBOARD_CREDENTIALS: ${TRAEFIK_DASHBOARD_CREDENTIALS}
      CF_DNS_API_TOKEN_FILE: /run/secrets/cloudflare-token
    volumes:
      - ./letsencrypt:/letsencrypt
      - /var/run/docker.sock:/var/run/docker.sock:ro
    secrets:
      - cloudflare-token
    labels:
      - "traefik.enable=true"
      - "traefik.http.routers.traefik-secure.rule=Host(`traefik.domain.com`)"
      - "traefik.http.routers.traefik-secure.entrypoints=https"
      - "traefik.http.routers.traefik-secure.service=api@internal"
      - "traefik.http.routers.traefik-secure.middlewares=traefik-auth"
      - "traefik.http.middlewares.traefik-auth.basicauth.users=${TRAEFIK_DASHBOARD_CREDENTIALS}"

networks:
  traefik-net:
    external: true
Create traefik.yml:
entryPoints:
  http:
    address: ":80"
    http:
      redirections:
        entryPoint:
          to: https
          scheme: https
  https:
    address: ":443"
    http:
      tls:
        certResolver: letsencrypt
        domains:
          - main: domain.com
            sans:
              - "*.domain.com"

providers:
  docker:
    exposedByDefault: false

api:
  dashboard: true

certificatesResolvers:
  letsencrypt:
    acme:
      email: [email protected]
      storage: /letsencrypt/acme.json
      certificatesDuration: 2160  # 90 days. Change to 1536 for 64-day, 1080 for 45-day
      #caServer: https://acme-staging-v02.api.letsencrypt.org/directory # staging
      dnsChallenge:
        provider: cloudflare
        resolvers:
          - "1.1.1.1:53"
          - "1.0.0.1:53"
        propagation:
          delayBeforeChecks: 20
# Uncomment for debugging:
# log:
#   level: DEBUG
#   filePath: /letsencrypt/traefik.log
Then create a minimal docker-compose.yml that mounts the static config:
secrets:
  cloudflare-token:
    file: "./secrets/cloudflare-token.secret"

services:
  traefik:
    image: traefik:v3.7
    container_name: traefik
    restart: unless-stopped
    security_opt:
      - no-new-privileges:true
    networks:
      - traefik-net
    ports:
      - 80:80
      - 443:443
    environment:
      TRAEFIK_DASHBOARD_CREDENTIALS: ${TRAEFIK_DASHBOARD_CREDENTIALS}
      CF_DNS_API_TOKEN_FILE: /run/secrets/cloudflare-token
    volumes:
      - ./letsencrypt:/letsencrypt
      - /var/run/docker.sock:/var/run/docker.sock:ro
      - ./traefik.yml:/traefik.yml:ro
    secrets:
      - cloudflare-token
    labels:
      - "traefik.enable=true"
      - "traefik.http.routers.traefik-secure.rule=Host(`traefik.domain.com`)"
      - "traefik.http.routers.traefik-secure.entrypoints=https"
      - "traefik.http.routers.traefik-secure.service=api@internal"
      - "traefik.http.routers.traefik-secure.middlewares=traefik-auth"
      - "traefik.http.middlewares.traefik-auth.basicauth.users=${TRAEFIK_DASHBOARD_CREDENTIALS}"

networks:
  traefik-net:
    external: true
Replace domain.com with your actual domain. Replace [email protected] with your email (used for Let’s Encrypt expiry notices).
delayBeforeCheck syntax changed in Traefik v3.3
The old delayBeforeCheck=20 is deprecated. Use propagation.delayBeforeChecks=20 instead. The old form still works but emits deprecation warnings and will be removed in a future version.
What this config does:
- DNS challenge: Traefik uses lego (ACME client) to create
_acme-challenge.domain.comTXT records via the Cloudflare API, then tells Let’s Encrypt to verify them. This is the only way to get wildcard certificates. - Wildcard domain:
domains[0].main=domain.com+domains[0].sans=*.domain.comrequests a cert covering both the apex and all subdomains. - Cert duration:
certificatesDuration=2160matches the current 90-day Let’s Encrypt default. See the Let’s Encrypt changes section below for the upcoming 45-day transition. - Docker secrets: The Cloudflare API token is stored as a file-based Docker secret, not an environment variable. If someone compromises the container, they can’t read the secret directly.
Set up HTTP-to-HTTPS redirect in Traefik
The entrypoint configuration handles this automatically. Traefik defines two entrypoints: http on port 80 and https on port 443. The redirect directive sends all HTTP traffic to HTTPS:
- --entrypoints.http.address=:80
- --entrypoints.http.http.redirections.entrypoint.to=https
- --entrypoints.http.http.redirections.entrypoint.scheme=https
- --entryPoints.https.address=:443
Any request hitting port 80 gets a 301 redirect to the same URL over HTTPS. No nginx, no extra containers. For more details on redirect options, see how to add Traefik HTTP to HTTPS redirect.
Secure the Traefik dashboard with basic authentication
The Traefik dashboard is exposed at traefik.domain.com with basic auth middleware. To generate the credentials:
Install htpasswd:
sudo apt update
sudo apt install apache2-utils
Generate a bcrypt hash (same as the basic auth guide — -nB gives bcrypt, not the weak APR1/MD5):
echo $(htpasswd -nB user) | sed -e s/\\$/\\$\\$/gYou’ll be prompted to type the password. The output looks like:
user:$$2y$$05$$KJ3RixvQ.Zabc123...rest_of_hashCreate the .env file:
vi .envAdd the credentials:
TRAEFIK_DASHBOARD_CREDENTIALS=user:$$2y$$05$$KJ3RixvQ.Zabc123...rest_of_hashThe double $$ is required. Docker Compose treats $$ as an escaped $. For more on dashboard auth, see how to add basic authentication to Traefik.
Deploy Traefik and verify your wildcard certificate
1. Create the Docker network
docker network create traefik-netThe traefik-net network is external so that other Docker Compose stacks can join it without depending on the Traefik compose file.
2. Create the Cloudflare secret
mkdir -p secrets
echo "YOUR_CLOUDFLARE_API_TOKEN" > secrets/cloudflare-token.secret
chmod 600 secrets/cloudflare-token.secret
Replace YOUR_CLOUDFLARE_API_TOKEN with the token you copied from Cloudflare.
3. Start Traefik
docker compose up -d4. Verify it’s working
Check the container is running:
docker ps | grep traefikExpected: traefik container shows Up status.
Check logs for certificate activity:
docker logs traefik 2>&1 | grep -i acmeExpected output includes lines like:
msg="Certificate obtained" domain="domain.com"
msg="Certificate obtained" domain="*.domain.com"
If you used the staging CA server first, you’ll see staging certificates. Comment out the caServer line, delete the letsencrypt/ directory, and restart to get production certificates.
Verify the wildcard certificate:
echo | openssl s_client -servername test.domain.com -connect domain.com:443 2>/dev/null | openssl x509 -noout -subject -dates -issuerExpected: the certificate subject should include *.domain.com, and the issuer should be “Let’s Encrypt”.
Check the stored certificates:
cat letsencrypt/acme.json | jq '.letsencrypt.Certificates[].domain'Expected: shows both domain.com and *.domain.com entries.
Wildcard certificate working
If you see the certificate with both domain.com and *.domain.com in the SAN (Subject Alternative Names), your wildcard certificate is working. Any subdomain you add will be covered automatically.
Test the dashboard:
curl -I https://traefik.domain.comExpected: HTTP 401 (basic auth is protecting it). Pass your credentials to access the dashboard UI.
How Traefik handles automatic certificate renewal
Traefik renews certificates automatically 30 days before expiry. With the current 90-day Let’s Encrypt certificates, renewal happens around day 60. No cron job needed. Traefik checks certificate expiry on its own schedule.
Traefik also supports ACME Renewal Information (ARI), which Let’s Encrypt provides to tell clients exactly when to renew. This means Traefik can react to CA-side changes (like early revocations) without manual intervention.
To check your current certificate expiry:
echo | openssl s_client -servername domain.com -connect domain.com:443 2>/dev/null | openssl x509 -noout -datesOr inspect acme.json:
cat letsencrypt/acme.json | jq '.letsencrypt.Certificates[].domain'For proactive monitoring, set up TLS expiry alerts with Uptime Kuma or similar tools.
45-day certificates are coming
Let’s Encrypt is transitioning to shorter certificate lifetimes. By February 2028, the default will be 45-day certificates. Traefik’s 30-day-before-expiry renewal window works fine with 45-day certs (renewal at day 15), but you’ll need to update certificatesDuration when the CA switches. See the Let’s Encrypt changes section below for the full timeline.
Adding services behind Traefik (example with Dockge)
Once Traefik is running with the wildcard certificate, adding a new service is just Docker Compose labels. Here’s an example with Dockge, a Docker Compose manager:
mkdir /opt/dockge
cd /opt/dockge
Create docker-compose.yml:
services:
  dockge:
    image: louislam/dockge:1
    restart: unless-stopped
    volumes:
      - /var/run/docker.sock:/var/run/docker.sock
      - /opt/stacks:/opt/stacks
    environment:
      - DOCKGE_STACKS_DIR=/opt/stacks
    networks:
      - traefik-net
    labels:
      - "traefik.enable=true"
      - "traefik.http.routers.dockge.rule=Host(`dockge.domain.com`)"
      - "traefik.http.routers.dockge.entrypoints=https"
      - "traefik.http.services.dockge.loadbalancer.server.port=5001"

networks:
  traefik-net:
    external: true
Start it:
docker compose up -dAccess at https://dockge.domain.com. The wildcard certificate covers it automatically. No port exposure needed. Traefik discovers the container via the shared traefik-net network and routes traffic based on the labels.
The key labels:
traefik.enable=true: tells Traefik to route traffic to this containertraefik.http.routers.dockge.rule=Host('dockge.domain.com'): matches the subdomaintraefik.http.routers.dockge.entrypoints=https: uses the HTTPS entrypointtraefik.http.services.dockge.loadbalancer.server.port=5001: the port Dockge listens on inside the container
For more service ideas, check Docker containers for your home server or browse self-hosted server panels.
Security considerations for your Traefik setup
Docker bypasses UFW (critical)
Docker manipulates iptables directly, bypassing UFW. Containers with exposed ports are accessible from the internet regardless of your firewall rules. This is a common surprise for people who configure UFW to allow only ports 22, 80, and 443. Docker’s port mappings create iptables rules that jump ahead of UFW.
Docker bypasses your firewall
Docker’s port mappings (ports: - 80:80) create iptables ACCEPT rules that bypass UFW. Use a cloud provider firewall (like Hetzner firewall rules) as a first layer of defense. For internal services, bind to 127.0.0.1 instead of exposing ports. See Docker bypassing firewall rules for detailed mitigation.
For this Traefik setup, ports 80 and 443 are intentionally exposed. Use a cloud firewall to restrict other ports.
Keep Traefik updated
CVE-2024-45410 affected Traefik v3.1
traefik:v3.1 had CVE-2024-45410 (CVSS 7.5 HIGH per NVD, 9.8 per GitHub’s advisory). HTTP headers like X-Forwarded-Host could be manipulated via the Connection header in HTTP/1.1. Multiple additional CVEs have been fixed since then. Use traefik:v3.7 (as this guide specifies) or traefik:v3 for automatic minor version updates. Subscribe to Traefik security announcements to stay informed.
Back up acme.json
If letsencrypt/acme.json is lost, Traefik must re-request all certificates from Let’s Encrypt. This counts against rate limits (50 certs per domain per week). Back up the entire letsencrypt/ directory regularly. Include it in your existing backup workflow or set up a cron job.
# Example: back up to /opt/backups
cp /opt/stacks/traefik/letsencrypt/acme.json /opt/backups/acme-$(date +%Y%m%d).json
File permissions
Set restrictive permissions on sensitive files:
chmod 600 letsencrypt/acme.json
chmod 600 secrets/cloudflare-token.secret
Consider CrowdSec for additional protection
For threat detection and automated blocking of malicious traffic, secure your VPS with CrowdSec. It integrates with Traefik and provides community-driven IP reputation.
Let’s Encrypt certificate lifetime changes
Let’s Encrypt is transitioning to shorter certificate lifetimes. This affects how you configure Traefik’s renewal settings.
Timeline:
| Date | Change | Traefik action |
|---|---|---|
| May 13, 2026 | tlsserver profile → 45-day certs (opt-in) |
Set certificatesDuration: 1080 if you opt in |
| Feb 10, 2027 | Default classic → 64-day certs |
Set certificatesDuration: 1536 |
| Feb 16, 2028 | Default → 45-day certs | Set certificatesDuration: 1080 |
What to do:
Right now (mid-2026), the default is still 90-day certificates. The certificatesDuration: 2160 in this guide matches. When Let’s Encrypt switches the default to 64-day certs in February 2027, update your config:
certificatesDuration: 1536 # 64 days in hoursOr via CLI:
--certificatesresolvers.letsencrypt.acme.certificatesDuration=1536If you want to test 45-day certificates early, you can opt in now:
certificatesDuration: 1080
profile: tlsserver
Traefik’s renewal logic (renew 30 days before expiry) works fine with shorter certs. With 45-day certs, renewal happens at day 15 – still plenty of buffer.
Troubleshooting common wildcard certificate issues
DNS propagation delay, ACME challenge fails
Symptom: Logs show propagation: timeout or NXDOMAIN errors.
Fix: Increase delayBeforeChecks to 30 or 60 seconds:
propagation:
  delayBeforeChecks: 60
Check if the TXT record was created:
dig _acme-challenge.domain.com TXTCloudflare is usually fast (<5 seconds) but can be slow for new zones. If the record doesn’t appear, verify your API token has DNS:Edit permissions.
Too many certificates already issued (rate limited)
Symptom: too many certificates already issued for domain.com
Fix: Let’s Encrypt allows 5 failed validations per host per hour. Always test with the staging CA server first:
caServer: https://acme-staging-v02.api.letsencrypt.org/directoryOnce staging works, remove the caServer line and delete letsencrypt/ before restarting. If you’re already rate-limited, wait 1 hour before retrying.
Cloudflare proxy (orange cloud) interfering
Symptom: DNS challenge works but certificate validation fails.
Fix: Ensure the _acme-challenge DNS record is DNS-only (gray cloud), not proxied (orange cloud). Traefik creates TXT records automatically – the Cloudflare proxy shouldn’t affect them, but some configurations can cause issues. The _acme-challenge record must be a TXT record that Let’s Encrypt can read directly.
Permission denied on acme.json
Symptom: Traefik can’t read or write to acme.json.
Fix:
chmod 600 letsencrypt/acme.jsonMake sure the letsencrypt/ directory exists and is writable by the container. If you created it with sudo, the container might not have access.
Container can't reach Cloudflare API
Symptom: unable to generate a certificate with network errors in logs.
Fix: Test DNS resolution inside the container:
docker exec traefik nslookup api.cloudflare.comIf this fails, check your VPS outbound connectivity and DNS settings. Some VPS providers block outbound DNS on port 53 – the resolver config (1.1.1.1:53) should handle this, but verify.
Wildcard cert not matching subdomains
Symptom: A subdomain gets a different certificate or Traefik’s default self-signed cert.
Fix: Verify your config includes the wildcard SAN:
domains[0].main=domain.com
domains[0].sans=*.domain.com
And your router rules use Host('sub.domain.com'), not regex patterns. Traefik v3.7 supports Host('*.example.com') as a wildcard matcher, but individual Host() rules per subdomain are the standard pattern.
If you need to reset completely, clean up Docker resources and start fresh:
docker compose down
rm -rf letsencrypt/
docker compose up -d
Conclusion
Traefik with Cloudflare DNS challenge gives you free wildcard SSL certificates with automatic renewal – no cron jobs, no manual certificate management. One certificate covers every subdomain you’ll ever deploy.
Keep these three things in mind: test with the Let’s Encrypt staging server first, back up your acme.json file, and keep Traefik updated for security patches. The upcoming shift to 45-day certificates means you’ll need to update certificatesDuration in your config when the time comes, but Traefik’s renewal logic handles it fine.
For the full Traefik reverse proxy setup (per-subdomain certs, middleware, load balancing), see the complete guide:
Learn More About Traefik Reverse Proxy