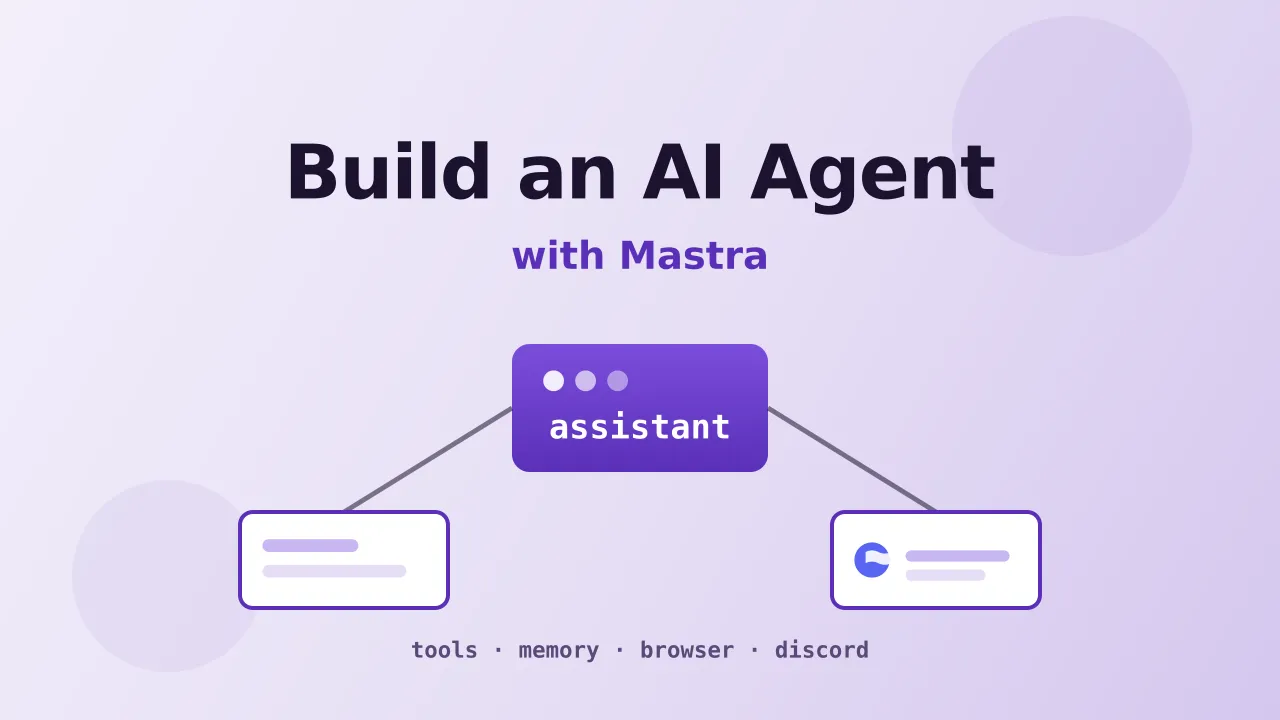
Build Your Own AI Agent with Mastra (Files, Web, Browser, Discord)
A step-by-step guide to building a production AI assistant with the Mastra framework: file tools, shell, live web search, browser automation, Discord streaming, and persistent memory. Full code on GitHub.
I have been building AI assistants on and off for the last year. I started with a Discord bot on Agno (wrote about that here), and it was fine, but I kept running into the same wall. Every framework wanted me to think in its terms. Define agents this way. Wire tools that way. Memory goes here, not there. After a while the boilerplate started to feel heavier than the actual logic.
So when I found Mastra, I was curious more than convinced. Another TypeScript agent framework. But the pitch was different: one file to define an agent, tools are just functions with Zod schemas, memory and storage are pluggable, and there is a built-in Studio UI for chatting with your agent and inspecting traces. No YAML, no DAG editor, no 200-line config file.
I ported my assistant over and open-sourced the result. This article walks through how I built it, step by step, so you can build your own or just clone mine and adapt it.
View the Code on GitHubWhat the assistant actually does
Before the how, here is the what. The agent I built can:
- Read, write, edit, and search files in a local workspace, and run shell commands (with approval)
- Search the live web and fetch clean page content through TinyFish
- Drive a real Chromium browser to navigate JS-rendered pages, click, type, and extract data
- Chat on Discord with streaming responses (text appears as it generates) and human-readable typing status
- Remember things across sessions using a local embedder (no embedding API key)
- Run on a schedule (a daily digest workflow that searches the web and writes a Markdown summary)
- Get edited at runtime through the Mastra Studio UI, no redeploy needed
It is one agent. Not a swarm, not a team. One general-purpose assistant that picks up the right tool for the job. I found that simpler is better here. The model is smart enough to route itself.
Prerequisites
- Bun installed (the runtime, not the sandwich)
- An OpenCode Go API key (model gateway, $10/month, first month $5)
- A TinyFish API key (free web search and fetch, no credit card)
- Chromium, only if you want browser automation
- Optional: Discord bot credentials if you want the chat channel
Two of those cost money. Let me explain why I picked them, because you can swap both out.
The model gateway is OpenCode Go. For $10 a month you get 14 open source models behind one API key (GLM 5.2, DeepSeek V4 Pro, MiniMax M3, Qwen 3.7, and others). I run the agent on GLM 5.2 by default and use GLM 5.1 as the cheaper judge model for goal evaluation. You could use any OpenAI-compatible provider instead. I like Go because I do not want to manage five API keys and five billing dashboards. Your call.
Get $5 in OpenCode Go CreditsThe web layer is TinyFish. Search and fetch are free, and fetch renders pages in a real Chromium instance so JavaScript-heavy docs sites come back readable. I wrote a whole article on why this matters for coding agents. Short version: most modern docs are SPAs, and raw HTML fetching returns empty shells. TinyFish handles that for you.
Get a free TinyFish API keyQuick start
If you want to skip ahead and poke at a working version first, clone the repo and run the setup.
git clone https://github.com/bitdoze/bitdoze-mastra.git
cd bitdoze-mastra
bun install
cp .env.example .env
# fill in your keys, then:
bun run dev
Open http://localhost:4111 and you will see Mastra Studio. Log in with your admin token, click into the assistant agent, and start chatting.
The rest of this article explains how that code is put together, so you can build your own from scratch or modify mine.
Step 1: Install Bun and create the project
Mastra runs on Bun. Install it first:
curl -fsSL https://bun.sh/install | bashThen scaffold a new Mastra project:
bun create mastra@latest my-agent
cd my-agent
bun install
This gives you a working skeleton with a sample weather agent. Delete the sample files. We are going to build from a clean slate.
Step 2: Install the dependencies
Here is what my project depends on. You do not need all of these on day one, but I will explain what each does as we add the corresponding feature.
bun add @mastra/core @mastra/memory @mastra/libsql @mastra/fastembed \
  @mastra/agent-browser @mastra/observability @mastra/duckdb \
  @mastra/editor @mastra/loggers @mastra/evals \
  @chat-adapter/discord @tiny-fish/sdk ws zod
For browser automation, also install Chromium:
bunx playwright-core install chromiumStep 3: Define the agent
This is the core of the whole project. One file, one agent. Here is the structure I use, adapted from my repo at src/mastra/agents/assistant.ts:
import { Agent } from "@mastra/core/agent";
import { memory } from "../memory";
import { workspace } from "../workspaces";
import { browser } from "../browsers";
import { tinyfishSearch } from "../tools/tinyfish-search";
import { tinyfishFetch } from "../tools/tinyfish-fetch";

const AGENT_MODEL = process.env.AGENT_MODEL ?? "opencode-go/glm-5.2";

export const assistant = new Agent({
  id: "assistant",
  name: "Assistant",
  instructions: () => {
    const now = new Date();
    const iso = now.toISOString().split("T")[0];
    const year = String(now.getUTCFullYear());
    return `TODAY IS ${iso}. THE CURRENT YEAR IS ${year}. Use ${year} in all web searches.

You are a general-purpose coding and research assistant.

You can read, write, and edit files, run shell commands, search the web,
and drive a browser. Prefer doing real work with tools over guessing.
Cite URLs when answering from the web.`;
  },
  model: AGENT_MODEL,
  memory,
  workspace,
  browser,
  tools: { tinyfishSearch, tinyfishFetch },
});
A few things worth noting.
The instructions field is a function, not a string. That matters. It gets resolved on every call, so the current date injected into the system prompt is always fresh. I learned this the hard way after my agent kept searching for things using last year’s date and getting stale results. Models are bad at knowing what year it is. Tell them.
The model field takes a string in provider/model format. opencode-go/glm-5.2 routes through the OpenCode Go gateway. If you use OpenAI directly, it would be openai/gpt-4o. Mastra supports dozens of providers out of the box.
memory, workspace, and browser are optional. You can start with just instructions, model, and tools, and add the rest as you go. I will cover each one below.
Step 4: Wire up the Mastra instance
The agent is useless on its own. You need to register it with a Mastra instance, which is the thing that runs the server, the Studio UI, storage, and auth. Create src/mastra/index.ts:
import { Mastra } from "@mastra/core/mastra";
import { PinoLogger } from "@mastra/loggers";
import { LibSQLStore } from "@mastra/libsql";
import { assistant } from "./agents/assistant";
import { auth } from "./auth";

export const mastra = new Mastra({
  agents: { assistant },
  storage: new LibSQLStore({
    url: process.env.DATABASE_URL ?? "file:./mastra.db",
  }),
  logger: new PinoLogger({ name: "Mastra", level: "info" }),
  server: {
    host: "0.0.0.0",
    port: 4111,
    auth,
  },
});
That is the minimum. Storage uses LibSQL (SQLite), which means no external database to set up. The file is created automatically on first run. Run bun run dev and you have a working agent server with a chat UI.
Step 5: Add memory
Out of the box, the agent has no memory between conversations. Every thread starts fresh. For a real assistant, that is not good enough. Mastra’s Memory class handles two things: working memory (a persistent scratchpad of user facts) and semantic recall (vector search over past messages).
Here is my src/mastra/memory.ts:
import { Memory } from "@mastra/memory";
import { LibSQLVector } from "@mastra/libsql";
import { fastembed } from "@mastra/fastembed";

export const memory = new Memory({
  vector: new LibSQLVector({
    url: process.env.DATABASE_URL ?? "file:./mastra.db",
  }),
  embedder: fastembed,
  options: {
    semanticRecall: {
      topK: 3,
      messageRange: 2,
    },
    workingMemory: {
      enabled: true,
      scope: "resource",
      template: `# User Profile
## Identity
- Name:
- Timezone:
## Preferences
- Communication Style:
- Coding Conventions:
## Session State
- Active Task:
- Decisions Made:`,
    },
  },
});
The part I want to highlight is embedder: fastembed. This runs the embedding model locally through ONNX Runtime (bge-small-en-v1.5). No OpenAI embedding API key, no per-token cost, nothing leaving your machine. The model downloads on first use, about 130MB. After that, semantic recall is free.
Working memory is scoped to resource, which means it persists across all threads for a given user. The agent fills in that template over time: your name, your timezone, your preferences. Next time you talk to it, even in a new thread, it remembers.
If you want hosted embeddings instead
Swap fastembed for new ModelRouterEmbeddingModel('openai/text-embedding-3-small') and add an embedding provider key. Local is fine for me, but if you are running on a tiny VPS without CPU headroom, hosted embeddings are faster.
Step 6: Add web search and fetch tools
This is where TinyFish comes in. Tools in Mastra are just functions with Zod input and output schemas. Here is the search tool, from src/mastra/tools/tinyfish-search.ts:
import { createTool } from "@mastra/core/tools";
import { z } from "zod";
import { getTinyFish } from "./tinyfish-client";

export const tinyfishSearch = createTool({
  id: "tinyfish_search",
  description:
    "Search the live web and return ranked results (title, snippet, url). Use for factual questions or finding pages to read.",
  inputSchema: z.object({
    query: z.string().describe("Search query. site: and -site: operators supported."),
    location: z.string().optional().describe("Country code for geo-targeting, e.g. US, GB."),
  }),
  outputSchema: z.object({
    results: z.array(
      z.object({
        title: z.string(),
        snippet: z.string(),
        url: z.string(),
        domain: z.string(),
      }),
    ),
  }),
  execute: async (input) => {
    const client = getTinyFish();
    const res = await client.search.query({ query: input.query });
    return {
      results: res.results.map((r) => ({
        title: r.title,
        snippet: r.snippet,
        url: r.url,
        domain: r.site_name,
      })),
    };
  },
});
The fetch tool is similar but calls client.fetch.getContents() with up to 10 URLs and returns clean Markdown. The description field matters more than you think. That is what the model reads to decide whether to use the tool. Be specific about when to reach for it.
The shared client lives in tinyfish-client.ts and just wraps the SDK:
import { TinyFish } from "@tiny-fish/sdk";

let client: TinyFish | null = null;

export function getTinyFish(): TinyFish {
  if (!client) {
    client = new TinyFish(); // reads TINYFISH_API_KEY from env
  }
  return client;
}
Both tools are free. Search is rate-limited to 30 requests per minute, fetch to 150 URLs per minute. For a personal assistant that is more than enough.
Step 7: Add a workspace for files and shell
The workspace field gives the agent a sandboxed filesystem and shell access. Mastra handles this through the Workspace class. Here is a simplified version of my src/mastra/workspaces.ts:
import {
  Workspace,
  LocalFilesystem,
  LocalSandbox,
  WORKSPACE_TOOLS,
} from "@mastra/core/workspace";

export const workspace = new Workspace({
  id: "default",
  name: "Default Workspace",
  filesystem: new LocalFilesystem({
    basePath: "./workspace",
  }),
  sandbox: new LocalSandbox({ workingDirectory: "./workspace" }),
  bm25: true,
  tools: {
    enabled: true,
    [WORKSPACE_TOOLS.FILESYSTEM.WRITE_FILE]: {
      requireApproval: true,
      requireReadBeforeWrite: true,
    },
    [WORKSPACE_TOOLS.FILESYSTEM.DELETE]: {
      enabled: false,
    },
    [WORKSPACE_TOOLS.SANDBOX.EXECUTE_COMMAND]: {
      requireApproval: true,
      maxOutputTokens: 5000,
    },
  },
});
This adds file tools (read, write, edit, grep, list) and a shell tool (run commands). Files written to the workspace are immediately executable because the filesystem and sandbox point at the same directory.
Notice the safety rails. Writes require approval and a read-before-write check. The delete tool is disabled entirely. Shell commands require approval by default. You can turn approvals off with REQUIRE_COMMAND_APPROVAL=false in .env for trusted local setups, but I would not do that on a shared server.
You can also grant the agent access to other directories on your machine through ALLOWED_DIRECTORIES. I use this to let the agent work across multiple projects. Containment stays on; it just gets a bigger yard.
Step 8: Add browser automation
The browser field enables a local Playwright instance that the agent can drive. Each conversation thread gets its own isolated browser. Sixteen tools: navigate, snapshot, click, type, scroll, screenshot, evaluate JavaScript, and more.
import { AgentBrowser } from "@mastra/agent-browser";

const headless = process.env.BROWSER_HEADLESS !== "false";
const cdpUrl = process.env.BROWSER_CDP_URL;

export const browser = new AgentBrowser(
  cdpUrl
    ? { headless, cdpUrl, scope: "shared" }
    : { headless, scope: "thread" },
);
The browser is optional. If you do not pass it to the agent, the browser tools simply do not exist. I keep it on because the agent sometimes needs to navigate a docs site that requires JavaScript, or click through a login flow to reach content behind auth.
There is a live screencast that streams to Studio over WebSocket, so you can watch the agent click around in real time. That is weirdly fun to watch.
Step 9: Add Discord
This is the feature that turned my agent from a Studio-only toy into something I actually use daily. The @chat-adapter/discord package connects the agent to Discord via Gateway WebSocket. No webhook URL needed. The bot receives DMs and @mentions on boot.
Here is the Discord channel configuration from my agent:
import { createDiscordAdapter } from "@chat-adapter/discord";

channels: process.env.DISCORD_BOT_TOKEN
  ? {
      adapters: {
        discord: {
          adapter: createDiscordAdapter(),
          streaming: true,
          typingStatus,
          toolDisplay: "cards",
          formatError: (error) => `Something went wrong: ${error.message}`,
        },
      },
      threadContext: { maxMessages: 10, addSystemMessage: true },
    }
  : undefined,
The guard around DISCORD_BOT_TOKEN is important. Without it, createDiscordAdapter() throws at module load and the entire agent becomes unusable, even if you only want to use it in Studio. I learned that the hard way.
streaming: true means text appears in Discord as the model generates it. The bot posts a message, then edits it repeatedly as content arrives. It feels alive in a way that “wait 30 seconds for a wall of text” does not.
typingStatus is a function that maps tool calls to human-readable labels. When the agent calls the search tool, Discord shows “is searching the web.” When it reads a file, “is reading a file.” Small touch, big difference in how it feels to use.
toolDisplay: "cards" renders tool calls as Discord embeds instead of raw JSON. Cleaner.
To set up the Discord side, you need a bot token, public key, and application ID from the Discord Developer Portal. Enable the Message Content Intent on your bot, or it will not be able to read mentions.
Step 10: Add a scheduled workflow
A daily digest workflow runs the agent on a schedule, searches the web, and writes a Markdown summary to the workspace. Mastra auto-registers it on boot.
import { createWorkflow, createStep } from "@mastra/core/workflows";
import { z } from "zod";

const digestStep = createStep({
  id: "generate-digest",
  inputSchema: z.object({ topic: z.string().optional() }),
  outputSchema: z.object({ ok: z.boolean(), path: z.string().optional() }),
  execute: async ({ inputData, mastra }) => {
    const today = new Date().toISOString().split("T")[0];
    const agent = mastra.getAgent("assistant");

    const result = await agent.generate(
      `Search for the latest ${inputData.topic ?? "technology news"} today (${today}). Summarize the top 5 stories as markdown.`,
      { memory: { thread: `digest-${today}`, resource: "workflow" } },
    );

    // result.text gets written to workspace/digest-<date>.md
    return { ok: true, path: `workspace/digest-${today}.md` };
  },
});

export const dailyDigest = createWorkflow({
  id: "daily-digest",
  inputSchema: z.object({ topic: z.string().optional() }),
  outputSchema: z.object({ ok: z.boolean(), path: z.string().optional() }),
  schedule: {
    cron: "0 9 * * *",
    timezone: "Europe/Bucharest",
    inputData: { topic: "technology news" },
  },
})
  .then(digestStep)
  .commit();
You can pause and resume schedules from Studio or the API. The workflow reuses the same agent, so it has access to all the same tools.
Step 11: Configure environment variables
Here is the .env file with the keys you need:
# Model gateway
OPENCODE_API_KEY=your-opencode-go-key
AGENT_MODEL=opencode-go/glm-5.2
AGENT_JUDGE_MODEL=opencode-go/glm-5.1

# Web search and fetch (free)
TINYFISH_API_KEY=sk-tinyfish-your-key

# Storage
DATABASE_URL=file:./mastra.db

# Discord (optional)
DISCORD_BOT_TOKEN=your-bot-token
DISCORD_PUBLIC_KEY=your-public-key
DISCORD_APPLICATION_ID=your-app-id

# Auth tokens for Studio login
ADMIN_API_KEY=your-admin-token

# Optional
# AGENT_TIMEZONE=Europe/Bucharest
# ALLOWED_DIRECTORIES=/home/me/projects/other-app
# REQUIRE_COMMAND_APPROVAL=false
The agent model and judge model both route through OpenCode Go. The judge model is used by the goal system to evaluate whether an objective has been met. I use the cheaper GLM 5.1 for that and the smarter GLM 5.2 for the main agent. If you want to understand the model lineup and pricing, I broke it all down in the OpenCode Go guide.
Step 12: Run it
bun run devOpen http://localhost:4111. You will see the login screen. Enter your admin token, and you land in Mastra Studio.
Studio gives you:
- A chat interface to talk to the agent
- A traces view to inspect every tool call, token count, and latency
- A workspace browser to see the files the agent has access to
- A schedules view to manage workflows
- An editor tab to modify the agent’s instructions and tools at runtime
That last one is worth pausing on. The Mastra Editor lets you change the system prompt and tool definitions through the UI, with draft, publish, and archived versioning stored in the database. No code changes, no redeploy. I use this to tweak the agent’s behavior during the day without restarting the server.
What does the Editor actually let me change?
The agent’s instructions (the system prompt) and its tool list. Saves create versioned drafts in the database. You can publish a draft to make it live, or roll back to an archived version. If you want to lock the agent down, set editor: false on the agent constructor. If you want to allow only prompt edits, use editor: { instructions: true }.
Deploy on a VPS
Running locally is fine for testing, but a real assistant should be available 24/7. I deploy mine on a Hetzner VPS behind Caddy as a reverse proxy.
Get €20 Hetzner Credit Try Hostinger VPSA CX22 (2 vCPU, 4GB RAM) handles this fine. The agent itself is not resource-heavy. The browser is the only thing that eats memory, and only when it is actively running.
Build and run as a systemd service
First, build the production bundle:
bun run buildThis produces a self-contained server in .mastra/output/. Then create a systemd user service at ~/.config/systemd/user/mastra-app.service:
[Unit]
Description=Mastra App
After=network-online.target
Wants=network-online.target

[Service]
Type=simple
WorkingDirectory=/home/you/projects/mastra-app
EnvironmentFile=/home/you/projects/mastra-app/.env
Environment=NODE_ENV=production
Environment="PATH=/home/you/.bun/bin:/usr/local/bin:/usr/bin:/bin"
ExecStart=/usr/bin/node /home/you/projects/mastra-app/.mastra/output/index.mjs
Restart=always
RestartSec=5

[Install]
WantedBy=default.target
Enable it:
systemctl --user daemon-reload
systemctl --user enable --now mastra-app
journalctl --user -u mastra-app -f
Enable lingering so the service survives SSH disconnects:
sudo loginctl enable-linger yourusernameReverse proxy with Caddy
Caddy handles TLS automatically. Add this to your Caddyfile:
chat.yourdomain.com {
    reverse_proxy localhost:4111
    encode gzip
}
One thing that tripped me up: behind a reverse proxy, set MASTRA_AUTO_DETECT_URL=true in your .env. Without it, Studio tries to call 0.0.0.0:4111 from the browser, which does not work. That flag makes Studio use the browser’s origin instead.
What I would do differently
I have been running this agent for a few weeks now. A few honest observations.
The single-agent approach works better than I expected. I was tempted to build a team (an architect agent, a research agent, a coding agent), and Mastra supports that through its workflow system. But the model is good enough to pick the right tool on its own. Adding more agents added more coordination overhead and not much actual capability. I might revisit this for specific tasks, but for now, one agent is enough.
Local embeddings are slower than hosted ones on the first run (the model has to download), but after that, they are fine for a personal assistant. If I were building something with many concurrent users, I would switch to hosted embeddings to keep latency down.
The Discord streaming is the feature I use most. Being able to @mention my agent from my phone and watch it search the web and read files in real time is genuinely useful. The typing status labels (“is searching the web”, “is reading a file”) make it feel less like a black box.
Browser automation is powerful but expensive in terms of memory and time. I keep it on but the agent reaches for it rarely. Most web tasks are handled by search and fetch. The browser is for when a site needs JavaScript or interaction.
Where to go from here
- Clone the full project and adapt it. The README has the complete setup, including auth, observability, and the goal system.
- Read the Mastra documentation for the full API. I covered the pieces I use, but there is more (evals, multi-agent workflows, RAG pipelines).
- If you want a different take on building a Discord AI bot, my Agno guide covers a Python-based approach with team orchestration and a different memory system.
- For the web search layer, the TinyFish guide goes deeper into the API, the cookbook projects, and how to wire it into other agents like Hermes and Pi.
- For the model layer, the OpenCode Go guide has the full model list, rate limits, and real-world usage numbers.
- If you want to compare this approach to other always-on assistants, see the OpenClaw setup guide and the OpenCode setup guide.
You have an agent now
One file for the agent, a handful of tool functions, and a Mastra instance to tie it together. That is the whole thing. Clone the repo, fill in two API keys, and you are chatting with an assistant that can read your files, search the web, and remember what you told it.


